21 Pumpkin Nail Designs I’d Actually Wear (And 3 I’d Skip)
I have a confession: I used to think pumpkin nails were cheesy. Like, full-on orange with a jack-o’-lantern face that looked like a kindergartener painted it.
Then my friend Priya showed up to brunch last October with this mocha-and-terracotta set with the tiniest hand-painted pumpkin on her ring finger, and I completely changed my mind.
She’d gotten them done at a little salon near her apartment in Austin for $45, and I probably stared at her hands for a solid five minutes while my latte went cold.
Here’s the thing about pumpkin nail designs: the trend has shifted hard from the bright, flat orange we grew up with. This season, it’s all about moodier tones, velvet chrome finishes, and designs that work whether you’re going to a pumpkin patch or a work meeting.
I’ve been testing different versions of this look since early September (yes, I’m that person), and I’ve also talked to enough friends and readers to know which ones hold up and which ones chip by day three.
If you’re planning a full fall look, you might want to check out some Halloween nail designs to pair with your pumpkin set, or even short Halloween nails if you keep your length practical.
1. Pumpkin Spice Chrome (The One Everyone’s Actually Wearing)
This is the design that converted me. Instead of flat orange polish, you’re working with a magnetic cat-eye gel that shifts between amber, copper, and a deep burnt orange depending on how the light hits it. Celebrity nail artists have been calling this the biggest trend of the season, and I get why — it looks expensive without being loud. You need a magnetic polish and a magnet stick to pull the shimmer into that velvet effect, but the actual application takes less than a minute per nail. I got mine done at a salon and it lasted almost three weeks without a single chip, which is honestly a record for me. The catch? Removing magnetic gel at home is a pain. Budget a salon removal unless you already own an e-file.
Pro tip: Hold the magnet above the wet gel for 10-15 seconds, then cure immediately. If you move your hand before curing, the magnetic particles settle flat and you lose the entire effect. I learned that the expensive way.
2. Terracotta and Mocha Tonal Manicure (No Pumpkin Art Required)
If you’re not ready to commit to literal pumpkin shapes, this is where I’d start. The palette this year has shifted from bright orange to a moodier mix of terracotta, mocha, and creamy nude. A gradient from milky coffee into a deeper rust on each nail gives you the entire fall mood without a single illustration. It photographs beautifully, it works in an office, and it extends well past Halloween.
This is also the smartest pick if you’re heading to fall engagement photos or a wedding. It doesn’t fight with a bouquet, a ring, or any outfit you own. My friend Danielle wore a mocha tonal set to her engagement shoot in Vermont last month and her photographer specifically mentioned how good the nails looked against the foliage.
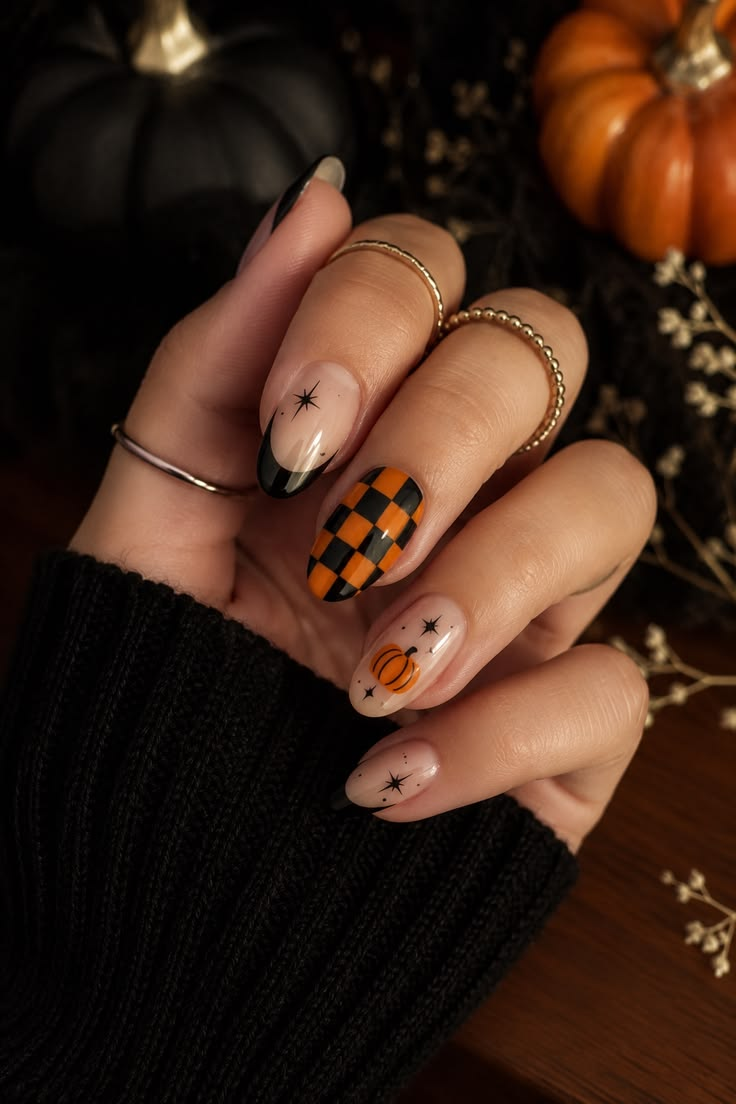
3. Micro Pumpkin Accent (For Short Nails and Low Maintenance)
Short nails don’t get enough love in fall nail content, and that’s a real gap. A tiny stamped or hand-painted pumpkin on one or two accent nails looks better on a short almond or square shape than a detailed scene ever would. You get the seasonal nod without the design looking cramped.
I tried this on my own short nails with a stamping kit from Amazon (around $12) and it took maybe fifteen minutes total. The stamp is forgiving for beginners — you don’t need freehand precision. If you’re into more general Halloween nail art, the micro accent approach is a solid bridge between a plain manicure and going full spooky.
Pro tip: Pair the accent pumpkin with a solid base in a warm neutral or deep burgundy. The contrast makes the tiny detail pop without overwhelming a short nail bed.
4. Pumpkin Spice French Tip
This is the easiest way to update a classic French without learning a new skill. Swap the white tip for a burnt orange or pumpkin shade with a thin white outline for contrast. It reads clean and modern, and it works on every nail length.
I did this at home with a French tip guide sticker set and a burnt orange gel polish. The whole thing took about thirty minutes. The trade-off is that French tips show wear at the edge faster than a full-coverage color, so plan on a touch-up around day ten if you’re hard on your hands. If you’re planning a couples costume for Halloween, a pumpkin French tip is neutral enough to match almost anything — it won’t clash with your partner’s outfit the way a full orange set might.
5. Two-Toned Abstract Pumpkin Spice
Skip the literal pumpkin shape entirely and go abstract. Two warm shades — say a creamy beige and a deep rust — swirled together or blocked across the nail gives you the pumpkin spice vibe without any illustration. It’s the kind of design that looks intentional and artsy rather than themed.
I’ve seen this done with a sponge for a soft, blurred effect, and it’s genuinely one of the easiest DIY designs on this list. The sponged technique adds a little texture that flat polish doesn’t have. This is also a good option if you want something that transitions from September through November without feeling like you’re wearing a costume.
6. Jack-O’-Lantern Line Art (The Sophisticated Version)
The jack-o’-lantern isn’t going anywhere, but the execution has changed. Instead of cartoonish wide-eyed faces, the current take uses darker orange or black linework over a terracotta or mocha base. It’s recognizable as a pumpkin without being childish.
I’ll be real with you: this is the design I’d recommend paying a professional for. Hand-painted faces require a steady hand and a fine liner brush, and if it goes wrong, it goes very wrong. My friend Kayla tried to DIY a jack-o’-lantern face with a toothpick (I’m not kidding) and ended up with what looked like a very sad spider. If you’re doing a group Halloween costume with friends, a jack-o’-lantern accent nail is a fun detail — but let someone who knows what they’re doing handle it.
7. Pink Pumpkin Crossover
This one surprised me. The pink pumpkin trend pairs the classic gourd shape with soft blush or baby pink backgrounds instead of orange. It reads more “early autumn” than “Halloween,” which makes it wearable well into November.
I saw this first on a Lemon8 post and thought it would look too sweet for my taste, but the gold-outlined version I tried — a soft pink base with a gold chrome powder pumpkin outline — completely won me over. It’s feminine without being cloying. If you’re doing a duo or group Halloween costume with a pink theme, this set would tie in perfectly.
Pro tip: If you’re doing pink pumpkin nails at home, use a nude or milky pink base rather than a bright bubblegum pink. The softer base makes the gold or white pumpkin outline read as elegant rather than costume-y.
8. Pumpkin Spice Sweater Nails
This is the design that made me understand why people get so into fall nails. The sweater texture — raised, cable-knit-inspired lines — is usually done with a builder gel or a 3D gel paint, and it looks genuinely cozy. Add a tiny pumpkin on one nail and you’ve got the whole aesthetic.
The trade-off is real: 3D texture catches on things. Sweaters, hair, zippers. I snagged mine on a cardigan within the first day. If you’re someone who’s constantly touching your hair or digging through a bag, this might not be the practical choice. But for a special event or a week where you’re mostly at a desk, it’s worth it.
9. Gold Foil Pumpkin Accent
Gold foil or gold chrome powder over a warm base gives you an elegant, almost jewelry-like pumpkin. The technique is to paint a pumpkin shape in gel, cure it, then rub gold chrome powder over the tacky layer. The result catches light in a way that flat polish never does.
I did a simplified version of this with gold foil flakes pressed into a burnt orange base. It’s less precise than chrome powder but more forgiving if you’re not confident with fine detail work. This design works beautifully for Thanksgiving dinner or any fall gathering where you want to look put-together without being obvious about it.
10. Pumpkin Spice Plaid
Plaid nails have been having a moment, and the pumpkin spice version layers warm plaid lines over a neutral base with tiny pumpkin accents. It’s a polished take on a classic pattern, and it reads very “fall wardrobe” in the best way.
The catch is that plaid lines require a steady hand and a striping brush. I tried this freehand once and ended up with something that looked more like a broken grid than a plaid. If you want to attempt it, use striping tape as a guide. It’ll save you a lot of frustration. This is also a great design if you’re coordinating with a family Halloween costume theme — it’s subtle enough to work with almost any group look.
11. Velvet Cat-Eye Pumpkin
This is the same magnetic cat-eye technique as the chrome design, but applied specifically in pumpkin shapes or as an accent over a matte base. The velvet effect makes the pumpkin look almost three-dimensional. It’s the most “expensive-looking” design on this list.
I’ll be honest — this is not a beginner DIY. Magnetic polish is finicky, and if you don’t cure it at exactly the right moment, you lose the effect. But if you’re getting your nails done professionally anyway, this is the one I’d ask for. It’s also a great option if you’re doing a Halloween couple costume and want your nails to look intentional without being themed.
12. Burnt Orange French with Deep Brown Accents
A sharper, more modern take on the French tip: burnt orange tips with deep brown or chocolate linework at the base. It’s clean, it’s graphic, and it works on both short and long nails.
This has become my go-to when I want something that feels seasonal but not overtly pumpkin-themed. I wore this set to a work event in early October and got three compliments from people who specifically said they liked that it wasn’t “too Halloween.” If you’re looking for Halloween costumes for women that feel polished rather than playful, this nail set would match that energy.
13. Pumpkin Latte Nail Art
Warm orange and creamy nude shades with tiny latte-inspired details — a little coffee cup, a swirl of “foam,” maybe a cinnamon stick. It’s the most literal interpretation of “pumpkin spice” as a concept, and it’s genuinely cute if you lean into it.
I did a simplified version with a tiny orange dot for the pumpkin and a white swirl for the foam on one accent nail. The rest of the nails were a solid creamy nude. It felt balanced — one whimsical nail, four wearable ones. If you’re doing last-minute Halloween costumes for couples and want a nail look that matches a cozy, coffee-shop vibe, this fits right in.
14. Muted Olive and Pumpkin Combo
Celebrity nail artists have been pairing olive green with pumpkin orange this season, and it works better than I expected. The olive grounds the orange so it doesn’t feel too bright or summery.
I tried this as a mix-and-match set: two olive nails, two pumpkin orange nails, and one accent nail with a tiny gold pumpkin outline. It’s playful without being chaotic. If you’re doing a trio Halloween costume or a group look, this color combo would actually tie three different outfits together surprisingly well.
15. Pumpkin Spice Glitter Ombré
A gradient from a creamy nude base into a rusty orange glitter at the tips. It’s glam without being formal, and the glitter hides chips better than a solid polish.
I wore this for a fall-themed birthday dinner and it held up through a lot of hand gestures and one very enthusiastic round of applause. The key is using a fine glitter rather than chunky flakes — chunky glitter catches on everything and starts shedding within a few days. If you’re into unique couple Halloween costume ideas and want a nail look that’s festive but not spooky, this ombré is a safe bet.
16. Pumpkin Spice Marble
Marble nails are everywhere this year, and the pumpkin spice version uses warm orange, brown, and cream swirled together with a watercolor or blooming gel technique. It looks like a fancy latte art situation on your nails.
This is one of those designs that looks incredibly difficult and is actually just about patience. You drop small amounts of polish onto a wet base and let them bloom, then drag a liner brush through gently. The first time I tried it, I overworked the design and ended up with muddy brown nails. The second attempt, I barely touched it and it looked great. Less is more.
17. Pumpkin and Sweater Texture Mix
This combines the sweater texture with a pumpkin accent — the texture usually goes on two or three nails, with the pumpkin on one. It’s a good way to get the cozy fall vibe without committing every nail to a 3D texture.
I’d recommend this if you want the texture but are worried about snagging. Keeping it to two nails instead of five cuts down on the practical annoyance significantly.
18. Pumpkin Spice Cookie Nails
Creamy bases covered in tiny orange and brown motifs — little pumpkins, leaves, dots. It has a hand-painted, almost whimsical feel that reads more “fall baking” than “Halloween.”
This is the design I’d recommend for anyone who wants something genuinely cute rather than edgy. It’s also very DIY-friendly if you have a dotting tool and a fine liner brush. If you’re doing family Halloween costumes with kids and want your nails to feel festive without being scary, this is the one.
19. High-Contrast PSL Marble with Gold Foil
Take the marble technique from above but push the contrast — darker browns and brighter oranges — and press gold foil flakes into the wet polish. The result is dramatic and a little bit luxe.
I did this on a whim before a fall wedding and it ended up being one of my favorite sets of the year. The gold foil catches light in photos in a way that flat polish doesn’t. If you’re doing Halloween costumes for teenage girls or a trendy group look, this would photograph beautifully for social media.
20. Pumpkin Spice Mix-and-Match
The mix-and-match approach is my personal favorite because it lets you try multiple techniques on one hand. One nail might be a solid burnt orange, another a tiny pumpkin accent, another a gold foil detail, and two a simple mocha base. It’s playful and it never gets boring.
The trade-off is that a mix-and-match set takes longer at the salon, which means a higher price. If you’re doing this at home, plan on at least an hour. But the result feels custom and personal in a way that a single design doesn’t.
21. Subtle Sponge Fall Nails
This is the design I’d recommend for anyone who wants pumpkin vibes without the commitment. A sponge is used to blend warm orange, brown, and red clay shades into a soft, blurred gradient that captures the essence of fall without any literal pumpkin shapes.
Celebrity manicurist Jin Soon Choi has said this technique creates “a beautiful, soft effect that captures the essence of fall,” and I completely agree. It’s also the most forgiving DIY option on this list — sponging is nearly impossible to mess up. I did this on a Sunday afternoon with three polishes and a makeup sponge and it took twenty minutes.
What I’d Skip
I promised I’d be honest, so here are the ones I’d pass on. The full 3D sculpted pumpkin — like an actual raised gourd shape on your nail — looks impressive on Instagram but is a nightmare in real life. It catches on everything, it’s uncomfortable, and removing it is a whole ordeal. The full pink pumpkin set with bright bubblegum pink and orange together can look great in theory but reads a little too “candy corn” in person for my taste. And the fully hand-painted pumpkin scene across all five nails is beautiful, but it costs $80-$120 at most salons and will chip within two weeks if you actually use your hands.
DIY vs. Salon: What It Actually Costs
| Design | DIY Difficulty | At-Home Cost | Salon Cost | Wear Time |
|---|---|---|---|---|
| Solid Pumpkin Spice | Easy | $8-12 | $30-45 | 7-10 days |
| Pumpkin French Tip | Easy-Moderate | $12-18 | $40-55 | 10-14 days |
| Micro Pumpkin Accent | Moderate | $15-25 (stamping kit) | $45-65 | 10-14 days |
| Chrome/Cat-Eye Pumpkin | Hard | $20-30 (magnetic polish) | $55-75 | 14-21 days |
| 3D Sweater Texture | Hard | $25-40 (builder gel) | $65-90 | 14-20 days |
| Hand-Painted Jack-O’-Lantern | Very Hard | N/A (don’t try it) | $75-120 | 10-14 days |
FAQs
How long do pumpkin nail designs actually last?
It depends entirely on the technique. Solid color and sponge gradients last about 7-10 days with proper top coat. French tips and stamping last 10-14 days. Magnetic gel and chrome finishes last the longest — up to three weeks if applied correctly. 3D textures are the most fragile; expect 10-14 days before they start catching or lifting.
Can I do pumpkin nails on short nails?
Absolutely. In fact, short nails often look better with micro pumpkin accents than long nails do. A tiny stamped pumpkin on a short almond or square shape reads as intentional and cute, while the same design on a long nail can get lost. The tonal and gradient designs also work beautifully on short nails.
What’s the best base color for pumpkin nail art?
A warm neutral — think milky beige, soft cream, or a muted mocha. Bright white bases make orange polish look harsh. Darker bases like deep brown or burgundy make the pumpkin accents pop in a moodier way. If you’re doing literal pumpkin shapes, a nude or terracotta base gives the most natural look.
Are pumpkin nails appropriate for work?
Yes, if you choose the right design. Tonal mocha manicures, subtle sponge gradients, and French tips with a warm orange twist all read as professional. Save the jack-o’-lantern faces and 3D textures for weekends or if your workplace is relaxed about appearance.
How do I remove magnetic cat-eye gel at home?
Honestly? Don’t. Magnetic gel is thicker than regular polish and requires soaking or filing that can damage your natural nail if you’re not experienced. Budget $10-15 for a salon removal, or invest in an e-file and learn the proper technique before attempting it yourself.
The Bottom Line
If I were starting from scratch with pumpkin nails, I’d begin with a tonal mocha-to-terracotta set — no art, just color. It’s the easiest to maintain, it works with everything in my closet, and it doesn’t feel like a costume. Once you’re comfortable with that, add one accent nail with a tiny stamped pumpkin. Build from there. The chrome and cat-eye finishes are worth the salon investment, but only if you already know you like wearing the warmer palette.
The best pumpkin nail design is the one you’ll actually keep on for more than a week without picking at it. For me, that’s a simple two-toned set with one gold-foil accent. For you, it might be the full 3D sweater texture. Either way, this season’s palette is warm enough that almost anything you choose will look like you knew what you were doing.