22 Halloween Nails That Actually Look Good in Real Life (Not Just on Pinterest)
I have a confession: I used to be the person who saved 47 Halloween nail designs in September and then panic-booked a salon appointment on October 28th, showed my nail tech a blurry screenshot, and ended up with something that looked nothing like the photo.
My friend Dana did the same thing last year — she wanted “subtle spiderweb French tips” and walked out with full-on cartoon spiders on every finger.
The problem isn’t the designs. It’s that most Halloween nail roundups show you the fantasy version — long almond nails, flawless freehand work, perfect lighting — and skip the part where you actually have to live with these for two weeks. Your nails might be short.
Your budget might be $15, not $85. And you might have a toddler who will absolutely destroy anything with 3D charms by day three.
So this isn’t a dream board. It’s a practical guide to 22 Halloween nails I’ve actually worn, seen on friends, or watched readers pull off at home.
I’ll tell you which ones are worth the salon chair, which ones you can do on your couch in 40 minutes, and where to skip the trend entirely.
Short Halloween nails get real coverage here too — because most of us aren’t walking around with coffin-length extensions in October.
Quick note before we start: if you’re still pulling together the rest of your look, I’ve got you covered on short Halloween nails, Disney Halloween costumes, and group Halloween costumes.
The nails are the last thing people notice, and honestly, that’s exactly why they matter. They pull the whole thing together.
1. Black Lace Over Sheer Nude
This is the Halloween nail design I recommend to literally everyone who asks. It’s the most elegant option on this list, and it works just as well at a work lunch on October 15th as it does at a Halloween party on the 31st.
The trick is restraint. Black lace painted over a sheer nude or pale blush base reads like fabric laid across your skin — gothic but not costumey. Use the thinnest striper brush you own and work in small connected loops and scallops instead of rigid straight lines. Seal with a glossy top coat so the fine work stays crisp.
Pro tip: Keep the lace to one or two accent nails. I tried it on all ten once, and it went from “elegant witch” to “tablecloth” real fast. If you’re doing this at home and your freehand isn’t great, stamping plates give you the same effect with way less stress.
For more moody October looks, check out these Halloween nail designs.
2. Blood Drip Over Chrome
This is the one that makes people gasp. A mirror-chrome silver or gold base with glossy red “blood” dripping from the cuticle creates a horror-movie contrast that photographs beautifully.
The key is the order: chrome first, fully cured, then the blood drips. If you do the red first, the chrome won’t adhere properly. Use a fine liner brush and drag the red downward in uneven, organic drips — not perfect teardrops. Real blood doesn’t drip symmetrically.
Pro tip: This design looks best on medium-to-long almond or coffin shapes. On short nails, the drips can look like accidental smudges instead of intentional art. If your nails are short, try a blood-drip French tip instead — just the tip of the nail in dripping red over a nude base.
If you’re planning a couple’s costume, these unique couple Halloween costume ideas pair perfectly with a vampy manicure.
3. Matte Black Coffin (The Power Move)
Sometimes the best Halloween nail design is no design at all — just a perfect application of a great color. Matte black on a coffin shape is the season’s quiet flex. It’s cold, confident, and goes with every costume from Wednesday Addams to a generic “spooky girl.”
The matte finish is what makes it. Glossy black can read cheap; matte black reads expensive. OPI’s “Lincoln Park After Dark” is the classic pick, but Sally Hansen’s Insta-Dri in “Black to Black” does the job for under $6.
Pro tip: Matte top coats wear faster than glossy ones, especially at the tips. Cap the free edge with every single coat, and bring a matte top coat with you if you’re going to a party — you’ll want to touch up by hour four.
This is also my go-to recommendation for anyone doing a last-minute Halloween costume for couples. It works with everything.
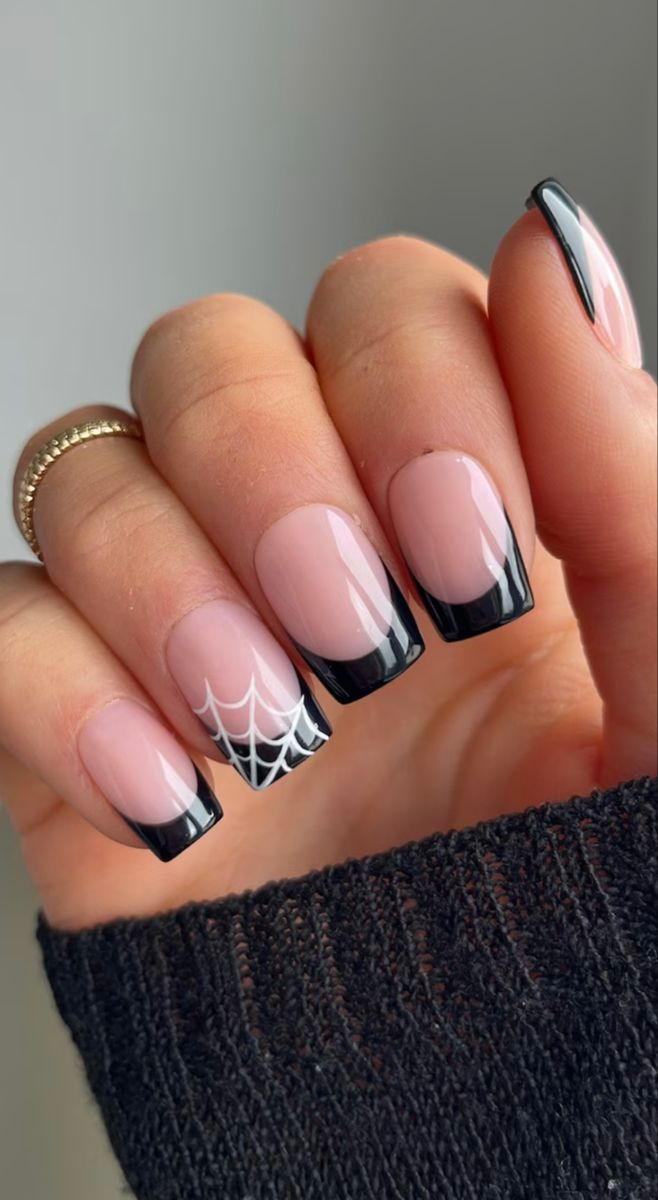
4. Subtle Spiderweb Line Art
I resisted this trend for two years because I thought spiderwebs were cheesy. I was wrong. Delicate, thin-line spiderwebs over a neutral base — think milky white, soft grey, or sheer nude — are genuinely pretty. They’re the “clean girl” version of Halloween nails.
The secret is using a fine liner brush and not going overboard. One web per nail, radiating from a single corner. If you’re doing it at home, a toothpick dipped in black polish works in a pinch, but a $6 liner brush from Amazon will change your life.
Pro tip: White spiderwebs on a black base look harsh. Black spiderwebs on a sheer pink base look intentional. If you’re nervous, practice on a piece of paper first — you’re drawing spokes, not a full web. Three lines is enough.
Pair these with a Halloween nail design that leans minimalist, and you’ve got a look that works from October 1st through the 31st.
5. Glow-in-the-Dark Accents
This is the one your inner child will love. Glow-in-the-dark polish has come a long way from the chunky neon stuff you had in middle school. Now you can get ghostly white, toxic green, and even glow-in-the-dark top coats that work over any color.
The move is to use it strategically: one accent nail, or just the tips. A full set of glowing nails is a lot when you’re in a lit room — the glow only kicks in under blacklight or in the dark. One glowing ghost on your ring finger is the sweet spot.
Pro tip: Charge them under a bright light for at least two minutes before you go out. If you’re at a party with no blacklight, they’ll fade fast. Carry a tiny UV flashlight in your purse if you’re committed.
For more spooky-season inspiration beyond nails, these Halloween decoration ideas have some great mood-setting pieces.
6. Oxblood Ombre
Oxblood is burgundy’s moodier, older cousin — same richness, none of the sweetness. An ombre that melts from dried-blood red at the cuticle to near-black at the tip is dramatic without a single decal.
This is a salon design, honestly. Doing a seamless ombre at home requires a makeup sponge and a lot of patience, and the results are usually patchy. If you’re going to pay for one Halloween manicure this year, this is the one I’d pick. It grows out gracefully and works with everything.
Pro tip: Ask your nail tech for a gel ombre, not acrylic. Gel blends more smoothly, and the finish looks wet and expensive. Acrylic ombres can look chalky if the tech isn’t experienced with color blending.
7. Creepy-Cute Ghosts (With Bows)
The “creepy turned cute” trend is having a moment — think ghosts wearing tiny hair bows, pink-themed spooky aesthetics, and Jellycat-inspired nail art. It’s for the person who loves Halloween but doesn’t want to look like they’re going to a horror convention.
The trick is scale. A tiny ghost with a bow on one accent nail is adorable. A ghost on every nail with a different colored bow is a lot. Pick one or two nails for the ghost, keep the rest solid — pastel pink, lilac, or a soft grey.
Pro tip: You can do this with nail stickers or water decals instead of freehand. I found a sheet of tiny ghost decals on Etsy for $4 that lasted through a full week of typing. If you’re doing freehand, use the end of a bobby pin to make the ghost body, then a toothpick for the bow.
If you’re going the cute route, these Halloween costumes for women have some looks that match the vibe perfectly.
8. Black Cherry Gloss
Black cherry is the color I reach for when I want something that feels Halloween-adjacent but not aggressively themed. It’s a juicy, almost-black cherry red with a wet high-shine top coat. It reads luxe, not costume.
The key is the finish. A glossy top coat is non-negotiable here — matte black cherry looks muddy. This is also one of the most forgiving designs on this list because it doesn’t require any art skills. Just two thin coats of a good black cherry polish and a shiny top coat.
Pro tip: Black cherry stains your nails if you skip base coat. I learned this the hard way. Always use a base coat under dark reds — it’s the difference between a clean removal and two weeks of yellow-tinted nails.
For more dark, vampy nail inspiration, these Halloween nail designs go deeper into the moody side of October.
9. Mystic Cat Eye (Blood Moon)
Cat eye polish is the shortcut to looking like you spent $80 at a salon when you actually spent $12 on a bottle and a magnet. The magnetic particles create a glowing streak that shifts when the light moves — it looks like a galaxy trapped in glass.
For Halloween, go jewel-dark instead of pastel. Blood moon cat eye (a burnt-red magnetic streak) and witch’s potion (deep jewel-tone jelly) are the two I’ve seen look best on real hands. One pass of the magnet is all you need.
Pro tip: Hold the magnet over the wet polish for a full 30 seconds before curing. Most people pull it away too fast, and the effect fades. Also, do one nail at a time — cat eye is not a “paint all ten then magnetize” situation.
Pair this with a trio Halloween costume if you’re coordinating with friends — it adds a subtle “we planned this” touch without being matchy-matchy.
10. Blood-Red French Tips
A French tip in blood red instead of white is the easiest way to make a classic manicure feel Halloween-appropriate. It’s subtle enough for October 5th, spooky enough for October 31st.
The application is simple: nude base, red tips. You can use reinforcement stickers (the little round ones for binder paper) as a stencil if your freehand isn’t steady. Stick one on each nail, paint the tip, peel it off — perfectly curved tips every time.
Pro tip: Go for a deep, brownish red, not a bright cherry red. Bright red French tips look like a Valentine’s Day manicure that got lost. Oxblood or burgundy is the move.
If you’re doing a last-minute Halloween costume for couples, this is the nail look that works with every single one.
11. Cracked Glass Chrome
This is the trend I was most skeptical about and then fell in love with. Cracked glass chrome looks exactly like it sounds — a metallic chrome finish with a web of fine cracks across it. It’s glamorous in a slightly broken, haunted-mirror way.
The effect comes from a special cracked-glass top coat that you apply over cured chrome. It creates the fissures on its own as it dries. You don’t have to paint cracks yourself.
Pro tip: This design shows every single ridge and imperfection on your natural nail. If your nails are ridged or peeling, use a ridge-filling base coat first. Otherwise, the chrome will highlight every flaw instead of looking smooth.
For a fuller costume moment, these Halloween costume ideas have options that pair well with a metallic manicure.
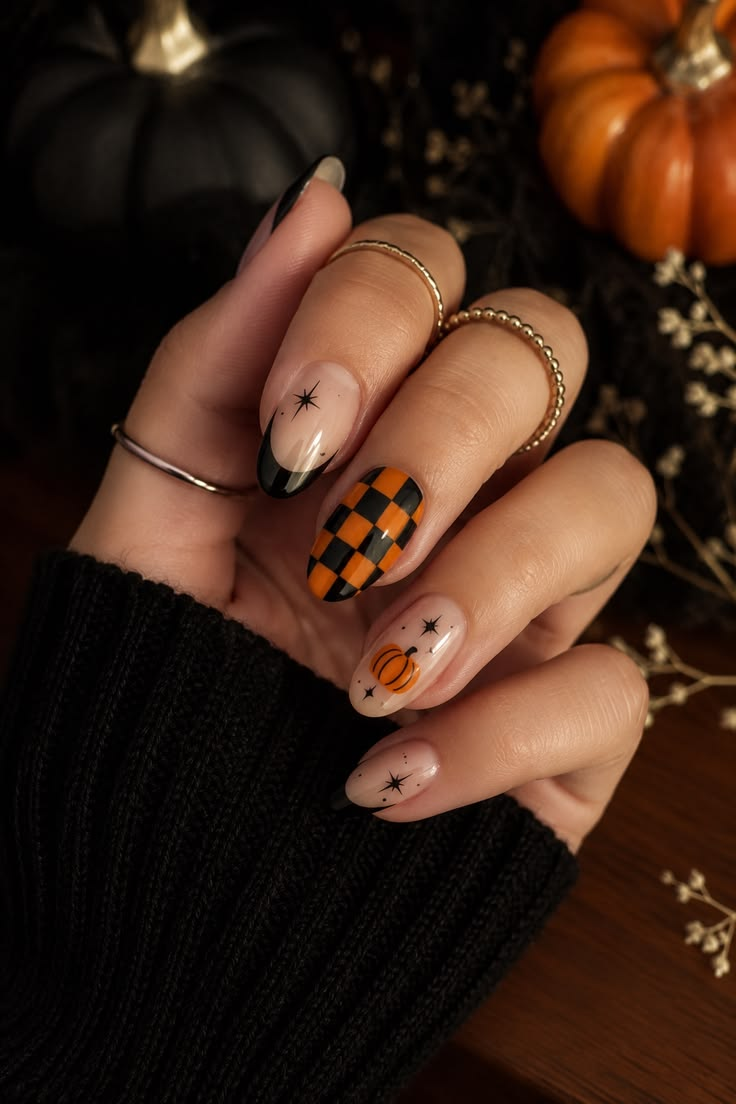
12. Tiny Pumpkins in the Corner
A single tiny pumpkin painted in the corner of one accent nail is the most beginner-friendly Halloween nail art on this list. It doesn’t require a steady hand or expensive tools. You need orange polish, a dotting tool (or a bobby pin), and a toothpick for the stem.
The scale matters. A pumpkin that takes up half the nail is a statement piece. A pumpkin the size of a pencil eraser in the corner is a subtle nod. On short nails, go smaller than you think you need to.
Pro tip: Use a matte top coat over the pumpkin and a glossy one over the rest of the nail. The contrast makes the pumpkin look like it was painted on fabric, which is oddly satisfying. This also works with tiny bats or a single skull.
If you’re doing a family costume, these family Halloween costumes have options that work for all ages — and a tiny pumpkin nail is appropriate for every one of them.
13. Sheer Ghostly Wisps
Where a cartoon ghost looks cute, a ghostly wisp feels ethereal. Soft, smoky white drifts across a sheer base like fog — no hard outline, no cartoon eyes. It’s one of the prettiest ways to nod at Halloween without a single obvious motif.
The technique is different from regular nail art. You drag a barely-loaded white brush in soft curving sweeps, then blur the edges with a clean sponge while the polish is still wet. The result looks like a watercolor painting, not a sticker.
Pro tip: If you want the ghost to actually read as a ghost, add one faint pair of dot eyes on a single nail and leave the rest as pure fog. More than one pair of eyes pushes it from “haunting” to “googly.”
These Halloween nails work beautifully with a best friend Halloween costume where you want to coordinate without matching exactly.
14. Vampire’s Kiss (Two-Finish Manicure)
This is the simplest “designed” look on the list. Paint nine nails matte black and one accent nail glossy blood-red. That’s it. The contrast between the flat matte and the wet gloss is what makes it work — it looks intentional without any actual art.
I wore this for a Halloween party last year and got more compliments than I did on a $65 salon set with hand-painted details. It’s the nail equivalent of a really good black dress.
Pro tip: Do the red accent nail on your ring finger, not your index. It’s the most visible nail when you’re holding a drink, and it photographs better. Yes, that matters.
If you’re doing a couples costume, these couples Halloween costumes have plenty of vampire-adjacent options that this manicure would complete.
15. Glow French Tips
Glow-in-the-dark French tips are exactly what they sound like — a classic French manicure, but the tips glow green or white in the dark. Under normal light, they look like a slightly unusual white-tip manicure. Under blacklight, they’re a party trick.
This is the design I’d recommend if you’re going to a bar or club for Halloween. It’s subtle in line, dramatic in the dark, and it doesn’t require any art skills beyond a steady hand for the tips.
Pro tip: Use a glow top coat over regular white tips instead of buying glow polish. You get the same effect for half the price, and the white tips look cleaner in daylight. Charge under a lamp for two minutes before you leave.
These sexy college Halloween costumes pair perfectly with a glow manicure — especially the ones that involve a lot of dancing in dark rooms.
16. Merlot Marble
Merlot marble is wine-dark swirls with a thread of smoke grey running through it. Every nail looks slightly different, which is the point — it mimics actual marble rather than a uniform pattern.
This is a salon design. Marble effect requires either water marbling (messy, inconsistent) or a skilled hand with a liner brush and a lot of patience. If you’re doing it at home, nail foils or marble-effect wraps are your best bet.
Pro tip: Ask for a glossy top coat, not matte. Marble reads as stone because of the light reflecting off it. Matte marble just looks like grey smudges.
For a complete Halloween look, these Halloween costumes for women have options that work with a darker, moodier manicure.
17. Black Micro French Tips
A micro French tip is just the very edge of the nail painted in black — maybe two millimeters. It’s a barely-there detail that makes your nails look considered without looking themed.
This is the design I wear when I want Halloween nails but I have meetings all week. It’s subtle enough for professional settings, but if you look closely, there’s a black edge. It’s like a secret.
Pro tip: On short nails, a micro French tip can actually make your nails look longer because the eye is drawn to the clean horizontal line. Keep the base sheer, not opaque, so the tip stands out.
If you’re doing a duo Halloween costume, this manicure works with everything from a matching couples look to something more elaborate.
18. Toxic-Green Drip
Neon slime dripping from the cuticle that goes electric under a blacklight is the most “Halloween party” design on this list. It’s not subtle. It’s not elegant. It’s fun.
The look is a nude or sheer base with a toxic-green drip effect at the cuticle, plus a glow top coat. Under regular light, it looks like green nail art. Under blacklight, it looks radioactive.
Pro tip: This is the one design where I’d skip the salon and use press-ons. The drip effect is hard to freehand, and press-on sets with toxic-green drips are widely available for under $15. Plus, you can take them off after the party and go back to your normal nails.
For a group costume moment, these group Halloween costumes have options where a neon drip manicure would fit right in.
19. Oxblood Solid (The Grown-Up Pick)
If you want one bottle of polish to get you through the entire Halloween season, buy an oxblood. It’s deep, rich, and moody without being obvious. Wear it solid, wear it matte, wear it glossy — it works all three ways.
I’ve tried a lot of oxbloods, and the one I keep coming back to is OPI’s “Lincoln Park After Dark.” It’s technically a deep purple, but it reads as oxblood on most skin tones. Essie’s “Lurex” is a good drugstore alternative at under $10.
Pro tip: Oxblood looks best with a high-shine top coat if you want it to read “expensive,” and a matte top coat if you want it to read “goth.” Two bottles of top coat, two completely different manicures.
If you’re doing a last-minute college Halloween costume, a solid oxblood manicure is the fastest way to look like you planned your outfit.
20. Black Dots on Milky White
Polka dots, but spooky. A milky white base with irregular black dots scattered across it — not in rows, not in a pattern, just scattered — looks like a ghost’s polka dot dress or a haunted dalmatian. It’s playful and weird in the best way.
This is a press-on nail design, honestly. Doing scattered dots by hand is tedious, and if you’re not careful, they start looking like a pattern instead of random. Press-on sets with this design are widely available.
Pro tip: If you’re doing it at home, use the end of a bobby pin for the dots. Dip it in black polish and tap it lightly on the nail. Don’t press down — you’ll get a ring instead of a solid dot.
These Halloween costume ideas for women have some playful options that would match a quirky manicure.
21. Celestial Chrome (Moons and Stars)
Tiny chrome moons and stars on a dark base — black, deep purple, or oxblood — are the “spooky but not too spooky” manicure. It’s witchy without being Halloween-specific, which means you can wear it from October 1st through November.
The chrome finish is what makes it. Regular silver polish looks flat. Chrome powder over gel gives you that mirror-shine that makes the stars actually look like they’re reflecting light.
Pro tip: Chrome powder requires a gel base and a no-wipe top coat. If you’re doing it at home, buy a chrome powder kit — it’s under $15 and will last you through multiple manicures. Regular polish doesn’t hold chrome powder.
For a family Halloween costume, this manicure works for the adult in the group without being too themed for the kids.
22. The “I Have No Time” Manicure (Press-Ons, Done Right)
Here’s the thing nobody tells you: press-on nails have gotten really good. The ones from Glamnetic, KISS, and imPRESS are not the flimsy plastic tabs from 2010. A good press-on set can last a week, costs $10–20, and takes 15 minutes to apply.
The key is preparation. Buff your natural nails lightly, wipe with alcohol, and use the glue, not the tabs, if you want them to last more than a day. Tabs are for people who want to change their nails every 24 hours. Glue is for people who want to get through the weekend.
Pro tip: Press-ons are the best option for a Halloween party on the 26th when you have work on the 28th. You get the full Halloween manicure for the party, then soak them off in warm water and go back to your regular nails. No commitment, no salon appointment, no $80.
If you’re doing a last-minute college Halloween costume, press-ons are genuinely the fastest way to get a themed manicure without booking anything.
Comparison Table: Which Halloween Nail Option Is Right for You?
| Design | Best For | DIY Difficulty | Salon Cost (Gel) | Press-On Cost | Wear Time |
|---|---|---|---|---|---|
| Black Lace Over Nude | Elegant events | Medium (freehand) | $50–85 | $12–20 | 2–3 weeks (gel) |
| Blood Drip Over Chrome | Statement looks | Hard | $65–95 | $15–25 | 2 weeks (gel) |
| Matte Black Coffin | Minimalists | Easy | $35–50 | $8–15 | 2–3 weeks |
| Subtle Spiderweb | Everyday October | Medium | $45–70 | $10–18 | 2 weeks |
| Glow-in-the-Dark Accents | Parties, blacklight | Easy | $40–60 | $10–15 | 1–2 weeks |
| Oxblood Ombre | Salon splurge | Hard | $55–85 | $15–25 | 2–3 weeks |
| Creepy-Cute Ghosts | Playful costumes | Easy (decals) | $45–70 | $10–20 | 1–2 weeks |
| Black Cherry Gloss | Everyday wear | Easy | $35–50 | $8–15 | 2–3 weeks |
| Mystic Cat Eye | Low-effort drama | Easy (at home) | $50–75 | $15–25 | 2 weeks (gel) |
| Blood-Red French Tips | Subtle Halloween | Easy | $40–60 | $10–15 | 2–3 weeks |
| Cracked Glass Chrome | Glam parties | Hard | $60–90 | $15–25 | 2 weeks |
| Tiny Pumpkins | Beginners | Easy | $35–50 | $8–15 | 2 weeks |
| Ghostly Wisps | Ethereal looks | Medium | $50–75 | $12–20 | 2 weeks |
| Vampire’s Kiss (2-finish) | Simple + chic | Easy | $35–50 | $8–15 | 2–3 weeks |
| Glow French Tips | Party nights | Easy | $40–60 | $10–18 | 2 weeks |
| Merlot Marble | Luxe events | Hard | $60–90 | $15–25 | 2–3 weeks |
| Black Micro French | Work-friendly | Easy | $35–50 | $8–15 | 2–3 weeks |
| Toxic-Green Drip | Party costumes | Hard | $55–80 | $10–18 | 1–2 weeks |
| Oxblood Solid | One-and-done | Easy | $35–50 | $8–15 | 2–3 weeks |
| Black Dots on Milky White | Quirky, playful | Medium (press-on) | $45–65 | $10–18 | 1–2 weeks |
| Celestial Chrome | Witchy but subtle | Medium (chrome kit) | $55–80 | $15–25 | 2 weeks |
| Press-Ons (Good Ones) | No time, no commitment | Easy | N/A | $10–20 | 5–7 days |
A note on costs: Salon prices vary wildly depending on your city. I’m in a mid-size city, and these are the ranges I’ve paid or seen friends pay. If you’re in a major metro, add $20–30. If you’re in a smaller town, subtract $10–15. Press-on costs are more consistent because they’re retail products.
FAQs: Halloween Nails, Answered Honestly
Do I need long nails for Halloween nail art?
No. Short Halloween nails can look just as good — sometimes better. Simple designs pack more punch on a smaller canvas, and you’re less likely to break a nail mid-party. The trick is scale: keep designs small and don’t try to fit a full scene on one nail. One tiny ghost or a single spiderweb is plenty.
How long do Halloween nails actually last?
Gel manicures last two to three weeks. Press-ons last about a week with glue, a day or two with tabs. Regular polish lasts three to five days before chipping, especially on the tips. If you’re doing your nails for a specific party, plan to do them two days before — not the day of, when you’re rushing.
Can I do Halloween nail art at home if I’m not artistic?
Yes, but pick your battles. Solid colors, French tips, and dot designs are genuinely easy at home. Freehand lace, blood drips, and marble effects are worth paying for. A good middle ground is using nail stickers or water decals — they cost $4–8 and look like freehand work.
What’s the best Halloween nail design for work?
Black micro French tips, black cherry gloss, or a solid oxblood. All three read as “nice manicure” rather than “costume,” and none of them will get you side-eyed in a meeting. Save the blood drips for the weekend.
Are Halloween nails worth the salon price?
Only for the designs you can’t do at home. I’ll pay $65 for merlot marble or blood drip chrome because I know I’ll mess those up. I won’t pay $50 for a solid black manicure — that’s a $6 bottle of polish and 20 minutes on my couch.
What’s the cheapest way to get Halloween nails?
Press-ons. A $10–15 set from Walmart or Amazon looks better than a $40 salon manicure on short nails, and it takes 15 minutes to apply. The catch is they only last about a week, and 3D charms tend to pop off if you’re rough on your hands. For a one-night event, they’re unbeatable value.
Do glow-in-the-dark nails actually work?
Yes, if you charge them properly. They need at least two minutes under a bright light before they’ll glow, and they fade after 30–45 minutes in the dark. If you’re going to a blacklight party, they’ll stay lit the whole night. In a regular dark room, they’re more of a novelty than a practical light source.
How do I make my manicure last through a Halloween party?
Cap the free edge with every coat — this is the single biggest difference between a manicure that chips by hour three and one that lasts a week. Also, don’t soak your hands in water for an hour before painting, and bring a top coat with you if you’re going to be dancing or drinking. A quick touch-up at hour four saves the whole look.
What I’d Do First If I Were Starting Over
If I were doing Halloween nails for the first time this year, here’s my honest plan: buy one good oxblood polish, one matte top coat, and one glossy top coat. Paint my nails oxblood glossy. Then, the night before whatever party I’m going to, I’d buy a $12 press-on set with a design I love — ghostly wisps, toxic-green drips, whatever — and apply those instead. I’d keep the oxblood in my bag for after the party, when I soak off the press-ons and go back to something subtle.
The Halloween nails I actually remember wearing are the ones that felt like me, not the ones that matched a Pinterest board. A solid oxblood manicure with one tiny pumpkin on your ring finger will get more compliments than a full set of hand-painted scenes — because it looks like you, not like a costume. And that’s the whole point.