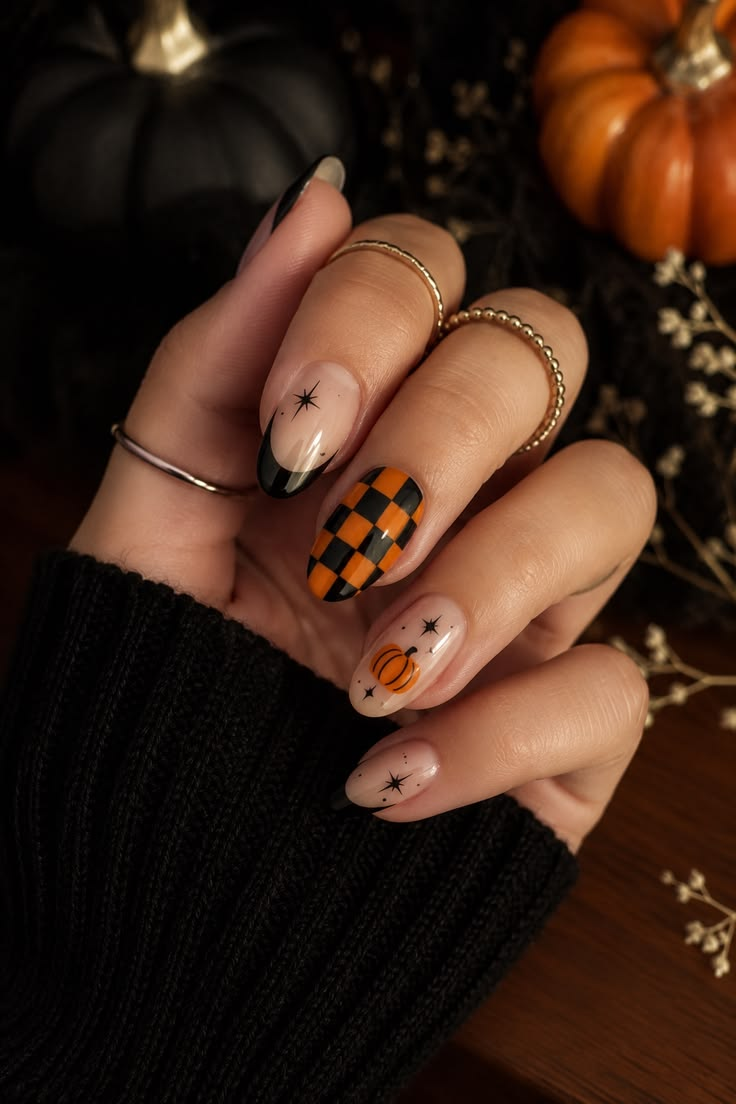
18 Thanksgiving Nail Ideas That’ll Actually Get You Compliments at Dinner
I have a confession: I used to think Thanksgiving nails meant one of two things — a turkey decal that looked like a kindergarten craft project, or the same burgundy I’d been wearing since October 1st.
Then my sister-in-law showed up to dinner two years ago with the most beautiful tortoiseshell set I’d ever seen on a real human hand. My aunt asked to see them three separate times.
My mom, who has never once commented on my nails in my entire life, said “those are nice.” I booked an appointment the following Monday.
Here’s the thing about Thanksgiving nails: this is the one holiday where you can go cozy or festive without it feeling forced.
The color palette is genuinely forgiving — cranberry, espresso, olive, caramel, pumpkin, gold.
You can lean into the “thankful and grateful” energy with leaf accents and wheat details, or you can keep it subtle with a deep glossy red and call it a day. Both work. Both look intentional.
So I’ve rounded up 18 Thanksgiving nail ideas I’ve either worn, watched friends wear, or saved from nail artists I actually trust.
I’ve noted which ones are DIY-friendly, which ones require a salon appointment, and what each one will realistically cost you.
There’s a comparison table further down if you want to skip straight to the “what’s worth paying for” section.
Let’s get into it.
1. Spiced Apple Cider (The Selena Gomez Shade)
The problem this solves: you want something that reads “fall” without screaming “I’m wearing a Halloween costume three weeks late.”
Selena Gomez was spotted this season wearing what her manicurist called “Spiced Apple Cider Nails” — a warm toffee brown on long almond-shaped tips. It’s rich without being dark, warm without being orange. Glamour covered it as the perfect last-minute Thanksgiving mani, which honestly tracks because it’s one of those shades that looks expensive no matter what you paid.
I tried this after seeing it on her and my nail tech matched it to OPI’s “That’s What Friends Are Thor” — a deep chocolate brown that feels like a cozy latte in nail form. It wore beautifully for a full three weeks.
Pro tip: This shade works on almost every skin tone because it’s a true neutral brown, not a red-brown or an ash-brown. If you’re cool-toned and worried it’ll pull orange, ask for a slightly cooler espresso instead. If you’re warm-toned, go for the toffee.
2. Cranberry Gloss (The Classic That Never Fails)
Why it matters: red nails are timeless, but cranberry hits differently for Thanksgiving. It’s literally the color of the sauce on your plate.
Celebrity nail artist Sofiia Mazur told InStyle that “deep cranberry red is that perfect in-between shade, richer than classic red but softer than burgundy. It instantly brings to mind cranberry sauce, mulled wine, and everything warm and festive about the holiday”.
I wore OPI’s “Totally Red-ical” — an orangey-red that The Everygirl flagged as the perfect Thanksgiving red because it “feels festive without leaning too Christmasy” — to my family dinner last year. My cousin asked for the shade name twice. It’s that kind of color.
Pro tip: Skip the matte top coat on cranberry. Matte cranberry looks dusty and flat. High gloss is what makes it read “juicy” instead of “dried out.”
3. Tortoiseshell (The One My Sister-in-Law Wore)
This is the design that converted me. Tortoiseshell nails combine amber browns, caramel, black, and translucent layers to create a vintage, almost stained-glass effect. It’s rich and textural without being busy.
The catch: this is not a DIY design. My friend Priya tried to replicate it at home with a YouTube tutorial and ended up with something she described as “muddy marble.” She paid $75 at the salon the following week and said it was worth every penny. Tortoiseshell requires layering translucent polishes in a specific order, and getting the proportions wrong makes it look smudged rather than intentional.
Pro tip: Ask for tortoiseshell as a French tip or on just two accent nails if you want a more subtle version. A full tortoiseshell set is stunning but can be a lot on shorter nails.
4. Toffee Tips (Warm Brown French)
The problem: traditional white French tips feel summery, and you want something that reads “autumn dinner” instead.
Toffee tips — a warm brown fading into a nude base — solve this perfectly. InStyle highlighted this design as a standout for the season, noting that the finely milled glitter is what takes it from basic to special. It’s the French manicure, but cozy.
I wore this on a shorter squoval shape and it made my nails look longer than they are. It’s also one of the more DIY-friendly options on this list if you’re comfortable with a French tip technique.
Pro tip: If you’re doing this at home, use a sheer nude base rather than an opaque one. The gradient effect only works when you can see a little of the natural nail underneath. Opaque base plus brown tip equals two-tone block, not a fade.
5. Olive Swirls (Subtle and Unexpected)
Why it matters: green nails can feel risky if you’ve never worn them. Olive is the gateway shade.
This design pairs olive green with warm cream and tan in abstract swirls on a sheer base, with the design reserved for just two nails per hand while opaque olive leads the rest. It’s a smart way to do nail art without committing to art on every finger.
I was nervous about olive until I tried it. It’s earthy enough to feel seasonal but unusual enough that nobody’s wearing the exact same thing. It also transitions beautifully from November into winter.
Pro tip: Olive swirls look best on short-to-medium rounded nails. On very long nails, the swirls can start to look like camouflage. Keep the swirls loose and organic — if they’re too uniform, they look printed.
6. Pumpkin Spice Cat-Eye (The Shimmer Upgrade)
This is for the person who wants “festive” but doesn’t want a literal pumpkin on their nail.
Refinery29 featured a cat-eye manicure packed with “deep copper and burnished brown, pumpkin orange and rose gold” that reads autumn without being thematic. Cat-eye polish uses a magnet to create a light-reflective stripe that shifts as you move your hand. It’s genuinely mesmerizing.
This is a salon set. Magnetic polish requires a magnet wand and a specific technique — curing the polish halfway, holding the magnet at the right angle, curing the rest. I’ve watched my nail tech do it. It’s not a beginner-friendly process.
Pro tip: Cat-eye looks best on longer almond or oval shapes because the reflective stripe elongates the nail visually. On very short nails, the effect gets lost.
7. Merlot Chrome (The Frosty Upgrade)
Merlot red is already a fall classic. Adding a layer of pearl chrome on top makes it winter-adjacent and reflective. Refinery29 described this as “something even more wintry” — a frosty set that works for both Thanksgiving and the holiday season.
I wore merlot chrome to Friendsgiving last year and got more compliments on it than any other manicure I’ve had this year. The chrome gives it dimension without glitter, which I prefer because glitter removal is a nightmare.
Pro tip: Chrome amplifies every ridge and imperfection on your nail surface. If your nails are peeling or uneven, ask for a builder gel base coat before the color. Otherwise, the chrome will highlight texture you didn’t know you had.
8. Argyle Print (Sweater Nails, Literally)
The problem this solves: you want your nails to feel cozy and textured like your favorite fall sweater, not like a holiday decoration.
Argyle is “the sweater pattern of the season,” according to Refinery29, and this diamond-emblazoned design combines chocolate hues with cherry reds and leafy tones. It’s preppy, vintage, and weirdly elegant for something that’s essentially a pattern from your grandfather’s golf sweater.
This is a salon design unless you’re very comfortable with a striping brush. Getting clean diagonal lines and consistent diamond shapes at home is genuinely hard. I’ve tried twice. Both attempts looked like abstract art from a distance.
Pro tip: Ask for argyle on one or two accent nails only, with the rest in a solid coordinating shade. Full argyle on every nail is a lot. One accent nail gives you the sweater vibe without overwhelming your hands.
9. Maple Leaves with Gold Flecks (The Seasonal Classic)
This is for when you want to lean into “Thanksgiving” without going full turkey.
Refinery29 featured a chestnut-colored manicure with “a minimalist leaf design and shimmering flecks of gold” that I immediately saved. It’s seasonal, it’s elegant, and the gold flecks catch the light in a way that photographs beautifully.
The leaf design is doable at home if you have a fine-liner brush and a steady hand. The gold flecks can be achieved with gold foil flakes pressed onto a tacky top coat — Marie Claire and other beauty sites recommend this technique because it’s easier than painting individual gold dots.
Pro tip: Keep the leaves on two nails maximum. If you put leaves on every nail, it starts to look like wallpaper. One accent leaf per hand is the sweet spot.
10. Toffee Shimmer (The One That Transitions)
Why it matters: you want a manicure that works for Thanksgiving dinner and the office party in December.
This is a warm toffee brown with a fine gold or rose-gold shimmer. The Everygirl flagged “Butter Me Up Toffee” as a gold shimmer polish that “pulls more orange from some angles, rose gold from others”. It’s the kind of shade that looks different depending on the lighting, which makes it feel more expensive than it is.
I wore this from mid-November through mid-December without changing it. It works with everything — sweaters, jeans, a dress, sweatpants.
Pro tip: Shimmer polishes show brush strokes if you use thick coats. Use three thin coats instead of two thick ones, and finish with a glossy top coat to smooth everything out.
11. Gilded Gold Cascade (Polka Dots, But Grown-Up)
This is my favorite DIY-friendly option on the list. The gilded gold cascade is exactly what it sounds like: tiny gold dots arranged in a cascade starting densely at the cuticle and fading out toward the tip, over a deep base color like burgundy or espresso.
You can make this with a toothpick or a bobby pin. I used a bobby pin on a burgundy base and it took me about fifteen minutes per hand. The result looked like something from a salon. My nail tech was genuinely impressed, which felt like a win.
Pro tip: Start with fewer dots than you think you need. You can always add more. Starting with too many dots and trying to remove them is how you end up with a smudged mess. Work from cuticle to tip, making the dots progressively smaller.
12. Fallen Leaves French (The Subtle Update)
This design takes a classic French tip and adds “leafy cuffs” — small leaf details at the base of the nail rather than at the tip. Celebrity nail artist San Sung Kim told InStyle this is “a subtle way to celebrate the season of Thanksgiving”.
The real problem it solves: you want Thanksgiving nails that don’t look like Thanksgiving nails. This design reads as “autumn” to anyone who knows, and as “nice French manicure” to anyone who doesn’t. It’s the definition of subtle seasonal.
Pro tip: Use a matte top coat on the base and gloss on the tips. The contrast between finishes makes the design look more intentional and gives the leaf details something to stand out against.
13. Deep Forest Green (The Moody Option)
Green nails are having a moment, and forest green is the Thanksgiving-appropriate version. Not lime, not mint — deep, dark, evergreen.
I was skeptical about green for years. Then I saw a reader comment on one of my fall nail posts saying she wore a deep forest green to Thanksgiving and her grandmother — who has opinions about everything — said it was “very elegant.” That sold me. I tried it the following year.
Pro tip: Forest green looks best in a high-gloss finish on shorter nails. If you want to make it more festive, add a single gold accent nail or a thin gold stripe at the cuticle.
14. Pumpkin Marble (For the Artistic Type)
Pumpkin marble nails are exactly what they sound like: a marbled effect in pumpkin orange, cream, and brown. The Pioneer Woman flagged this as one of the best simple Thanksgiving designs for beginners, and I agree — marbling is forgiving because imperfection is the point.
You can DIY this with a few drops of polish on a silicone mat, a toothpick to swirl them together, and then press your nail into the swirl. It’s messy and fun and genuinely hard to mess up.
Pro tip: Use a cream or nude base first, then add the marble on top. Marbling directly onto bare nail looks patchy. Also, work one nail at a time — the polish dries fast and the swirls stop moving if you wait too long.
15. Muted Plaid (Cozy and Preppy)
Plaid nails are the sweater weather manicure. The Pioneer Woman included “muted plaid” in her list of simple Thanksgiving designs, and InStyle featured a version with “chocolate brown tips and leafy cuffs” that felt like the sophisticated older sister of the argyle look.
This is another design I’d recommend as an accent nail rather than a full set. One or two plaid nails against a solid cream or nude base gives you the cozy factor without the visual overload.
Pro tip: Use thin tape strips to get clean plaid lines. Paint your base color, let it dry completely — and I mean completely, not “dry enough” — then apply the tape, paint over it with your accent color, and peel the tape while the polish is still wet. That’s the trick most tutorials skip.
16. Textured Tones (3D Without the Charms)
Refinery29 described this as a manicure that uses “dusky berry shades and warm golds” to create a “soft, dreamy” 3D effect. It’s texture without rhinestones or bows — the kind of 3D that reads as “elevated” rather than “craft project.”
I’m generally anti-3D nail art because it catches on everything (sweaters, hair, my own face when I’m tired). But textured tones are different — the texture comes from the polish finish itself, not from objects glued to your nail. It’s the best of both worlds.
Pro tip: If you want texture that won’t catch, ask for a “velvet” or “sugar” finish rather than actual 3D elements. It gives you dimension without the snagging.
17. Harvest Moon Accent Nail (The Storyteller)
This is a personal favorite because it’s so simple and so clever. You paint most of your nails a solid cream or nude, then paint one accent nail a deep navy blue with a single gold dot near the center. It’s a harvest moon in a night sky.
I did this on a whim last November and it became my most-complimented manicure of the entire season. It’s minimalist, it’s seasonal, and it has a little story to it. People notice it and ask about it, which is exactly what you want from a holiday manicure.
Pro tip: The gold dot should be slightly off-center. A perfectly centered dot looks like a sticker. An off-center dot looks like a moon.
18. Glazed Chocolate (The “Quiet Luxury” Option)
This is the shade for people who want to look expensive without doing anything complicated. Glazed chocolate is a deep brown base with a sheer, shimmery top coat that gives it a “glazed donut” effect. InStyle featured this in their Thanksgiving roundup, and it’s been one of the most saved designs on my own Pinterest board.
It’s brown, so it’s inherently cozy. But the glaze makes it feel special. I wore this for a low-key Thanksgiving at home (sweatpants, takeout, movie marathon) and still felt put-together, which is honestly the whole point.
Pro tip: The glaze effect comes from a sheer shimmer top coat, not from glitter polish. If you use actual glitter, you lose the “glazed” look and end up with sparkly brown nails. Ask for a pearl or chrome top coat instead.
What These Actually Cost (And What’s Worth Paying For)
Here’s the honest breakdown. I’ve paid for most of these, DIY’d several, and watched friends do the rest. This is what you’re looking at:
| Design | DIY Difficulty | At-Home Cost | Salon Cost (Gel) | Worth Paying For? |
|---|---|---|---|---|
| Spiced Apple Cider | Easy | $10-12 | $40-55 | No — solid color, easy DIY |
| Cranberry Gloss | Easy | $10-12 | $40-55 | No |
| Tortoiseshell | Hard | $25-35 | $70-90 | Yes — layering is tricky |
| Toffee Tips | Medium | $15-20 | $55-70 | Borderline — DIY with tape works |
| Olive Swirls | Medium | $15-20 | $55-70 | Borderline |
| Pumpkin Spice Cat-Eye | Hard (magnet needed) | $30-40 | $70-90 | Yes |
| Merlot Chrome | Medium | $20-30 | $65-85 | Borderline — chrome powder is messy |
| Argyle Print | Hard | $20-30 | $65-85 | Yes — striping brush required |
| Maple Leaves + Gold | Medium | $15-25 | $60-80 | Borderline |
| Toffee Shimmer | Easy | $10-15 | $45-60 | No |
| Gilded Gold Cascade | Easy | $10-15 | $55-70 | No — bobby pin dots work |
| Fallen Leaves French | Medium | $15-20 | $55-70 | Borderline |
| Deep Forest Green | Easy | $10-12 | $40-55 | No |
| Pumpkin Marble | Easy | $15-20 | $60-75 | No — DIY is genuinely easy |
| Muted Plaid | Hard | $20-30 | $65-85 | Yes — tape technique is finicky |
| Textured Tones | Hard | $25-35 | $70-90 | Yes — velvet finish needs gel |
| Harvest Moon Accent | Easy | $10-15 | $50-65 | No — one dot is one dot |
| Glazed Chocolate | Easy | $12-15 | $50-65 | No |
The pattern here: anything with a magnetic wand, chrome powder, or layered translucent patterns is worth paying for. Solid colors, sheer shades, simple dots, and marbling are DIY-friendly. If you’re going to spend money on one salon appointment this season, spend it on tortoiseshell, cat-eye, or plaid. Those are the ones where the technique genuinely makes or breaks the result.
What I’d Do First If I Were Starting Over
If I were building a Thanksgiving nail plan from scratch, I’d start with one salon appointment for a design I genuinely can’t DIY — tortoiseshell or cat-eye — about five days before Thanksgiving. That’s the sweet spot: close enough that the manicure is fresh, far enough that any minor swelling from the salon (it happens) has settled.
Then I’d buy one solid shade for backup — cranberry or espresso — for touch-ups or for the week after when I inevitably chip something while doing dishes. And I’d skip anything with 3D charms or bows. They look great for three days and then they catch on everything.
The other thing I’d do: take a photo of your nails in natural light before you leave the salon. Indoor lighting lies. If you get home and realize the shade pulls completely different in daylight, you’ll want to know that before you’ve worn it for a full day.
And if you’re reading this two days before Thanksgiving with bare nails and no appointment, don’t panic. Paint them a solid cranberry. Add one gold accent nail. Done. You’ll look festive, you’ll look intentional, and nobody at dinner is going to inspect your cuticles. I promise.
FAQs
How far in advance should I book a Thanksgiving nail appointment?
At least a week, ideally two. Thanksgiving week is one of the busiest times for nail salons — right up there with Mother’s Day and prom season. If you’re going for a design that takes longer (tortoiseshell, cat-eye, plaid), book the earliest slot you can get. I’ve made the mistake of calling on the Tuesday before Thanksgiving. Every salon within a twenty-minute drive was fully booked.
What’s the best nail shape for Thanksgiving?
Short-to-medium squoval or rounded shapes work best for most of the designs on this list. They’re practical for cooking, eating, and hugging relatives, and they make nail art look intentional rather than overdone. Almond works well for French tips and cat-eye finishes. Long coffin or stiletto nails are a commitment — beautiful, but you’ll feel them during every hand-washing.
Can I do Thanksgiving nails with regular polish instead of gel?
Yes. Solid colors, sheer shades, simple dots, and marbling all work fine with regular polish. They just won’t last as long — expect 3-5 days before chipping if you’re doing dishes or cooking. For anything with chrome, velvet, or magnetic finishes, gel is genuinely necessary. Regular polish can’t hold those effects.
What nail colors look best for Thanksgiving on short nails?
Deep, saturated colors actually work better on short nails than sheer shades do. Cranberry, espresso, forest green, and olive all make short nails look deliberate and polished. Very sheer shades on short nails can read as “I forgot to paint them” unless your nail beds are naturally long. If you want a sheer shade, go for Ghost Rose or a milky nude with a glossy top coat.
How much should I budget for a Thanksgiving manicure?
Basic gel color runs $40-55. Designs with chrome, cat-eye, or intricate art run $65-90. Full maximalist sets with rhinestones or 3D elements can hit $100+. If you’re DIYing, a single polish is $10-15, and a basic dotting tool or bobby pin costs nothing. Most people already have a top coat and cuticle oil.
Are Thanksgiving nails supposed to be themed, or can they just be fall colors?
Both. This is the one holiday where you genuinely have options. If you want turkey decals and pumpkin accents, go for it. If you want a deep glossy red and nothing else, that works too. Celebrity nail artist Amy Oung told InStyle that you can “get into a festive mood by wearing rich neutral colors on the nails” — the design is optional. The color palette is what makes it feel seasonal, not the decals.