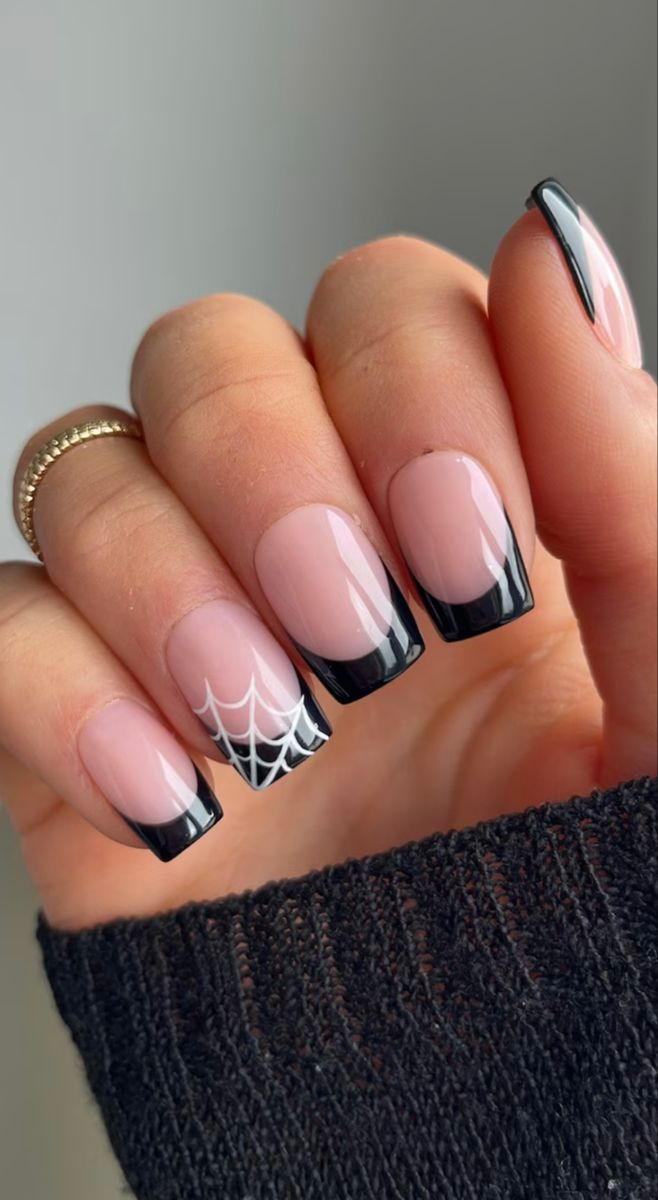
23 Winter Nail Designs I’d Actually Wear All Season (And 4 I’d Skip)
I still have a photo on my phone from December 2022 — my nails were a chrome-finish deep burgundy, and I took approximately 47 pictures of my own hands that month.
My husband noticed. He didn’t say anything, but he noticed.
Here’s the thing about winter nail designs: the season runs from basically November through February, which is four months of the same manicure if you don’t plan ahead.
And most roundups show you the same ten ideas — red, glitter, snowflake, repeat.
Meanwhile you’re sitting in a salon chair scrolling Pinterest at the last minute, showing your nail tech a screenshot you’re not even sure about.
So this is the list I wish I’d had.
I’ve worn a lot of these, my friend Danielle is a licensed nail tech in Columbus who gave me honest feedback on what actually holds up in cold weather, and a few of these came straight from reader comments on my last nail post.
I’ve also included the ones I’d personally skip and why, because not every viral design survives contact with real life.
Let’s get into it.
1. Deep Burgundy Glossy
If you only get one winter nail design this season, make it this. Deep burgundy — not red, not maroon, but that rich wine shade — works with literally every winter outfit, from a black turtleneck to a cream sweater.
The trick is the finish. A high-gloss top coat makes it look expensive; a matte finish makes it look flat and dated. Ask for two coats of color and a really good glossy top coat (not a quick-dry one, those dull out).
Pro tip: Burgundy shows chips faster than almost any other shade because the contrast between the polish and your natural nail is so strong. If you’re hard on your hands, get gel instead of regular polish — it’ll last three weeks instead of five days.
2. Chrome Finish Nails
Chrome nails had a massive year and they’re not going anywhere for winter. The effect is that mirror-like, almost liquid-metal finish, and it looks especially good in silver, gunmetal, and icy blue.
The catch: chrome powder only works over gel or acrylic, not regular polish. So this is a salon-only look unless you’re already doing at-home gel. Also, chrome shows every ridge and imperfection in your nail, so if your nails are peeling or uneven, the powder will highlight it instead of hiding it.
I tried chrome for the first time in January and genuinely couldn’t stop looking at my hands. It’s a very specific kind of joy.
Pro tip: Ask for a “chrome over color” rather than a full chrome. A base of deep navy or black with chrome powder on top gives you depth that a plain silver chrome doesn’t have.
3. Velvet Nails (The Fuzzy Ones)
Velvet nails use a special flocking powder to create an actual fuzzy, velvety texture. They look like tiny sweaters on your fingers and they’re genuinely one of the most fun winter nail designs out there.
The downside is real: they don’t last. Velvet nails are basically a one-week manicure, and they get matted down if you wash your hands a lot. They’re also hard to do at home — you need the flocking powder and a specific technique.
Pro tip: Save velvet nails for a specific event — a holiday party, a birthday dinner — not for a month where you need your nails to survive a lot of handwashing. They’re a moment, not a staple.
4. Icy Blue French Tips
This is the winter version of the classic French manicure, and it’s everywhere right now. Instead of white tips, you use an icy pale blue or a soft silver, and it reads as “winter” without being literal about it.
The good news is this works on short nails too. A thin icy tip on a short, oval nail looks clean and intentional. On longer almond nails it looks more dramatic.
Pro tip: If you’re doing this at home, use a striping brush, not the brush that comes in the polish. The line is everything with a French tip, and a shaky tip ruins the whole thing.
5. Matte Black With Gold Flakes
Matte black alone can look harsh. But matte black with tiny gold foil flakes scattered across it? That’s a winter nail design that reads as deliberate and a little bit edgy.
The gold flakes are applied before the matte top coat, so they’re sealed in. A good nail tech can do this in about 20 extra minutes. At home, you can buy gold foil flake sets for around $8 and press them on with a dotting tool.
Pro tip: Matte top coat wears down faster than glossy because it has a rougher surface. You’ll need a touch-up around day 10. If that sounds annoying, go glossy with the gold flakes instead.
6. Classic Red (But the Right Red)
Red nails in winter are not groundbreaking. But the wrong red is a problem — too orange and it looks summery, too pink and it looks like Valentine’s Day came early. The right winter red is a blue-based red: think cherry, crimson, or a true brick.
OPI’s “Big Apple Red” is the classic, but Essie’s “Russian Roulette” is a warmer alternative that looks better on olive and deeper skin tones.
Pro tip: Hold the bottle up to your skin before committing. Blue-based reds flatter cool undertones; orange-based reds flatter warm undertones. Most people guess wrong.
7. Snowflake Accent Nails
A single snowflake on one accent nail is charming. A snowflake on every nail is a lot. This is one of those winter nail designs where restraint is the whole point.
The snowflake itself can be done with a fine liner brush or a stamping plate. Stamping is faster and more precise, but it requires a stamper, a plate, and some practice. Freehand is more forgiving if you’re going for a slightly imperfect, hand-drawn look.
Pro tip: Put the snowflake on your ring finger, not your index finger. The ring finger is the least likely to chip because you use it less, and it’s the traditional accent nail for a reason.
8. Glazed Donut Nails
This trend came from Hailey Bieber and honestly, it stuck because it works. Glazed donut nails are a sheer, pearlescent white-pink with a chrome powder on top that gives them that soft, glowy, almost wet look.
They’re subtle enough for work, pretty enough for a date, and they flatter basically every skin tone. The only real downside is that sheer colors show growth quickly — you’ll see the regrowth line at about the two-week mark.
Pro tip: Ask for a “milky white base with a pearl chrome on top.” If you just say “glazed donut,” some techs will know and some won’t. Being specific saves you both time.
9. Dark Green Forest Nails
Forest green is the unsung hero of winter nail colors. It’s festive without being red-and-green Christmas, and it looks incredible against gold jewelry.
I’d go glossy for this one. Matte forest green can look a little murky depending on the shade. And if you want to elevate it, add a thin gold line down the center of one nail.
Pro tip: Dark green is one of the few colors that looks good on both short and long nails. If you’re growing out a bad set, this is the color to hide the awkward in-between stage.
10. Milky White With Silver Glitter
Milky white is having a moment. Add a fine silver glitter on top and you get something that reads as snowy without being cheesy about it.
The key is the glitter particle size. Chunky glitter looks like craft store. Fine, micro-glitter looks like frost. Ask for the finest glitter your tech has.
Pro tip: Milky white shows stains from dark clothing and hair dye. If you wear a lot of black or you’re coloring your hair this month, choose a slightly more opaque white to avoid the stain issue.
11. Sweater Weather Textured Nails
This is a technique where you use a matte top coat plus a textured gel to create a knit-like pattern on the nail. It’s the manicure equivalent of a cable-knit sweater.
It’s beautiful and it’s also one of the more expensive winter nail designs because it takes real skill. Expect to pay $75–$120 depending on your market. At home, you can approximate it with a matte top coat and a nail stamping plate with a knit pattern.
Pro tip: Textured nails catch on sweaters and hair. If you have long hair you wear down a lot, think twice — the texture will snag it all day.
12. Gold Chrome Tips
Gold chrome on the tips of a nude or clear base is a luxe, minimal take on winter nail art. It looks like jewelry for your hands.
The trade-off is that gold chrome powder over tips wears off faster than a full chrome nail because the tips take the most abuse. You’ll get maybe 10 days before it starts looking patchy.
Pro tip: If you want gold without the wear issue, do a gold flake design instead. Flakes are sealed under the top coat and last as long as the manicure itself.
13. Oxblood Almond Nails
Oxblood is burgundy’s darker, moodier cousin. On an almond-shaped nail, it looks sophisticated and a little bit expensive.
Almond shape is having a real moment, and it’s flattering on most hand shapes. The one exception is very short fingers — almond can make them look shorter. If that’s you, go with a short oval instead.
Pro tip: Oxblood is one of those colors that looks different in every lighting. Check it in natural light before you commit if you’re buying a bottle for at-home use.
14. Snow Globe Nails
Snow globe nails have tiny glitter or foil pieces suspended under a clear top coat, so they look like a shaken snow globe. It’s a fun, slightly over-the-top winter nail design that’s perfect for the holidays.
The downside: they’re thick. If you’re not used to a lot of product on your nails, they’ll feel heavy and you’ll notice them constantly for the first two days.
Pro tip: Keep the snow globe effect on two or three nails, not all ten. It’s a lot of visual weight, and doing it on every nail makes the design feel chaotic instead of intentional.
15. Brown Sugar Glitter
This is a warm, cozy take on glitter — a brown or caramel base with a fine gold or bronze glitter on top. It reads as “warm drink by a fireplace” in nail form.
Brown sugar glitter works especially well on medium and deeper skin tones. On very fair skin it can look muddy if the brown is too dark, so ask for a lighter caramel base if that’s you.
Pro tip: This is one of the best winter nail designs for growing out a manicure because the glitter hides the regrowth line. If you’re stretching your appointments, this is the one to get.
16. Abstract Line Art
Abstract line art nails use thin, flowing lines — often white or gold — over a solid base. It’s modern, minimal, and much easier to DIY than it looks.
The trick is a really fine liner brush and a steady hand. If your hand shakes, use a stamping plate instead. Line art is unforgiving; one wobbly line ruins the whole nail.
Pro tip: Practice the line on a piece of paper first. It sounds obvious, but almost nobody does it, and it makes a huge difference.
17. Pearl Accent Nails
Small pearls placed on one or two nails is subtle and elegant. It’s a nice alternative to glitter if you want something that feels special but not sparkly.
The pearls are usually applied with nail glue and sealed with top coat. They can pop off if you’re rough on your hands, so keep a spare pearl and a dot of glue handy.
Pro tip: Keep pearls away from the tip of the nail. Tips take the most impact, and that’s where they’ll pop off first.
18. Espresso French Tips
Espresso brown tips on a nude base is a warm, modern alternative to the classic French. It’s been showing up everywhere on my Pinterest feed, and it works because it’s a softer contrast than black or white tips.
This is a great option if you want something that reads as “done” without being loud. It’s also very forgiving if your nail tech’s line isn’t perfect, because the contrast is lower.
Pro tip: Use a warm nude base, not a cool one. A cool-toned nude with espresso tips looks mismatched.
19. Iridescent Chrome
Iridescent chrome shifts color depending on the light — pink to green to blue. It’s a fun, slightly futuristic winter nail design that photographs beautifully.
The catch is that iridescent chrome is one of the more finicky powders to apply evenly. If your tech hasn’t done a lot of chrome work, the finish can look patchy. Ask to see photos of their previous chrome work before you commit.
Pro tip: Iridescent chrome looks best on longer nails because the color shift needs surface area to be visible. On short nails it mostly reads as one flat color.
20. Red and Gold Combo
Red nails with a gold accent nail, or red nails with gold flake detailing, is a classic holiday combination that never really goes out of style. It’s festive without being literal.
The key is picking the right red and the right gold. A blue-based red with a warm gold looks slightly off. Keep your red and gold in the same temperature family — warm with warm, cool with cool.
Pro tip: If you’re doing red and gold for a specific event, book your appointment two days before, not the day of. Fresh nails look best after 24 hours when the top coat has fully set.
21. Black Cherry
Black cherry is that deep, almost-black red that’s been everywhere this winter. It’s moody, it’s dramatic, and it looks incredible on almost everyone.
The one thing to know: black cherry is a nightmare to remove, especially if you’re doing it at home. It stains the nail bed. Use a base coat — always — and if you’re removing it yourself, soak in acetone for a full 10 minutes before you start pushing.
Pro tip: If you get black cherry in gel, make sure your tech uses a proper base coat. Skipping it means you’ll be looking at stained nails for weeks after removal.
22. Minimalist Gold Dots
A single gold dot near the cuticle of each nail is about as minimal as nail art gets, and it’s perfect if you want something subtle. It’s also one of the easiest designs to DIY — a dotting tool and a bottle of gold polish is all you need.
This is a good choice for someone who works in a conservative office but still wants a little something.
Pro tip: Keep the dot small. A large dot reads as a design element; a small one reads as a detail. The small one is more elegant.
23. Frosted Ombre
Frosted ombre goes from a solid color at the base to a lighter, frosty shade at the tip. It mimics the look of frost on a window and it’s genuinely beautiful.
The downside is that ombre is one of the harder techniques to do well. A bad ombre looks like a gradient that gave up halfway. If you’re doing it at home, use a makeup sponge to blend, not a brush.
Pro tip: Go from dark at the base to light at the tip, not the other way around. Light-to-dark ombre makes nails look like they’re dirty at the ends.
Winter Nail Designs I’d Skip (And Why)
Not every viral design survives real life. Here’s what I’d personally pass on:
- 3D bows and charms — cute for a photo, terrible for typing, hair, and pockets. They catch on everything.
- Full glitter on every nail — removal is brutal, and the texture feels gritty against your skin.
- Very long stiletto nails in winter — you’ll be wearing gloves and mittens. Long nails plus gloves equals constant snagging.
- Nail art with loose rhinestones — they fall off within days, and you’ll find them in your bed, your car, and your hair.
Cost Comparison: What Winter Nail Designs Actually Cost
Here’s a realistic breakdown based on what I’ve paid and what my friend Danielle charges in a mid-size city. Prices vary a lot by market — expect to pay 30–50% more in major cities.
| Nail Type | Typical Cost | Lasts | Best For |
|---|---|---|---|
| Regular polish (salon) | $15–$25 | 4–7 days | Quick color change, low commitment |
| Gel manicure | $35–$60 | 2–3 weeks | Everyday wear, chip resistance |
| Gel with nail art | $50–$90 | 2–3 weeks | Holiday events, photos |
| Acrylic full set | $60–$100 | 3–4 weeks | Length, durability |
| Acrylic with complex art | $90–$150+ | 3–4 weeks | Special occasions |
| At-home gel kit | $40–$80 (one-time) | 1–2 weeks per set | Frequent color changes, budget |
| Velvet/flocking | $50–$80 | 5–10 days | One specific event |
The honest take: If you’re doing winter nail designs regularly, a gel manicure every three weeks is cheaper than a regular polish every week. The math works out, and your nails look better the whole time.
FAQs About Winter Nail Designs
What nail colors are trending for winter?
Deep burgundy, forest green, black cherry, espresso brown, and icy blue are the biggest winter nail colors right now. Chrome finishes and glazed donut nails are also everywhere.
How long do winter nail designs last?
Gel and acrylic designs last two to four weeks. Regular polish lasts about a week. Velvet and textured designs last five to ten days at most.
Are short nails okay for winter nail designs?
Yes. Short almond or oval nails handle most winter designs well, including French tips, chrome, and minimalist art. The only designs that really need length are iridescent chrome and heavy nail art.
What’s the best winter nail design for someone who works with their hands?
A gel manicure in a dark solid color — burgundy, forest green, or black cherry. No 3D elements, no heavy art. It’ll hold up to handwashing and typing better than anything else.
Is chrome going out of style?
No. Chrome has been going strong for two seasons and it’s still showing up in salon requests. Iridescent and silver chrome are the biggest variations right now.
Can I do winter nail designs at home?
French tips, minimalist line art, gold dots, and glazed donut nails are all doable at home with some practice. Chrome powder and velvet flocking are harder and usually not worth the DIY learning curve.
If I Were Starting From Scratch, This Is What I’d Do
If I were building a winter nail rotation from zero, I’d start with one gel manicure in deep burgundy — it’s the color that works for every occasion from Thanksgiving through February, and gel means I’m not thinking about it again for three weeks.
Then, for the one or two holiday events where I want something special, I’d splurge on a chrome or glazed donut design. Those are the ones that get compliments and photograph well, and they’re worth the extra cost for a specific occasion.
The winter nail designs that actually stick around are the ones that survive real life — handwashing, typing, zipping coats, digging for keys in a bag. Anything that can’t handle that is a photo, not a manicure.
If you’re still deciding, start with burgundy. You can’t go wrong, and you’ll probably keep coming back to it every December for the rest of your life. I know I do.