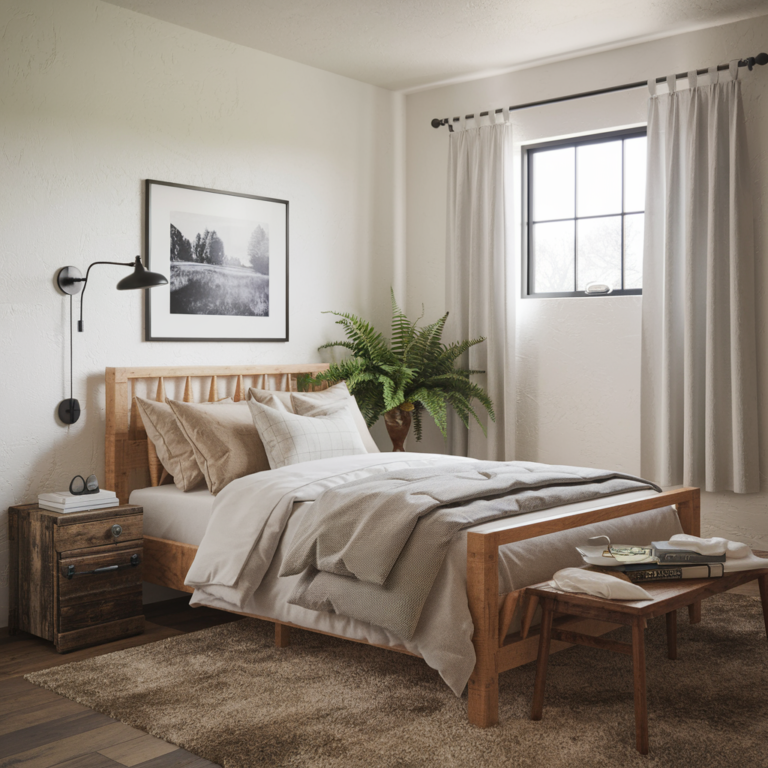
27 Dorm Room Ideas for Girls That Actually Work in a 120-Square-Foot Box
My first dorm room had cinderblock walls the color of skim milk, a fluorescent light that made everyone look vaguely ill, and a mattress that felt like it was stuffed with newspaper.
I spent my entire freshman year living with bare walls and whatever bedding my mom panic-bought at Target, and by winter break I was genuinely ready to lose my mind.
The turning point was embarrassingly small: I hung a $12 string of warm fairy lights along the ceiling perimeter, and suddenly the room didn’t feel like a holding cell anymore.
That was the moment I understood that dorm room ideas for girls aren’t really about “aesthetic” — they’re about making a space that’s actively working against you feel like it’s on your side.
Here’s the thing nobody tells you before move-in: you’re going to spend roughly 60% of your college life in that room. Sleeping, studying, crying over organic chemistry, binge-watching comfort shows at 2 AM.
A room that feels like a storage unit makes all of that harder. A room that feels intentional — even cheaply intentional — makes it easier.
The good news is that most of the transformations I’ve seen (and pulled off myself) cost between $100 and $400 total, not the $1,500 you see in dorm-haul videos.
Quick Comparison: Dorm Storage Options That Actually Fit
The single most common mistake I see in dorm rooms is buying storage before measuring anything. A rolling cart that looks perfect online can block the only walking path in the room, and a “storage ottoman” can eat a third of your floor. Here’s the reality check, based on what college students actually recommend and what I’ve watched work (and fail) in real rooms.
The Bed Wall: Where Most of Your Energy (and Budget) Should Go
Your bed takes up half the visual real estate in the room and it’s the first thing anyone sees when they walk in. If you’re going to spend money anywhere, spend it here — on comfort, on a focal point, and on bedding that doesn’t look like it came from a hospital supply closet.
1. A Mattress Topper Is the One Upgrade You Should Not Skip
The dorm mattress is the single worst piece of furniture you will ever sleep on. It’s plastic-wrapped, vaguely crunchy, and designed to survive decades of teenagers rather than to be comfortable. A mattress topper is the difference between waking up with a backache and actually sleeping through the night. I’ve tested the budget end of this category: a $50 two-inch memory foam topper from Amazon can genuinely transform a hard dorm mattress into something cozy, and one reviewer described their three-inch twin memory foam topper as turning their dorm bed into “a cozy and restful bed”. The viral Sleepyhead topper on TikTok runs $299–$499 for a twin XL, which is more than most students spend on bedding altogether, and while it is genuinely comfortable, the Tempur-Adapt at $268 for a twin XL is the more established “expensive but worth it” pick if you’re going premium.
Pro tip: Buy Twin XL, not Twin. Almost every dorm bed is Twin XL, and a regular Twin topper will leave six inches of miserable plastic mattress exposed at the foot of the bed. This is the most common and most preventable bedding mistake.
2. Layer Your Bedding Like You Actually Care (Because It Photographs Better Than You Think)
Start with neutral sheets — white, cream, or soft gray — then add a comforter or duvet in your accent color, then pile on four to six decorative throw pillows in coordinating colors. This is the formula that makes a bed look “styled” instead of “made,” and it costs almost nothing extra if you buy the pillows on sale. The throw pillows are what people notice in photos; the sheets are what you actually sleep on, so don’t blow your whole bedding budget on pillows and then buy the cheapest sheets you can find.
Pro tip: Wash your sheets before move-in day and pack them in a vacuum-sealed bag. They’ll take up half the space in your suitcase, and you won’t be hunting for a laundry room on night one.
3. A Tapestry Headboard (Zero Damage, Instant Focal Point)
You’re not allowed to drill into the wall, which means no real headboard. The workaround I used and still recommend: a large boho tapestry hung with Command strips behind the bed. It creates a visual anchor, softens the cinderblock situation, and comes down in seconds at the end of the year. A 51×60-inch tapestry runs $15–$35, and it’s the single highest-impact wall change you can make without touching a drill.
Pro tip: Iron the tapestry before hanging it. It ships folded, and a tapestry with visible crease lines looks like a sheet you tacked to the wall. A cheap handheld steamer (or five minutes in a bathroom with the shower running hot) fixes it.
4. Blushcore Instead of Bright Pink (The Color Palette That Ages Well)
The 2026 version of a “pink dorm room” is muted: terracotta, dusty rose, and soft caramel instead of saturated hot pink. It photographs beautifully, it doesn’t date in a year, and it still looks calm at 11 PM under warm light — which bright pink never does. If you’re drawn to a soft, feminine palette, this is the one I’d choose. If you want a different direction, sage green is the safest “color” for a small room because it reads as a neutral and makes the walls recede instead of closing in.
Pro tip: Pick your color palette before you buy anything — bedding, rug, wall decor, storage bins. A room with five different accent colors reads as chaos, while a room with one accent color repeated three times reads as intentional. This is the cheapest “design trick” that exists.
5. A Bed Pocket Caddy (The $15 Fix for the Nightstand You Don’t Have)
Dorm beds are usually lofted, which means your phone, glasses, and water bottle have nowhere to live except the floor. A felt bed pocket hangs on the bed frame and holds all of it within reach. It’s not glamorous, but it’s the piece of storage people use every single day and never think to put on a shopping list. If you’re in a small dorm room with no floor space for a real nightstand, this is the nightstand.
Pro tip: Hang the pocket on the side of the bed facing the wall, not the open room. It keeps the clutter out of sight and prevents you from knocking it off every time you get up.
Storage That Doesn’t Look Like Storage (Because the Room Is Already Small)
The goal with dorm room storage isn’t to cram more stuff in — it’s to make the stuff you have disappear into the architecture. These are the pieces that do actual work.
6. The $40 Rolling Cart That College Students Actually Recommend
The Brightroom 3-Tier Metal Utility Cart from Target was the winner of a Dorm Therapy survey of more than 360 college students, with a 9.6 average rating and specific praise for being durable, space-saving, and affordable. One student used it as a snack cart; another used it as a nightstand. It’s 31 inches tall, 17 inches wide, and 13 inches deep, and it comes in four colors. The IKEA RÅSKOG is the close runner-up at $28 for the smaller size and $40 for the larger, and it’s the cart you’ve seen in every dorm photo on your feed. The trade-off: it’s open storage, so it only looks tidy if you actually keep it tidy. Baskets or bins on each shelf hide the clutter.
Pro tip: Lock the wheels. The cart comes with lockable casters, and an unlocked cart that rolls away every time you set something down on it will drive you insane by week two.
7. Over-the-Door Organizers for Shoes, Snacks, and Hair Tools
A hanging over-door organizer holds up to 44 pounds, takes zero floor space, and is the best $7–$15 you can spend on small dorm room organization. I’ve seen them used for shoes, cleaning supplies, snacks, and — most usefully — hair tools. A curling iron and a straightener don’t need drawer space if they have a pocket on the back of the door. The catch is door thickness: measure the top of your dorm door before you buy, because some organizers don’t fit over the thicker fire-rated doors.
Pro tip: Put the heaviest items in the bottom pockets. Over-door organizers are stable, but a top-heavy one will swing every time the door opens and close with a slam.
8. Under-Bed Bins (But Only If You’ve Measured First)
Under-bed storage is the classic small space storage solution, and it works — if you know your bed’s loft height. The mistake people make is buying bins before move-in, then discovering their bed is lofted high enough for a dresser but not high enough for the bins they bought. Measure the clearance, then buy flat bins with handles that slide easily. $20–$40 gets you a set that will hold off-season clothing, extra bedding, and the bulk toiletries you don’t need every day.
Pro tip: Label the bins with painter’s tape and a marker, not permanent labels. You’ll change what’s in them three times before you graduate, and a bin labeled “winter stuff” that’s actually full of summer clothes is a personal betrayal.
9. A Storage Ottoman (The One That Doubles as Seating)
If you have floor space for exactly one piece of furniture beyond the bed and desk, make it a storage ottoman. It holds blankets, extra pillows, or the overflow from your closet, and it gives you a place to sit when a friend comes over and the desk chair is buried under laundry. TJ Maxx and HomeGoods usually have them for $25–$40, which is less than you’d pay for a decent storage bin and a separate stool.
Pro tip: Measure the ottoman against the walking path before you buy. A storage ottoman that blocks the only route from the door to the bed is a $30 mistake you’ll trip over daily.
10. Floating Shelves Above the Desk, Not Beside It
A bookcase eats floor space; shelves don’t. Mounting shelves directly above the desk keeps the study zone’s footprint to about one square meter, and stacking them vertically pulls the eye upward — which is the most reliable trick for making a narrow room feel taller. You’ll need Command strips rated for the weight (large strips hold 7.5 lbs per pair), and you’ll need to actually use them for books and supplies rather than decorative trinkets.
Pro tip: Put the heaviest books on the bottom shelf and the lightest decor on the top. It’s physics, not design — but it’s also design.
Lighting: The Highest-Impact Change You Can Make for Under $30
Dorm overhead lighting is fluorescent and unflattering, and swapping in warm-toned lighting is the single highest-impact change a student can make in a dorm room. The fluorescent bulb flattens the room, shows every corner, and makes everyone look like they’ve been interrogated. Two or three warm light sources at different heights do the opposite: the corners fall into shadow, and the room reads as deeper and cozier.
11. Warm Fairy Lights Instead of the Ceiling Light
String lights or fairy lights run $12–$25 and are the cheapest dramatic change on this list. Run them along the ceiling perimeter, over the bed, or around a tapestry, and turn off the overhead light permanently. This is the change I made in my own freshman room, and it’s the one I’d make first if I were starting over. The room doesn’t just look better — it feels different to be in.
Pro tip: Buy warm white, not cool white. Cool white fairy lights read as “dentist office” and undo the whole point. Look for 2700K–3000K on the packaging if the listing doesn’t say “warm white.”
12. LED Strip Lights With Removable Clips (Not Permanent Adhesive)
LED strips are everywhere, and they’re great for under-desk or under-bed glow. But the standard adhesive backing on many LED strips will pull paint when you remove them, which is a damage-deposit problem waiting to happen. The fix: buy strips that come with removable Command-style clips rather than permanent adhesive, or use the clip-mount systems that Govee and similar brands sell specifically for this. A 100-foot Govee smart strip runs about $55–$65, which is more than fairy lights, but it gives you app control and 16 million colors.
Pro tip: Run the strip along the back edge of the desk, not the front. It lights up the wall and the workspace without shining directly into your eyes or your roommate’s eyes.
13. A Clip-On Reading Light (The Roommate-Friendly Upgrade)
A clip-on reading light for the bed lets you read or study after your roommate has gone to sleep without lighting up the whole room. It clips onto the bed frame or a headboard, costs $15–$25, and is the piece of lighting equipment people don’t realize they need until they’re trying to read by the glow of a phone screen at midnight. If you have a lofted bed, get one with a flexible neck so you can angle it down without clipping it to something that vibrates every time you move.
Pro tip: Get one with a warm and cool white setting. Warm for reading before bed, cool for actual studying. The $20 version with two color temperatures is worth the extra $5 over the single-setting version.
14. A Desk Lamp With a USB Port (Because Outlets Are Scarce)
Dorm rooms have approximately one and a half outlets, and half of them are behind the bed where you can’t reach them. A desk lamp with a built-in USB charging port solves two problems at once. The TaoTronics LED desk lamp runs $25–$35, has adjustable color temperature, five brightness levels, and a USB-A port for charging your phone, and the eye-care mode reduces flicker for late-night studying. It’s not the most exciting purchase on this list, but it’s one of the most-used.
Pro tip: Check whether your dorm allows lamps with non-LED bulbs before you bring an old desk lamp from home. Most schools have moved to LED-only for fire safety, and a halogen bulb lamp will get confiscated at check-in.
Walls You’re Actually Allowed to Touch (No Nails, No Damage)
Most schools prohibit nails, screws, and any damage to walls. Command strips are the workaround, but you have to respect the weight limits: standard picture hanging strips hold 4 pounds per pair, and large strips hold 7.5 pounds per pair. Press firmly for 30 seconds and wait an hour before hanging anything, and pull straight down slowly when you remove them.
15. A Photo Grid (The Most Personal Wall Decor That Costs Almost Nothing)
A grid of photos is the most personal and most versatile wall option, and Polaroid-style prints work especially well because of their size and warm, slightly soft look. Print 20–30 photos at a drugstore (usually $0.15–$0.30 per print), hang them in a grid with mini clothespins and twine or tape them directly to the wall with removable strips, and you’ve got a gallery that tells your actual life story instead of a generic poster. This is the wall decor I’d choose over any tapestry or print, because it’s the only one that’s genuinely yours.
Pro tip: Print on matte paper, not glossy. Glossy photos catch the overhead light and turn into a wall of white rectangles in every photo you take of the room.
16. A Gallery Wall That Stops at Eye Level
Five to seven frames in two or three sizes, aligned along one invisible line, keeps the upper wall empty — and that empty band is exactly what makes a small room feel bigger rather than busier. Use Command picture hanging strips for each frame, and keep the whole arrangement below eye level. A gallery wall that creeps too high makes the ceiling feel lower, which is the opposite of what you want in a 120-square-foot room.
Pro tip: Cut paper templates the same size as your frames and tape them to the wall before you commit. It takes ten minutes and saves you from a gallery wall that’s six inches too far left.
17. Peel-and-Stick Wallpaper (The Renter-Safe Color Change)
If your school allows it and your walls are smooth enough for adhesive to grip, peel-and-stick wallpaper is the only way to change the wall color without paint. A single accent panel behind the bed or desk runs $20–$40, and it comes off cleanly if you follow the removal instructions. The catch: cinderblock walls are textured and won’t hold adhesive wallpaper, so this works in rooms with painted drywall but not in the classic block-walled dorm. Check your room before you buy.
Pro tip: Buy one extra roll. Peel-and-stick wallpaper is like tile — you always need more than you calculated, and a second order from the same batch may not match the first.
18. A Tapestry or Wall Hanging (The Instant Personality Piece)
A tapestry is the laziest way to fill a big blank wall, and I mean that as a compliment. A $15–$35 wall hanging covers a huge surface, weighs almost nothing, and hangs with two Command strips. It’s the piece that turns a cinderblock wall into a backdrop. The trade-off is that tapestries can look dorm-generic if everyone has the same one, so pick a design or color that actually matches your palette instead of the first mandala you see.
Pro tip: Hang the tapestry so the bottom edge is a few inches above the bed, not touching it. Fabric that pools on the mattress collects lint and looks sloppy in photos.
Comfort and Coziness (The Upgrades That Are Actually Worth It)
These are the purchases that don’t photograph as dramatically but change how the room feels to live in every day. Prioritize them over decorative items, because a cozy blanket you use daily beats five trinkets you never touch.
19. One Large Area Rug, Not a Small One
The most common small-room mistake is a rug that’s too small — it chops the floor into pieces and the room shrinks. Run one large rug under the bed and past its edges instead. Fewer visual breaks on the floor always reads as more space. A 5×7 or 6×9 rug runs $30–$100 depending on material, and a jute or low-pile rug is easier to vacuum in a dorm than a shag. If you can only afford a small rug, skip it entirely and put the money toward bedding — a too-small rug actively makes the room worse.
Pro tip: Measure the floor space between the bed and the desk before you buy. A rug that fits the open floor area but disappears under the bed is the right size; a rug that only covers the center of the room is the wrong one.
20. A Throw Blanket You’ll Actually Use
A cozy throw blanket is the highest-use comfort purchase in any dorm room. It lives on the bed, gets dragged to the desk on cold mornings, and doubles as a picnic blanket when the floor lounge is full. $20–$35 gets you a soft microfiber or chunky knit throw, and it’s worth spending $10 more on one that doesn’t pill after three washes. This is not a decorative item — it’s a daily-use item that happens to look good draped over the desk chair.
Pro tip: Get a dark or mid-tone color, not white. Dorm laundry is expensive and infrequent, and a white throw blanket will be gray by October.
21. A Clip-On Fan for the Lofted Bed (The Sleeper You Didn’t Know You Needed)
Dorm rooms are temperature-controlled by a building system you can’t adjust, and lofted beds trap heat. A small clip-on fan attaches to the bed frame, runs on USB or a standard plug, and makes summer move-in and stuffy September nights survivable. $15–$25 gets you a quiet one with two or three speeds. This is the purchase people make in week three after two nights of bad sleep, and I’d rather you make it in week one.
Pro tip: Get one with a clamp, not a stand. A standing fan takes up floor space you don’t have, and a clamp fan can point directly at you without blocking the walking path.
22. A Small Plant (Real or Fake) With a Cute Pot
Plants with cute pots run $25–$40 for real or faux, and they’re the cheapest way to make a room feel alive. A pothos or snake plant survives low light and irregular watering; a faux plant survives everything. The pot matters more than the plant — a $6 nursery pot in a $12 ceramic cachepot looks intentional, while a $25 plant in its plastic nursery pot looks like you forgot to finish unpacking.
Pro tip: If you go real, get a snake plant or a ZZ plant, not a fern. Ferns need humidity and attention, and a crispy dead fern is worse for the room’s energy than no plant at all.
23. A Full-Length Mirror (The One You’ll Use Every Single Day)
A full-length mirror is the most-used “decor” item in any dorm room, and it’s the one people forget to put on the list. An over-the-door mirror runs $30–$50, hangs with two hooks, and takes zero floor space. A leaning mirror is sturdier but needs floor space and a wall to lean against. Either way, you need one, because getting dressed in a 3×2 bathroom mirror is a daily exercise in guessing.
Pro tip: Hang the over-the-door mirror on the closet door, not the entry door. The entry door gets opened and closed constantly, and a mirror that swings every time someone walks in is a liability.
24. A Small Whiteboard or Dry-Erase Board (The Roommate Communication Tool)
A mini dry-erase board on the wall or desk is the low-tech solution to roommate logistics: whose turn it is to take out the trash, what’s missing from the shared snack stash, and the note that says “I’m in the library until 10, please don’t blast music.” $8–$15 gets you a small board and a pack of markers. It’s not decor, exactly, but it prevents the kind of passive-aggressive sticky notes that make shared rooms miserable.
Pro tip: Mount it near the door, not above the desk. The door is where people look on their way in and out, and a board above the desk becomes invisible within a week.
What NOT to Buy (Save Your Money and Your Floor Space)
I’ve watched people waste more money on dorm stuff than on any other category of purchase, and most of it is because shopping lists are written for an idealized room that doesn’t exist. Here’s what to skip, based on what actually survives contact with a real 130-square-foot room shared with a stranger.
25. Skip the Rolling Laundry Hamper (Get a Collapsible Bag Instead)
A rolling hamper looks practical in a product photo and becomes a floor obstacle the moment it lands in a dorm room. It eats a chunk of floor space permanently, whether it’s full or empty. A pop-up collapsible hamper folds flat for trips home, pops open in seconds, and takes up a fraction of the space. This is the single easiest “what not to buy” swap on the list.
Pro tip: Get one with a shoulder strap, not just handles. You’ll be carrying it down stairs or across a courtyard, and handles-only hampers are a two-trip ordeal.
26. Skip the Iron and Ironing Board (A Steamer Is Smaller and Better)
An iron and ironing board are bulky, rarely used, and exactly the kind of item that lives under the bed all year and goes home unused in May. A handheld steamer costs $20–$30, takes up a shelf instead of a closet corner, and handles the wrinkles that actually matter. If you’re bringing dress clothes for presentations or interviews, a steamer is the tool you want.
Pro tip: Steam your clothes while they’re hanging on the closet door, not laid flat on the bed. Gravity does half the work, and you don’t have to wrestle with a hot plate on a soft surface.
27. Skip the Full Cookware Set and the Big Fridge-Microwave Combo (Coordinate First)
Most dorm rooms either already have a micro-fridge or ban personal refrigerators and microwaves outright, and full cookware sets rarely fit in a dorm kitchenette. Talk to your roommate before either of you buys a fridge, a microwave, or a full set of pots and pans. The person who buys first wins the space argument, and the person who buys second has wasted $80 on a duplicate. A Brita pitcher is also usually unnecessary because dorm floors have filtered water bottle fillers.
Pro tip: Text your roommate a photo of what you’re planning to buy before you buy it. A 30-second conversation saves the “we have two mini-fridges and no floor” problem that ruins more move-in days than any other duplication.
How Much Does This Actually Cost? A Real Dorm Decor Budget
Dorm decorating budgets vary widely, but most students land somewhere between $150 and $500 for a full makeover, and the projects on this list fit inside that range. Here’s how I’d allocate it if I were starting from scratch with a dorm room decor on a budget mindset.
| Priority | What to Buy | Budget Range | Why This Order |
|---|---|---|---|
| 1. Sleep | Mattress topper, pillow, duvet | $60–$150 | You use it every night; a bad mattress ruins everything else |
| 2. Lighting | Warm lamp, fairy lights, clip-on reading light | $25–$80 | The highest-impact change per dollar, and it fixes the fluorescent problem |
| 3. Floor | One large area rug or runner | $30–$100 | Softens the room and makes it feel less institutional |
| 4. Walls | Frames, prints, removable hooks, tapestry | $20–$60 | Personality without damage, and it’s the first thing people see |
| 5. Storage | Bins, under-bed boxes, rolling cart, over-door organizer | $20–$80 | Declutters the room and makes everything else look more intentional |
The enhanced tier — better bedding, a storage ottoman, a photo grid, plants, and a desk lamp with personality — runs $250–$400 total, and I’d only go there after the five priorities above are covered. The mistake people make is buying decorative items first and realizing they have no money left for a mattress topper, which is the one purchase that affects every single night.
Pro tip: Buy your mattress topper and your lighting before anything else. Those two categories affect your daily experience more than any rug or tapestry, and they’re the easiest to under-budget because they’re not “fun” purchases.
The Wrap-Up: What I’d Do First If I Were Starting Over
If I were moving into a dorm room again tomorrow — and I have a cousin who’s a year out, so I’ve already started planning this — I’d buy the mattress topper and the warm fairy lights before I bought a single decorative item. Those two things change how the room feels to sleep in and be in, and everything else is secondary. Then I’d hang a tapestry with Command strips, put a photo grid on the wall, and spend the rest of the budget on storage that actually fits the room I measured. The rug can wait. The gallery wall can wait. The rolling cart and the over-door organizer can’t, because they’re the difference between a room that functions and a room that looks like a storage unit with a bed in it.
The dorm room ideas for girls that actually work aren’t the ones with the biggest shopping haul or the most elaborate DIY. They’re the ones that solve a real problem — bad light, no storage, an ugly mattress — with the least amount of money and the least amount of damage to the room. Start with the problems, not the Pinterest board, and the room will come together faster than you think.
FAQs About Dorm Room Ideas for Girls
What is the most important thing to buy for a dorm room?
A mattress topper. You will sleep on that mattress for roughly 60% of your college life, and a $50 memory foam topper makes a bigger daily difference than any decorative item in the room. Buy it before you buy a rug, a tapestry, or a gallery wall.
How much should I budget for dorm room decor?
Most full dorm makeovers land between $150 and $500, and a solid essential setup runs $150–$200 if you prioritize bedding, lighting, and storage over decorative items. The $1,500 dorm-haul videos on TikTok are not a realistic baseline.
Can I hang things on dorm walls without damaging them?
Yes, with Command strips — but respect the weight limits. Standard picture hanging strips hold 4 pounds per pair, and large strips hold 7.5 pounds per pair. Press firmly for 30 seconds and wait an hour before hanging anything, and pull straight down slowly when you remove them. Peel-and-stick wallpaper works on smooth painted walls but not on textured cinderblock.
What storage is best for a small dorm room?
A 3-tier rolling cart, an over-door hanging organizer, and a bed pocket caddy cover the three biggest storage gaps: overflow items, door space, and bedside essentials. The Brightroom cart from Target is the most-recommended piece among college students surveyed, and it costs $40. Skip the rigid rolling laundry hamper and get a collapsible one instead.
What should I NOT bring to a dorm room?
Skip the iron and ironing board, the rolling laundry hamper, the full cookware set, and any duplicate fridge or microwave you haven’t coordinated with your roommate. Also leave expensive or sentimental items at home — dorm rooms are high-traffic shared spaces, and things walk off.
Are LED strip lights worth it in a dorm room?
They’re worth it if you buy strips with removable clips rather than permanent adhesive, because the standard adhesive backing can pull paint and cost you a damage fee. A 100-foot smart strip runs $55–$65, which is more than fairy lights, but it gives you app control and more lighting options for studying and relaxing. Warm fairy lights are the cheaper, higher-impact first purchase.
How do I make a dorm room feel cozy on a small budget?
Warm lighting, one large rug (not several small ones), a throw blanket you actually use, and a tapestry or photo grid on the wall. These four changes cost under $100 total and transform the room more than any single expensive purchase. Turn off the overhead fluorescent light permanently and you’re 80% of the way there.