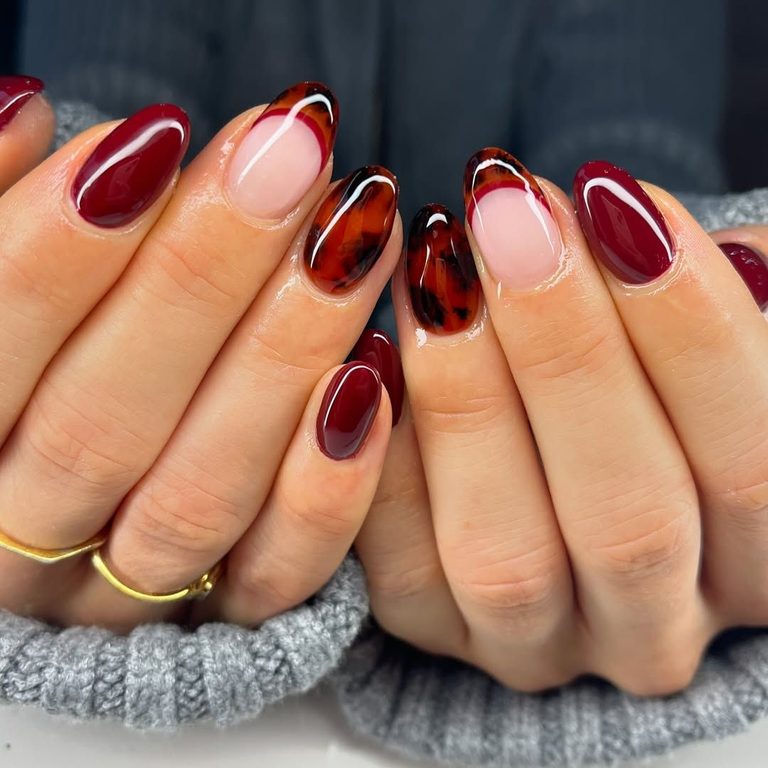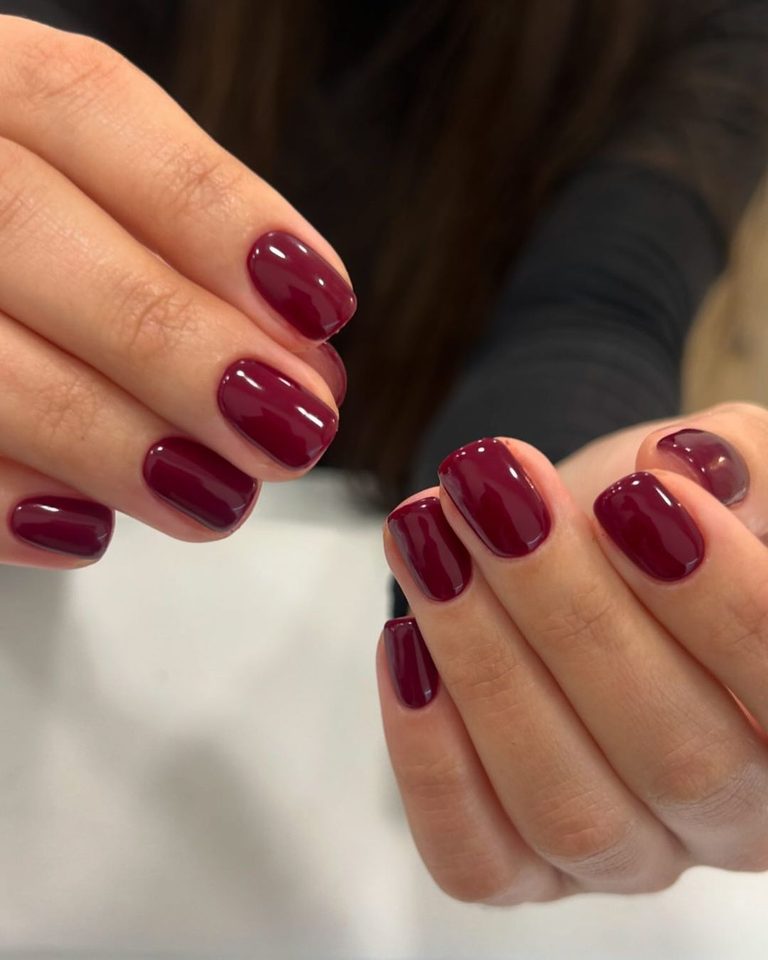
25 Summer Nail Designs I’d Actually Wear (and the 4 I’d Skip)
I have a complicated relationship with summer nail designs. On one hand, I love the idea of sitting in a salon chair for an hour while someone else fixes my cuticles.
On the other hand, I have watched a $45 gel manicure chip in four days because I opened a can of sparkling water wrong.
So I’ve spent the last three summers testing things—at the salon, at my kitchen table, and once on a friend’s bathroom floor because her lighting was better than mine.
Here’s what I’ve learned: the best summer nail designs aren’t the ones with the most steps. They’re the ones that survive sweat, sunscreen, pool water, and the specific chaos of a July that refuses to slow down.
Some of these are minimalist and take 15 minutes. Some are maximalist and require a steady hand and a podcast. A few I would personally skip, and I’ll tell you why.
I’ve organized this by design, not by difficulty, because the design is what you actually came here for. Under each one, I’ll tell you why it works, how to pull it off, and the one detail most posts leave out.
I’ve also included a comparison table for polish types at the end, because the design is only half the battle—the other half is whether it’s still on your nail by Friday.
1. Watermelon Nails (The Trend That Ate Summer)
Watermelon nails are the number one summer nail trend of 2026, with a 767 percent increase in searches over three months according to Fresha data, and I understand why. It’s a fruit that already looks like a design: pink flesh, green rind, tiny black seeds. You’re basically copying nature’s color palette.
The version that works for real life is the watermelon French manicure: a sheer pink or aura base with a thin green tip. It reads as a French without being boring, and it’s much easier to do at home than a full slice on every nail. If you want the full fruit, start with a neutral base and use a dotting tool for the seeds—the Orly Dotter Duo is what celebrity nail artist Queenie Nguyen recommends for berries and polka dots, and it costs less than a single salon visit.
The trade-off is time. A full watermelon on ten nails is a 90-minute salon appointment or a very patient at-home session. Start with an accent nail. You’ll get the vibe without the wrist cramp.
Pro tip: Use a sheer pink jelly polish for the flesh, not a cream. Jelly finishes mimic the translucent look of actual watermelon and hide small mistakes better than opaque polish.
2. Strawberry Nails (The Nostalgic Crowd-Pleaser)
Strawberry nails are the softer, more wearable cousin of watermelon. Refinery29 has been tracking this trend for two summers running, and it’s stuck around because it works on short nails, long nails, and everything in between. The classic version is a red or pink base with a tiny green stem and a few black dots for seeds.
My friend Danielle did this on her natural nails last June with a $6 bottle of Sally Hansen Insta-Dri in a cherry red and a toothpick for the stem. She said the trick was doing the green stem last, after the red had fully dried, so she didn’t drag red through the green. “I did one hand, waited 20 minutes, then did the other hand while watching a show,” she told me. “It took forever, but I got three compliments at brunch.”
If you want a lower-effort version, paint one accent nail as a strawberry and keep the rest a solid pink. The summer nail art still reads, and you cut your painting time in half.
Pro tip: Don’t buy a special “nail art brush” for the stem. A toothpick or the end of a bobby pin works just as well, and you probably already have one in your bathroom drawer.
3. Cherry Nails (The 2026 Fruit Revival)
Cherries are having a moment. Vogue’s summer 2026 report names cherry details as one of the defining fruit nail trends, alongside blueberries and olives—yes, olives are technically a fruit, and yes, martini olive nails are a thing. Cherry nails are slightly more sophisticated than strawberry because the shape is simpler: two red circles and a curved stem.
The version I’ve seen work best is a micro-cherry on a sheer nude or pale pink base. One or two cherries per nail, placed off-center, looks intentional without looking like a cartoon. My reader Hannah sent me a photo of hers and said she used a dotting tool from a $7 Amazon set and a $4 bottle of Essie polish. Total cost: $11.
The mistake people make is going too big. A cherry that takes up the whole nail reads as a sticker. A cherry that takes up a third of the nail reads as nail art.
Pro tip: Paint the cherry body first, let it dry completely, then add the stem. If you try to do both while the red is wet, you’ll get a smeared stem and a cherry that looks like a blob.
4. Lemon Drop Nails (The Color That Refuses to Die)
Lemon drop nails have been around since 2024, and they’re still showing up in 2025 and 2026 trend reports because yellow is hard to get right and this specific shade is flattering on almost everyone. It’s not neon yellow. It’s a soft, buttery lemon that reads as “I went on vacation” even if you didn’t.
Vogue notes that the trend has evolved into combinations—lemony colors with blue accents, white stripes, or a single accent nail in a contrasting shade. I did a lemon-yellow base with a thin white stripe down the center of each nail last July and it was the longest-wearing manicure I’ve ever given myself. The stripe distracted from the chips.
The trade-off is that yellow polish is notoriously streaky. Two thin coats are better than one thick coat, and a ridge-filling base coat makes a real difference. If you’re buying one new polish for summer, make it a yellow that leans warm, not green.
Pro tip: Test the yellow on one nail before committing to all ten. Some yellows pull green on cool skin tones and orange on warm skin tones. A single test nail saves you from a full set you hate.
5. Butter Yellow (The “Bottled Sunshine” Shade)
Butter yellow is the softer, more wearable version of lemon drop, and it’s the color I’d recommend to anyone who wants a summer nail design that works for the office, a wedding, and a weekend without changing anything. Outlook Luxe calls it “this season’s softer version of sun-drenched tones” and notes that it flatters every skin tone without overpowering it.
I was skeptical of yellow until I tried Essie’s “Check In To Check Out,” a mid-tone coral that’s adjacent to butter yellow in warmth. The woman at the salon counter told me yellow was “a personality color” and I should stick to pink. I ignored her, bought the yellow, and wore it for eight days without a single chip. The lesson: don’t let a stranger talk you out of a color you want to try.
Butter yellow works best as a solid color or a subtle French tip. It doesn’t need nail art. The color is the design.
Pro tip: Pair butter yellow with a glossy top coat, not matte. Matte yellows can look like mustard. Glossy yellows look like sunshine, which is the whole point.
6. Matcha Green (The Creamy Neutral That Isn’t Beige)
Matcha green is the quiet hero of summer 2026. It’s a milky, muted green that sits between sage and pale mint, and it behaves like a neutral—which means it goes with everything, flatters almost every skin tone, and doesn’t scream “I’m wearing green nail polish.” Grazia calls it “a statement that behaves like a neutral,” and that’s the most accurate description I’ve read.
My friend Priya wore OPI’s “In Mint Condition” for her sister’s outdoor wedding in June and said it looked good against her tan, her dress, and the actual grass. “It was the only thing that didn’t clash with anything,” she said. “I’m buying it in bulk.” The Essie version, “Mint Candy Apple,” is a brighter, more vibrant mint that’s great for beginners because the coverage is excellent.
Matcha green is also the rare color that works on both fingers and toes without looking like a mistake. If you’re doing a single color for a vacation, this is the one.
Pro tip: If matcha feels too green, look for a shade labeled “sage” or “pistachio” instead. Pistachio is slightly warmer and reads more neutral on the nail.
7. Pistachio Nails (The Gelato-Inspired Shade)
Pistachio is matcha’s warmer, slightly more playful sibling. Grazia describes it as “milky and muted, floating in that dreamy little space between sage and pale mint, closer to a scoop of gelato than to anything neon.” That’s the energy. It’s the color of a pistachio gelato you eat on a hot day, and it looks like you just got back from somewhere with better weather than wherever you are.
I tried a pistachio shade from Olive & June last summer and the formula was thick enough that two coats covered everything, which is rare for a pastel. The wear time was six days before the first chip, which is average for a non-gel polish on my hands. If you want longer wear, use a gel-like top coat like Essie Gel Couture.
The one warning: pistachio can pull yellow on some skin tones. If you have very cool undertones, swatch it on one nail first.
Pro tip: Pistachio pairs beautifully with a single gold accent nail or a thin gold stripe. The warmth of the gold makes the green look more intentional and less like a mistake.
8. Strawberry Milkshake Nails (The Soft Pink That Flatters Everyone)
Strawberry milkshake nails are exactly what they sound like: a shade halfway between pastel pink and milky white, soft and slightly sheer. The French beauty site Ma Grande Taille calls it “a color that flatters all skin tones,” and I’d argue it’s the safest summer nail color for anyone who wants something pretty without committing to a bright.
My reader Rachel said she wore this for a June wedding and then kept re-painting it for six weeks because it made her hands look “clean and expensive.” She used two coats of a milky pink over a clear base and topped it with a high-gloss top coat. The total cost was $9.
The trick is the finish. A matte strawberry milkshake looks like frosting. A glossy one looks like a jelly candy. Go glossy.
Pro tip: If you can’t find a “strawberry milkshake” shade, mix a drop of opaque white into a sheer pink on a piece of foil. You can custom-mix the exact level of milkiness you want.
9. Sweet Peach Nails (The Warm Neutral for Sun-Kissed Skin)
Peach is the color that looks like it was made for summer. It’s warm, it’s soft, and it flatters almost every skin tone—NewBeauty notes that peach nails “flatter all skin tones and go with any look.” I wore a peach shade to a backyard barbecue in July and three people asked me what color it was. That never happens with pink.
The key is choosing the right peach. A yellow-leaning peach looks great on sun-kissed or olive skin. A pink-leaning peach works better on cool undertones. If you’re not sure, swatch both on two nails and look at them in natural light.
Peach is also a forgiving color for short nails and for anyone who isn’t confident in their nail art skills. It doesn’t need anything else.
Pro tip: Peach is the one color where a matte finish actually works. It looks like the skin of a real peach. If you want to try matte, do peach first.
10. Aperol Spritz Nails (The Cocktail-Inspired Orange)
Aperol Spritz nails are the exact shade of the drink: bright, slightly bitter orange, the kind of color that makes you want to sit outside and do nothing. Prestige Online names it as a major 2026 summer trend, and it’s the rare bright that doesn’t feel aggressive.
The design can be as simple as a solid orange or as involved as a bubbly, textured finish that mimics the carbonation in the drink. I did a solid orange with a single white accent nail and it was the most complimented manicure I’ve had in two years. The orange is warm enough that it looks intentional, not accidental.
The trade-off is that bright orange can clash with certain outfits. If you wear a lot of red or pink, this might not be the color for you. If you wear a lot of white, denim, and beige, it’s perfect.
Pro tip: Look for a shade labeled “burnt orange” or “blood orange” rather than “neon orange.” The slightly muted version reads more expensive and is easier to wear to work.
11. Denim Nails (The Texture Trend That Sounds Weird and Works)
Denim nails are exactly what they sound like: nails that mimic the color and texture of denim fabric, ranging from dark wash to muted blue. Prestige Online reports that major brands like Hermès and Chanel have embraced the trend, which means it’s not just a TikTok experiment—it’s a real thing.
I was skeptical until I saw a dark-wash denim manicure on a friend. It looked like a neutral, not a gimmick. The trick is to use a matte top coat on a blue polish and add a very subtle texture with a dry brush or a sponge. You’re not trying to recreate a pair of jeans. You’re trying to capture the vibe.
The easiest version for a beginner is a solid blue-gray polish with a matte finish. It reads as denim without any special tools. If you want the full texture, use a small piece of a makeup sponge to dab a slightly lighter blue over the base before it dries.
Pro tip: Don’t use a glitter top coat for denim nails. Denim is matte. Glitter makes it look like a blue disco ball, which is a different trend entirely.
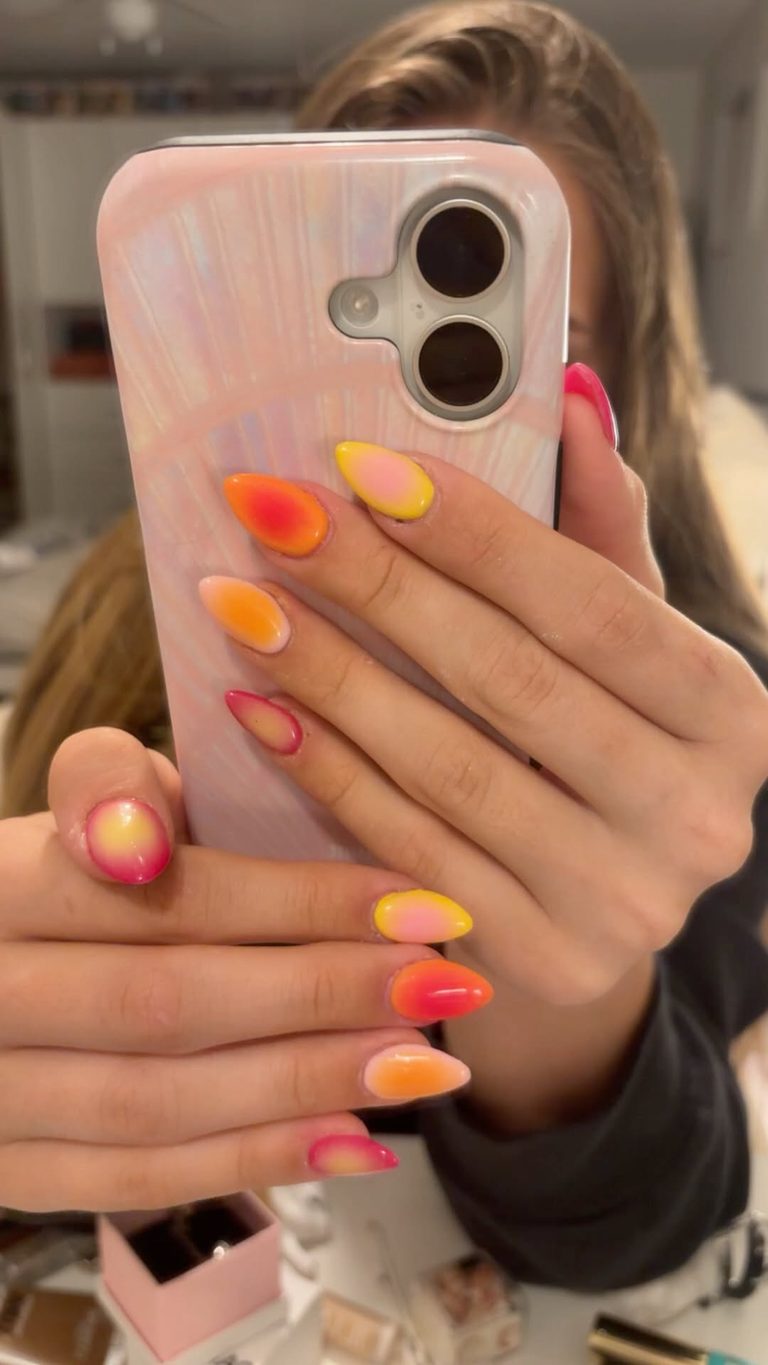
12. Aura Nails (The Gradient That Looks Like a Sunset)
Aura nails are the closest thing to a mood ring for your fingers. Prestige describes them as “the beautiful hues of Northern lights creating an immersive effect, but on your nails,” with more than three colors blended into a gradient. The result is a soft, glowing center that fades into the edges, like a sunset you took a photo of and then painted on your hands.
My friend Maya did aura nails for a music festival in June and said the secret was a makeup sponge. “You paint the colors in a bullseye on the sponge, then dab it on the nail,” she explained. “It looks messy until the top coat goes on, and then it looks like you know what you’re doing.” She used three colors: coral, pink, and a tiny bit of yellow in the center.
Aura nails work on short or long nails and don’t require a steady hand, which makes them a good DIY nail art option for beginners. The trade-off is drying time. You need the base to be completely dry before you sponge, or you’ll pull up the polish underneath.
Pro tip: Wet the makeup sponge slightly and squeeze it out before you use it. A damp sponge blends the colors more smoothly than a dry one and prevents the “sponge texture” from showing up in the final result.
13. 3D Elements (The Maximalist Choice)
3D nail art is everywhere in 2026, and it’s not just for celebrities. Prestige notes that the trend includes miniature pearls, faux piercings, 3D floral motifs, and even sculpted fruits. The look is bold, tactile, and not remotely subtle. If you want a summer nail design that makes people grab your hand to look closer, this is it.
The realistic version for everyday life is one 3D accent nail, not all ten. My reader Hannah did a single 3D pearl on each ring finger and said it lasted four days before one fell off. “I found it in my purse,” she said. “I glued it back on with nail glue and it stayed for another week.” The lesson: 3D elements are temporary. Treat them like jewelry, not like a permanent manicure.
If you’re doing this at home, use a gel top coat to adhere the 3D element and cure it under a lamp. Regular top coat isn’t strong enough to hold a pearl through a hand-washing.
Pro tip: Put the 3D element on your non-dominant hand. You’re less likely to knock it off, and you’ll still get the visual impact in photos.
14. Calla Lily Nails (The Romantic, Moody Floral)
Calla lily nails are the antidote to the “tropical flower on every nail” summer manicure. InStyle describes them as “sculptural flowers blooming in 3D” on top of plum French tips, nude cat-eye bases, and mismatched prints. They’re elegant, slightly edgy, and a little unexpected—which is exactly what I want from a summer nail design that isn’t a watermelon.
The version that works for real life is a single calla lily stem on an accent nail, painted over a sheer nude or a soft plum. My friend Danielle did this for a July wedding and said the florist at the venue asked if she’d had them done professionally. She hadn’t. She used a $4 detail brush and a YouTube tutorial.
The trade-off is that calla lilies require a steady hand and a decent detail brush. If you’re not confident, start with a simpler floral—a single daisy or a small blossom—and work your way up.
Pro tip: Paint the stem first and let it dry completely before adding the white petals. The contrast between the green stem and white petal is what makes the flower read as a calla lily instead of a blob.
15. Polka Dot Nails (The Cool-Girl Comeback)
Polka dots are back, and they’re not the kindergarten version you’re picturing. Fashion Magazine calls them a “cool-girl comeback,” and Harper’s Bazaar lists polka dot nails among the top trends for 2025 and 2026. The difference is scale: tiny dots, scattered irregularly, on a sheer or neutral base. It looks like a print you’d find on a silk scarf, not a birthday party napkin.
I did polka dots on a pale pink base last summer using the end of a bobby pin and a bottle of white polish. The whole thing took 20 minutes and cost nothing because I already owned both items. The key is to let each dot dry before adding the next one, or you’ll get a smeared mess that looks like hail damage.
Polka dots work on short nails especially well because the dots are small and the design doesn’t need length to read.
Pro tip: Dip your dotting tool in the polish, then dab it on a piece of foil first to remove the excess. A dot with too much polish spreads and loses its shape.
16. Jelly Nails (The Sheer, Glossy Finish)
Jelly nails are less a design and more a finish. Harper’s Bazaar lists the jelly manicure as a top trend, and it’s the one I recommend to anyone who wants a summer nail design that looks like a professional did it, even if you did it yourself. The polish is translucent, glossy, and slightly squishy-looking, like a gummy candy.
My friend Priya wore a jelly pink for a beach trip and said it was the only polish that didn’t look terrible after three days in the ocean. “The sheer finish hides chips,” she said. “A solid color shows every mistake. Jelly forgives you.” She used three thin coats and a glossy top coat, and the result was a manicure that looked like it belonged on a magazine cover.
Jelly finishes are also the best base for fruit nail art because they mimic the translucency of real fruit. If you’re doing watermelon or strawberry nails, start with a jelly base.
Pro tip: Build jelly polish in three thin coats, not two thick ones. Thick coats take forever to dry and stay tacky in the center, which means you’ll smudge them the first time you reach for your phone.
17. Chrome Nails (The Metallic Finish That Reads as Jewelry)
Chrome nails are the metallic finish that makes your hands look like they’re wearing jewelry. Harper’s Bazaar lists chrome as a trend that’s still going strong, and NewBeauty shows a watermelon chrome version that’s equal parts ethereal and subtle. The finish is achieved with a chrome powder rubbed over a cured gel base, which means it’s a salon service or a slightly involved at-home process.
The easiest at-home version is a chrome-effect top coat, which is less intense than real chrome powder but much easier to use. I tried a $9 chrome top coat over a black polish and it looked like a gunmetal gray with a mirror shine. It wasn’t the full chrome effect, but it was close enough for a backyard party.
The trade-off is that chrome shows every ridge and imperfection on your nail. If your nails are peeling or uneven, a ridge-filling base coat is non-negotiable.
Pro tip: If you’re using chrome powder at home, apply it over a no-wipe top coat that has been cured but not wiped. The powder needs a slightly tacky surface to stick to. If the surface is too smooth, the chrome will look patchy.
18. Cat-Eye Nails (The Magnetic Shimmer)
Cat-eye nails use a magnetic polish to create a band of shimmer that moves when you tilt your hand. It’s the kind of summer nail design that looks expensive and complicated but is actually just a matter of holding a magnet over wet polish for 10 seconds. Harper’s Bazaar lists cat-eye as a trend that’s still going strong, and NewBeauty shows a pearly cat-eye version that’s soft and wearable.
I tried a $12 cat-eye polish from Amazon and the effect was subtle but visible. The key is to hold the magnet as close to the nail as possible without touching it, and to move it slowly in one direction. If you hold it still, you get a single stripe. If you move it, you get a softer, more diffuse shimmer.
The trade-off is that cat-eye polish is thicker than regular polish and takes longer to dry. Use a quick-dry top coat and plan to sit still for 15 minutes.
Pro tip: Magnetize each nail immediately after painting it, before moving to the next nail. The magnetic particles settle as the polish dries, so if you wait too long, the effect won’t be as strong.
19. Beach Nails (The Vacation Vibe Without the Vacation)
“Beach nails” is less a specific design and more a mood: pastel resort colors, pearly finishes, coral splashes, and tidal-wave blues. Refinery29 describes the trend as “your shortcut to vacation vibes,” with shades like Blue Crush, Pearly Queen, and Coral Splash. It’s the manicure equivalent of a pina colada.
My friend Maya did a beach-themed set with a different pastel on each nail—pale blue, soft coral, pearly white, and a sandy beige—and it was the most fun manicure I’ve seen in a while. “It looked intentional because the colors were all in the same family,” she said. “It wasn’t random. It was a palette.” The cost was $0 because she used polishes she already owned.
Beach nails work best on short nails with a glossy finish. The colors are soft enough that a mismatch doesn’t look chaotic. It looks like you couldn’t decide, which is the whole point.
Pro tip: Pick four colors from the same undertone family—all warm pastels or all cool pastels—and repeat one color on the thumb and ring finger to tie the set together.
20. Sunflower and Blossom Nails (The Easy At-Home Floral)
Floral nails can be intimidating, but sunflowers and simple blossoms are the easiest entry point. Refinery29 notes that sunflower and blossom-printed designs are “easy to do at home on just a few nails,” which makes them a good DIY nail art option for anyone who wants a summer design without a salon appointment.
A sunflower is a yellow center with white or yellow petals and a tiny brown dot in the middle. A blossom is five dots around a center dot. That’s it. My reader Hannah did a single sunflower on each thumb and kept the rest of her nails a sheer nude, and the result looked like a $60 salon manicure. She used a toothpick for the petals and a bobby pin for the center.
The trade-off is that florals can look childish if you go too big. Keep the flowers small and the base neutral, and they’ll look intentional.
Pro tip: Use a matte top coat over floral nails. Matte finishes make the design look more like a painting and less like a sticker.
21. Mismatched Nails (The “I Couldn’t Decide” Design)
Mismatched nails are exactly what they sound like: a different design or color on each nail, tied together by a shared palette or a recurring element. InStyle notes that calla lily nails often incorporate “graphic, mismatched prints,” and the trend works for any design. It’s the manicure equivalent of a capsule wardrobe—everything goes together because the colors do.
I did a mismatched set last August with a pale pink base, one polka dot nail, one stripe nail, one floral nail, and two solid nails. It took 45 minutes and I was convinced it looked like a mistake until three separate people asked where I got it done. The trick is to repeat at least one element—a color, a finish, or a shape—across all the nails so the set feels cohesive instead of chaotic.
Mismatched nails are also a good way to use up the random polish bottles you already own. You don’t need to buy anything new.
Pro tip: Pick one “anchor” color that appears on at least three nails. The anchor color is what makes the set look intentional instead of like you ran out of time.
22. Negative Space Nails (The Minimalist’s Best Friend)
Negative space nails leave part of your natural nail unpainted, creating a design with the polish rather than covering the whole nail. It’s the easiest way to get a summer nail design that looks modern without requiring a steady hand or a lot of time. A single stripe, a half-moon, or a thin French tip all count.
I did a negative space manicure with a single diagonal stripe of coral polish across each nail and a clear base coat. The whole thing took 15 minutes and lasted five days. My friend Danielle saw it and said, “That looks like something from a magazine,” which is the highest compliment a DIY manicure can receive.
The trade-off is that negative space shows your natural nail, so if your nails are stained or uneven, you might want a ridge-filling base coat underneath. But that’s a small price for a design that takes less time than a coat of regular polish.
Pro tip: Use painter’s tape or a nail vinyl to create the negative space shape. It’s easier than freehanding a straight line, and it peels off cleanly if you remove it while the polish is still slightly wet.
23. The “Clean Girl” Nude (The Polish That Looks Like You Have Your Life Together)
The clean girl nude is the manicure equivalent of a slicked-back bun: minimal, polished, and quietly expensive. It’s a sheer nude or pale pink that matches your skin tone closely enough to look like your nails but better. Harper’s Bazaar lists “natural nails and naked manicures” as a top trend, and it’s the one I’d recommend to anyone who works in a conservative office or just doesn’t want to think about their nails for two weeks.
The key is finding the right nude for your skin tone. A nude that’s too light looks like White-Out. A nude that’s too dark looks like a bruise. My rule of thumb is to match the polish to the inside of your wrist, not the back of your hand. The inside of your wrist is closer to your natural nail bed color.
If you can’t find a perfect match, a sheer pink is a safe fallback. It looks good on almost everyone.
Pro tip: Take a photo of your hand in natural light and use a color-picker app to find your exact skin tone. Then look for a polish that matches that hex code. It sounds ridiculous, but it works better than guessing.
24. Deep French Tips (The Grown-Up French)
The French manicure never really goes away, but the 2026 version is deeper and more dramatic than the thin white tip you remember from 2004. InStyle notes that “deep white arcs cut across the middle of each nail” are a key calla lily nail look, and the same concept works for any color. A deep French tip is a statement without being a full nail of color.
I did a deep French with a plum tip and a sheer pink base for a fall-adjacent summer event and it was the most sophisticated my hands have ever looked. The trick is to make the tip thick enough to read from a distance but not so thick that it takes up the whole nail. Aim for a tip that covers the top third of the nail, not the top half.
Deep French tips work on short nails especially well because they make the nail look longer without requiring length.
Pro tip: Use a small flat brush and a steady hand to paint the tip. If you don’t trust yourself, use a French tip guide sticker. They cost about $4 for a pack of 100 and make the process almost foolproof.
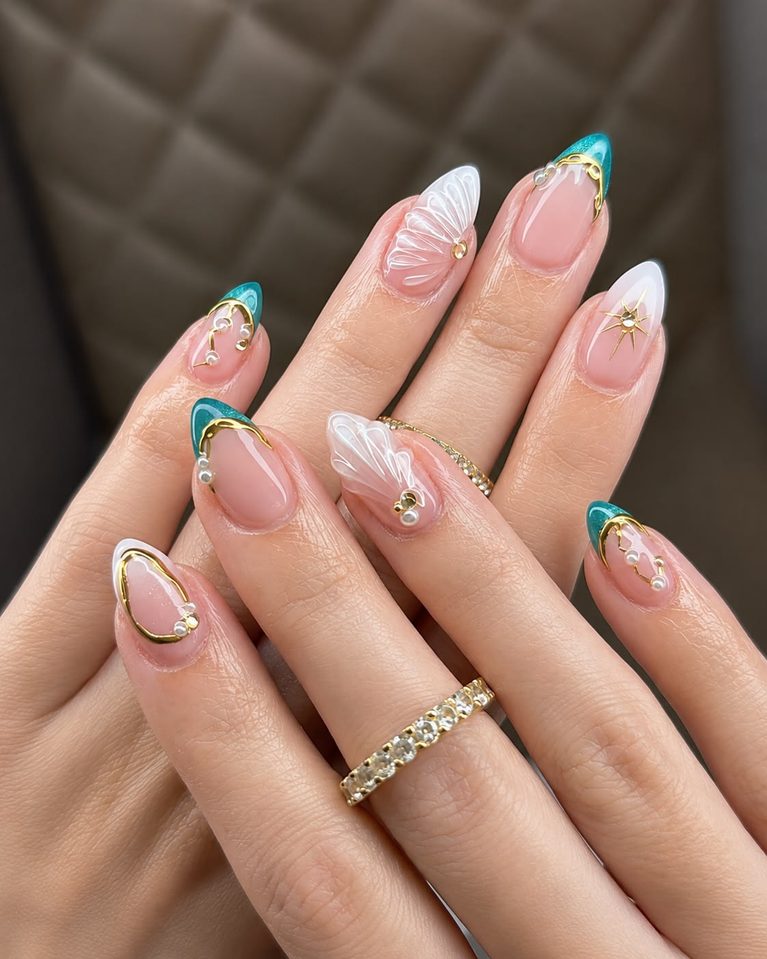
25. Mermaid Nails (The Shimmer Finish That Isn’t Glitter)
Mermaid nails are the soft, shimmery, iridescent finish that makes your hands look like they’ve been touched by the ocean. Elle names “mermaid nails” as a top summer holiday manicure trend, and the look is usually achieved with a pearlescent top coat or a chrome powder in a pale blue or pink. It’s not glitter. It’s a sheen that shifts in the light.
My friend Priya wore mermaid nails for a beach wedding and said the finish was subtle enough for the ceremony but still caught the light in photos. “It looked like I had a filter on my hands,” she said. She used a $10 pearlescent top coat over a pale blue polish, and the total cost was less than $20.
The trade-off is that pearlescent top coats can make polish take longer to dry. Use a quick-dry top coat underneath and the pearlescent coat on top, and give yourself 20 minutes before you do anything with your hands.
Pro tip: Apply the pearlescent top coat in one thin layer, not two. A second layer dulls the shimmer and makes the finish look cloudy instead of iridescent.
How Much Does a Summer Manicure Actually Cost? A Comparison
The design is only half the story. The other half is whether you’re paying $12 for a bottle of polish or $65 for a gel manicure every three weeks. Here’s the honest breakdown based on my own receipts and the numbers from a few cost-comparison sources, including DIY gel math and long-wear polish tests.
| Type | Upfront Cost | Cost Per Manicure | Typical Wear | Best For |
|---|---|---|---|---|
| Regular polish (Essie, OPI, Sally Hansen) | $6–$12 per bottle | $1–$3 per manicure | 5–8 days (OPI tends to outlast Essie in real-world wear, though Essie’s formula is theoretically better)[reference:0] | Anyone who likes changing colors often |
| Gel-like polish (Essie Gel Couture, OPI Infinite Shine, Sally Hansen Miracle Gel) | $10–$16 per bottle/kit | $3–$5 per manicure | 7–11 days (OPI Infinite Shine claims up to 11 days)[reference:1] | People who want longer wear without a lamp |
| At-home gel kit | $40–$150 one-time | $3–$5 per manicure after startup[reference:2] | 10–14 days | Frequent manicures, people who like DIY |
| Salon gel manicure | $0 | $40–$77 per visit[reference:3] | 10–14 days | Special occasions, people who don’t want to DIY |
| Press-on nails | $9–$15 per set | $9–$15 per set | 5–10 days depending on application | Short-term wear, events, people who change their mind often |
The math on at-home gel is the most dramatic: a salon gel manicure costs $40–$77 per visit, while a home starter kit costs $60–$150 once and then drops to a few dollars per manicure[reference:4]. If you get a gel manicure twice a month, the kit pays for itself in two visits. The trade-off is the learning curve—improper prep and curing are the number one causes of early peeling[reference:5]. If you’re not willing to learn the prep steps, the salon is still the better deal for you.
What I’d Do First If I Were Starting Over
If I were starting my summer nail journey from scratch, I’d buy three things: a bottle of sheer pink jelly polish, a bottle of butter yellow, and a quick-dry top coat. That’s less than $30 and it covers the two most versatile summer nail designs on this list—the clean girl nude and the bottled sunshine yellow—without requiring any nail art skills.
I’d also stop trying to make every design last two weeks. Regular polish lasts five to eight days on my hands, and that’s fine. The point of summer nails is to have fun with them, not to white-knuckle a manicure until it looks like a science experiment. Change your polish on a Sunday night while watching a show. It takes 20 minutes and it’s the cheapest way to feel like you have your life together.
And I’d skip the chrome powder and the 3D pearls until I was confident with a basic polish. The advanced designs are fun, but they’re not the foundation. A good base coat, two thin coats of color, and a glossy top coat will get you further than any trend.
FAQs
How do I make my summer nail polish last longer?
Prep is everything. Wipe each nail with rubbing alcohol or white vinegar before you paint—oils on the nail plate are the number one cause of early lifting[reference:6]. Use a base coat, two thin color coats, and a top coat, and cap the free edge of each nail with every layer. Thin coats dry more evenly than thick ones, and a quick-dry top coat prevents smudges while you wait.
What nail colors flatter every skin tone?
Butter yellow, matcha green, strawberry milkshake pink, and peach are the most universally flattering shades for summer[reference:7][reference:8]. The key is the undertone: warm-leaning shades (peach, butter yellow) flatter warm and olive skin, while cool-leaning shades (matcha, milky pink) flatter cool skin. If you’re not sure, swatch two shades on two nails and check them in natural light.
Is it cheaper to do gel nails at home?
Yes, over time. A salon gel manicure runs $40–$77 per visit, while an at-home starter kit costs $60–$150 upfront and then about $3–$5 per manicure after that[reference:9]. The kit pays for itself in two or three visits. The trade-off is the learning curve—if you skip prep or under-cure the gel, it will peel within days, and you’ll spend more time fixing it than you saved.
What’s the easiest summer nail design to do at home?
Negative space nails, polka dots, and the clean girl nude. Negative space requires only a steady hand and a strip of tape. Polka dots need a bobby pin and a dot of polish. The clean girl nude is just two coats of a sheer pink. All three take under 30 minutes and don’t require any special tools.
How often should I change my nail polish in summer?
Every 7–10 days for regular polish, every 2–3 weeks for gel. Summer heat, sweat, and chlorine break down polish faster than winter weather, so if you’re swimming or spending a lot of time outside, expect a shorter wear time. A top coat refresh on day four or five can extend the life of a regular manicure by a few days.
Are press-on nails a good option for summer?
They’re the best option if you want a design you can’t do yourself—3D art, chrome, intricate florals—without a salon appointment. Press-ons cost $9–$15 per set, apply in 10–15 minutes, and remove with warm water[reference:10]. The trade-off is wear time: most press-ons last five to seven days, and water exposure can loosen the adhesive. They’re great for a vacation or an event, less great for a full month of daily wear.
—
Written by a real person who has painted her nails in a parked car, on a train, and once in a hotel bathroom with a towel over the sink. If you try the watermelon French or the butter yellow, I want to see it.