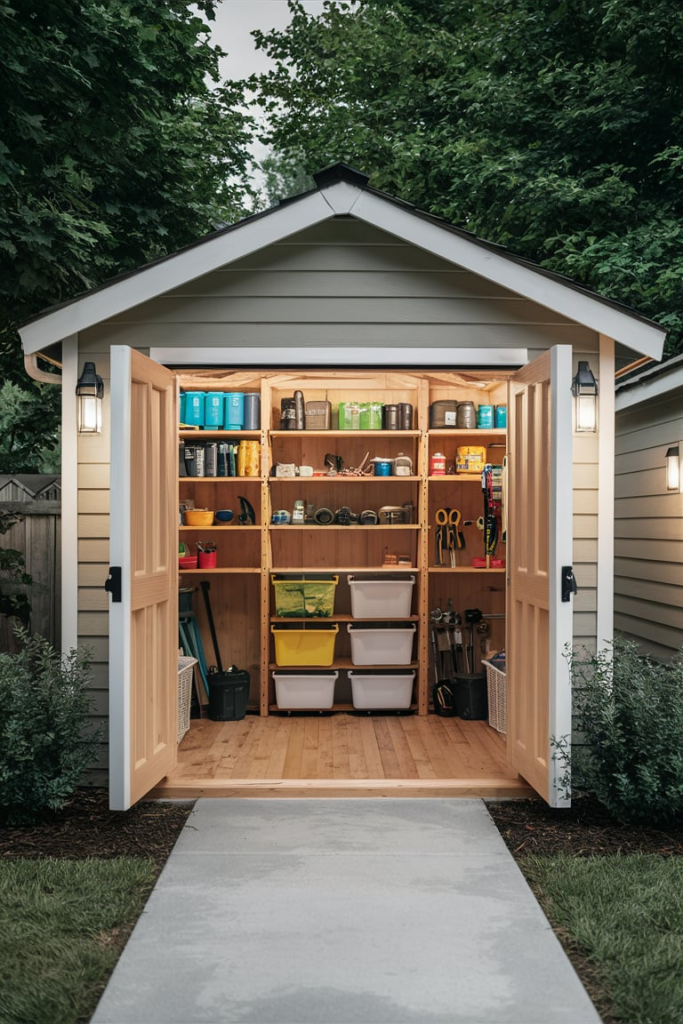
27 Shed Organization Ideas That Actually Work

Let’s be honest — a messy shed is like a junk drawer on steroids. One day it’s a place for your gardening tools, and the next thing you know, it’s a black hole swallowing everything from holiday decorations to rusty screws.
But here’s the deal: your shed doesn’t have to be a chaotic catch-all. With the right strategies, your shed can become a well-oiled machine of organization, a space so neat and practical that even your neighbors might start peeking in with envy.
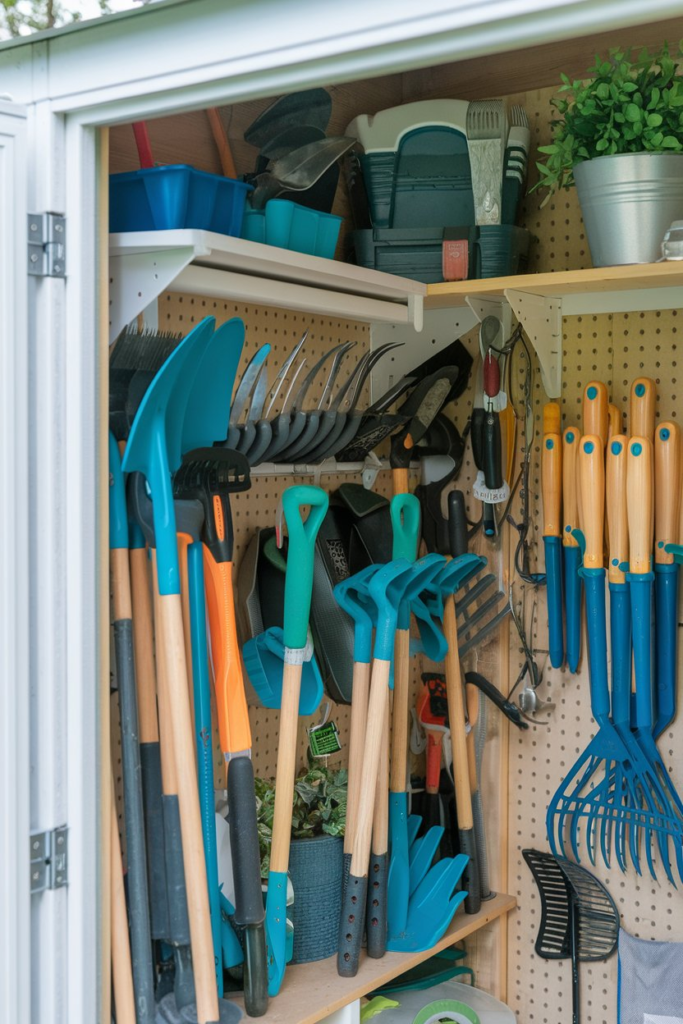
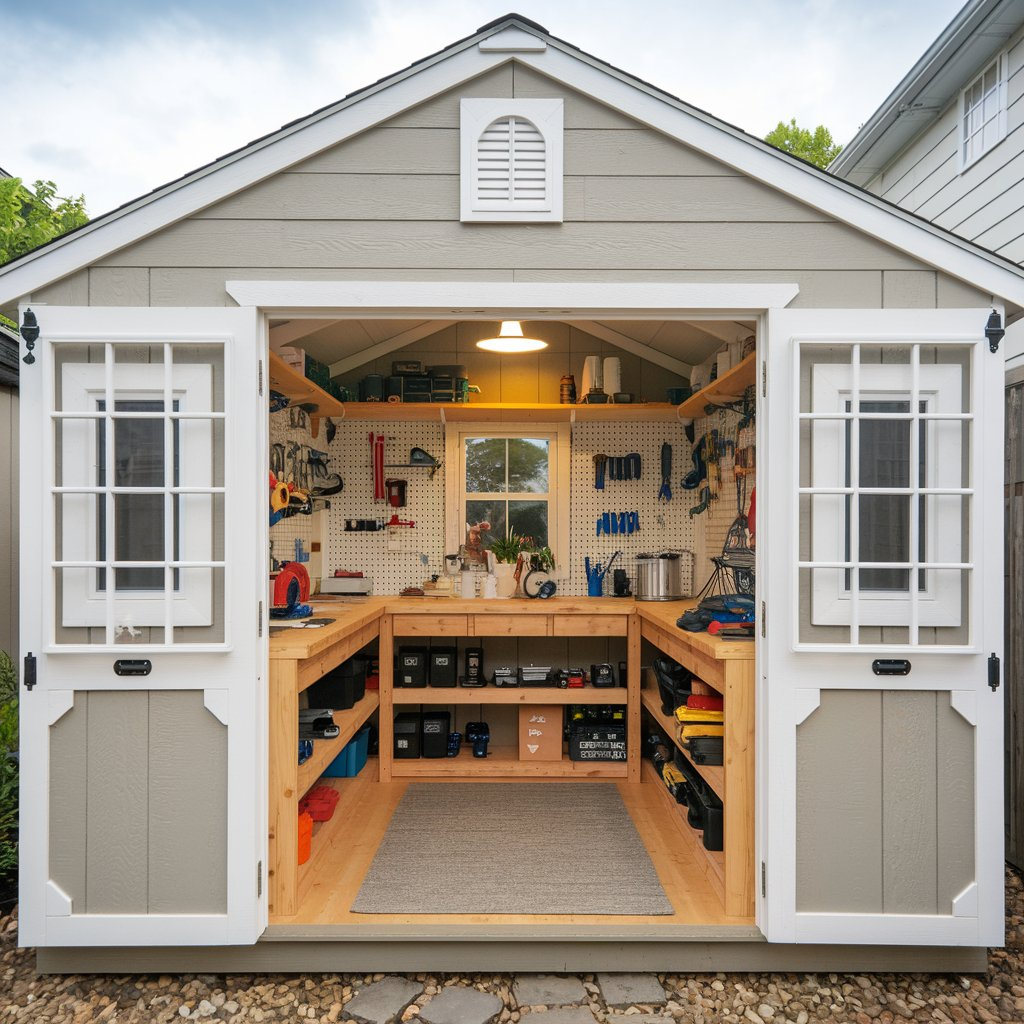
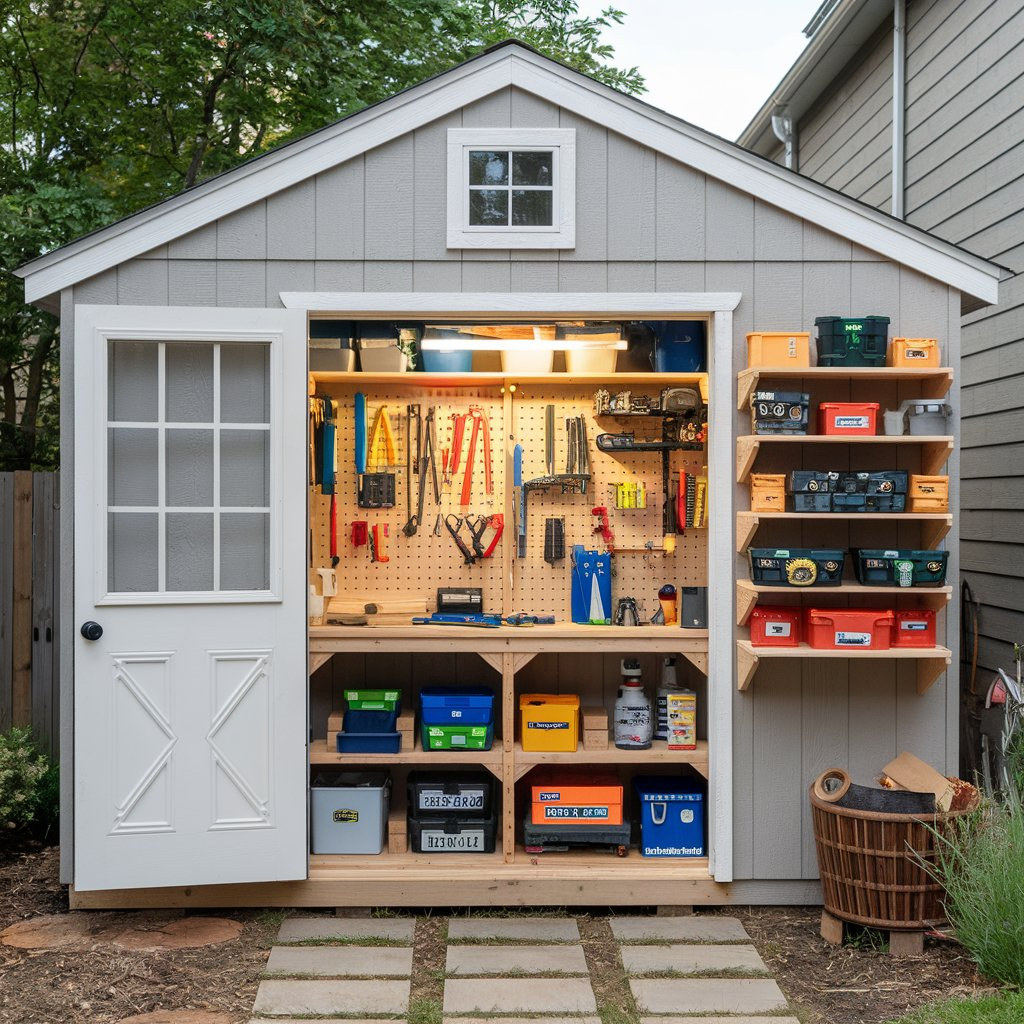
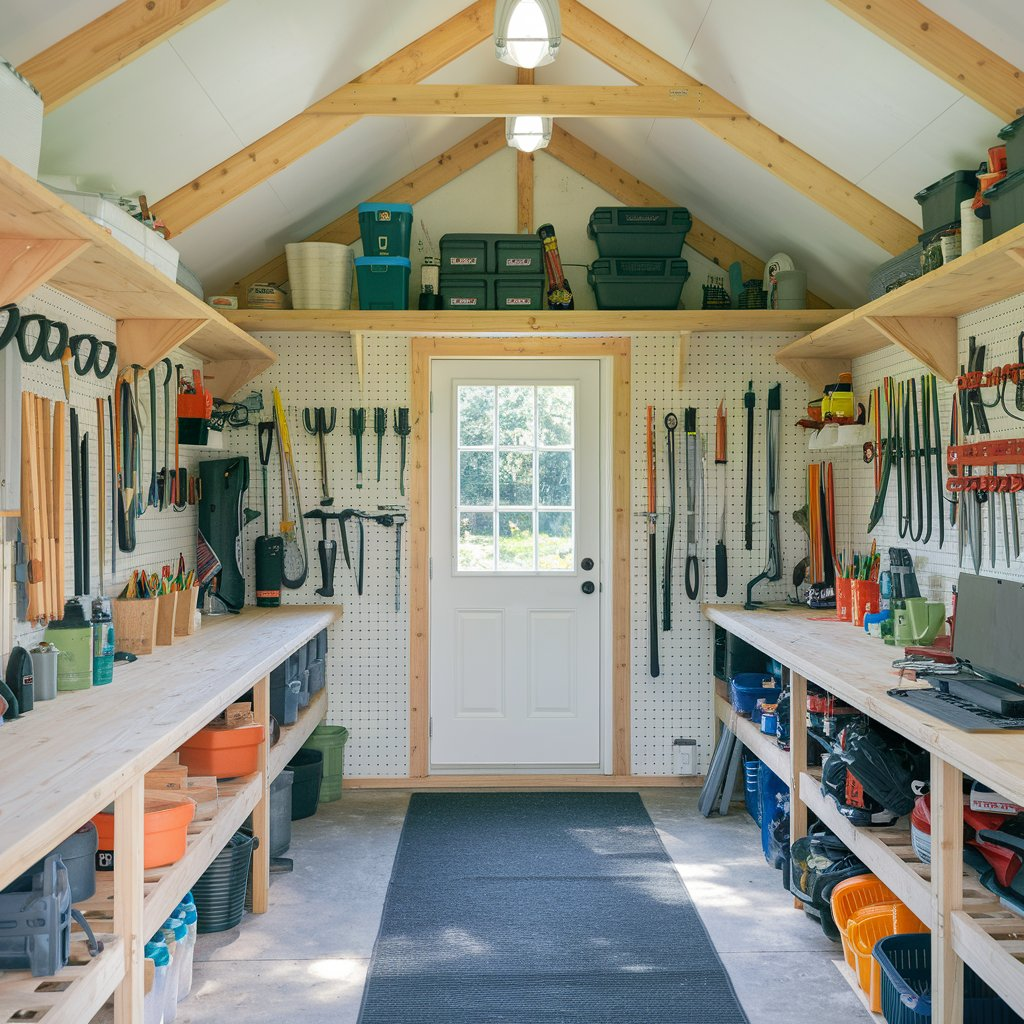
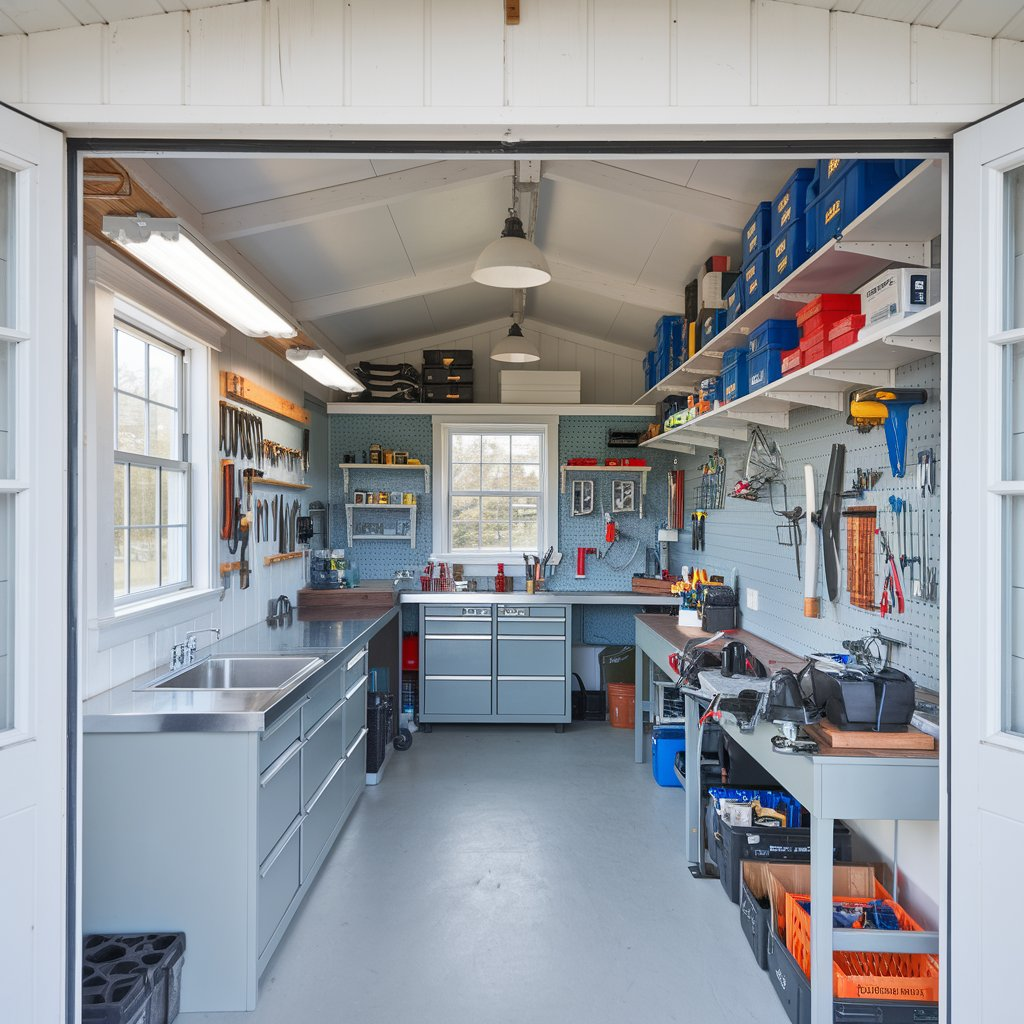
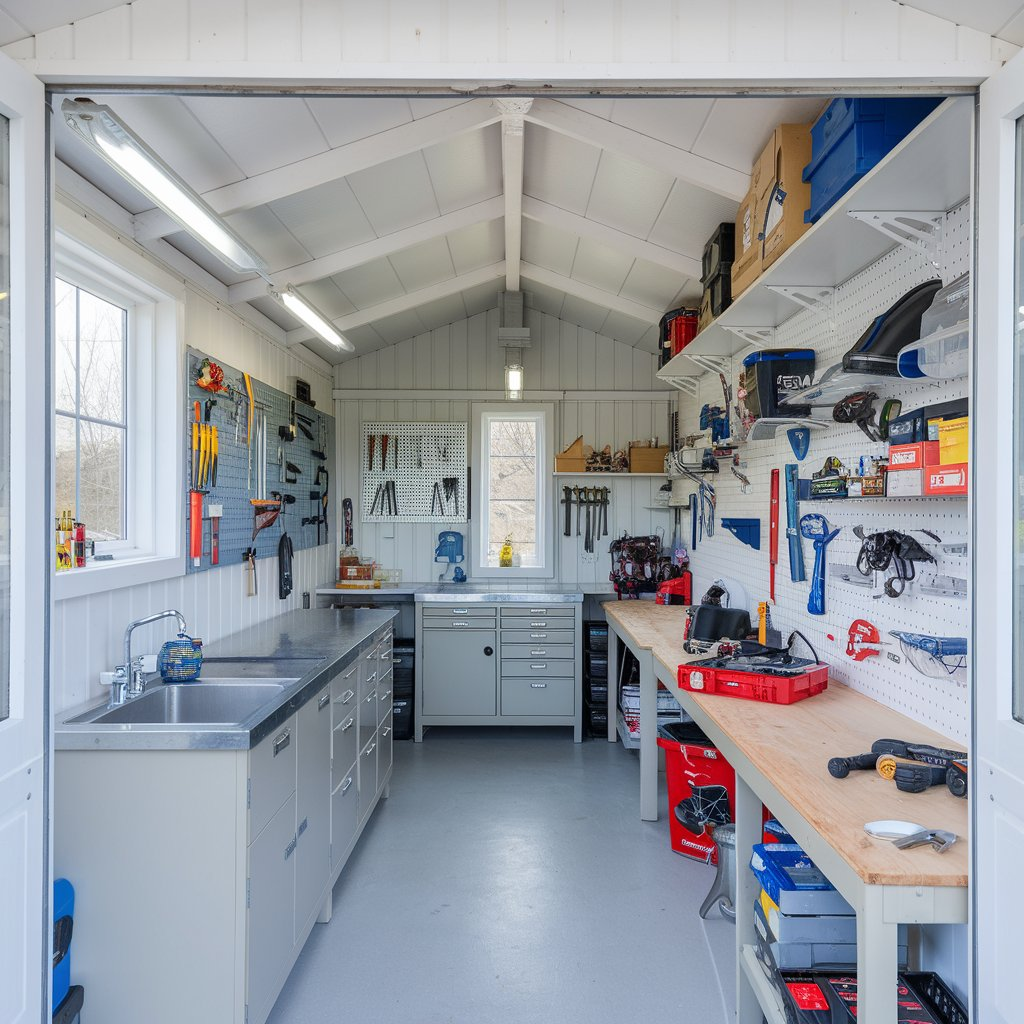
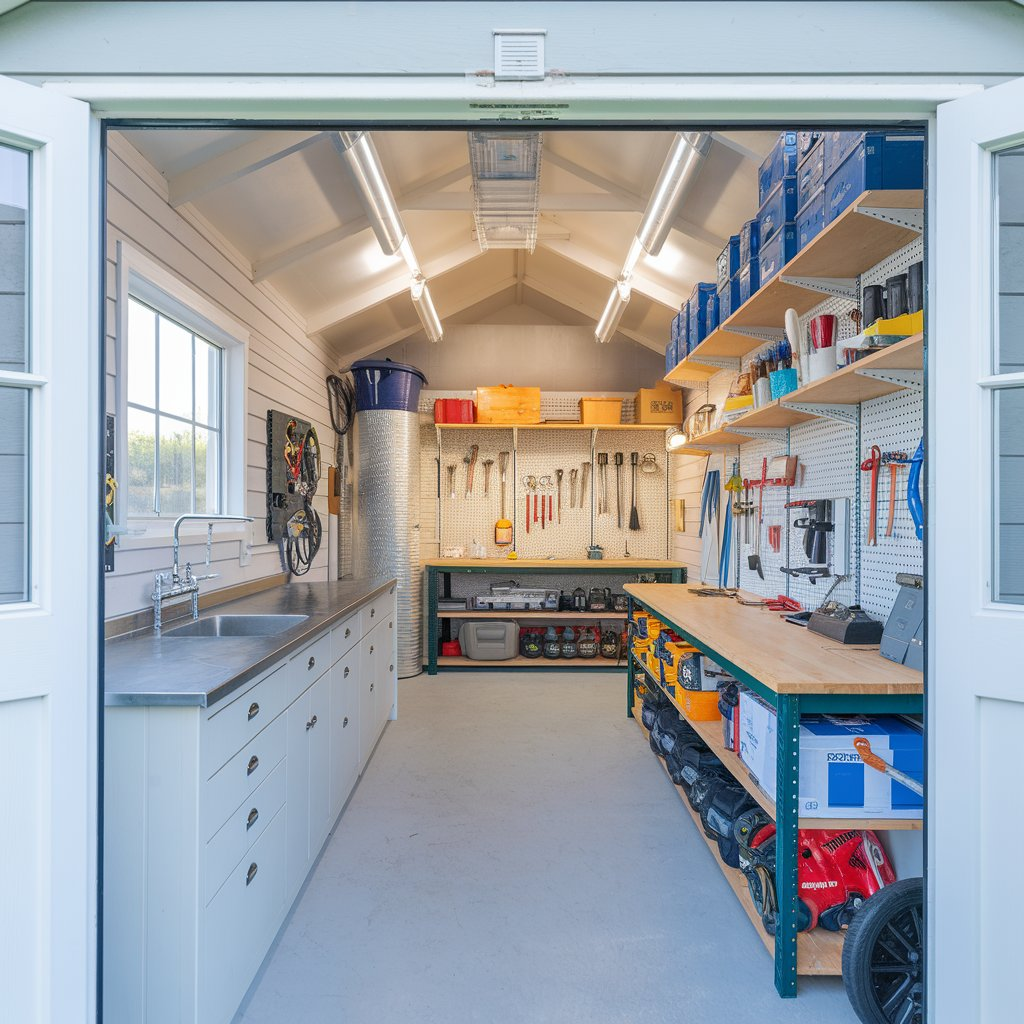
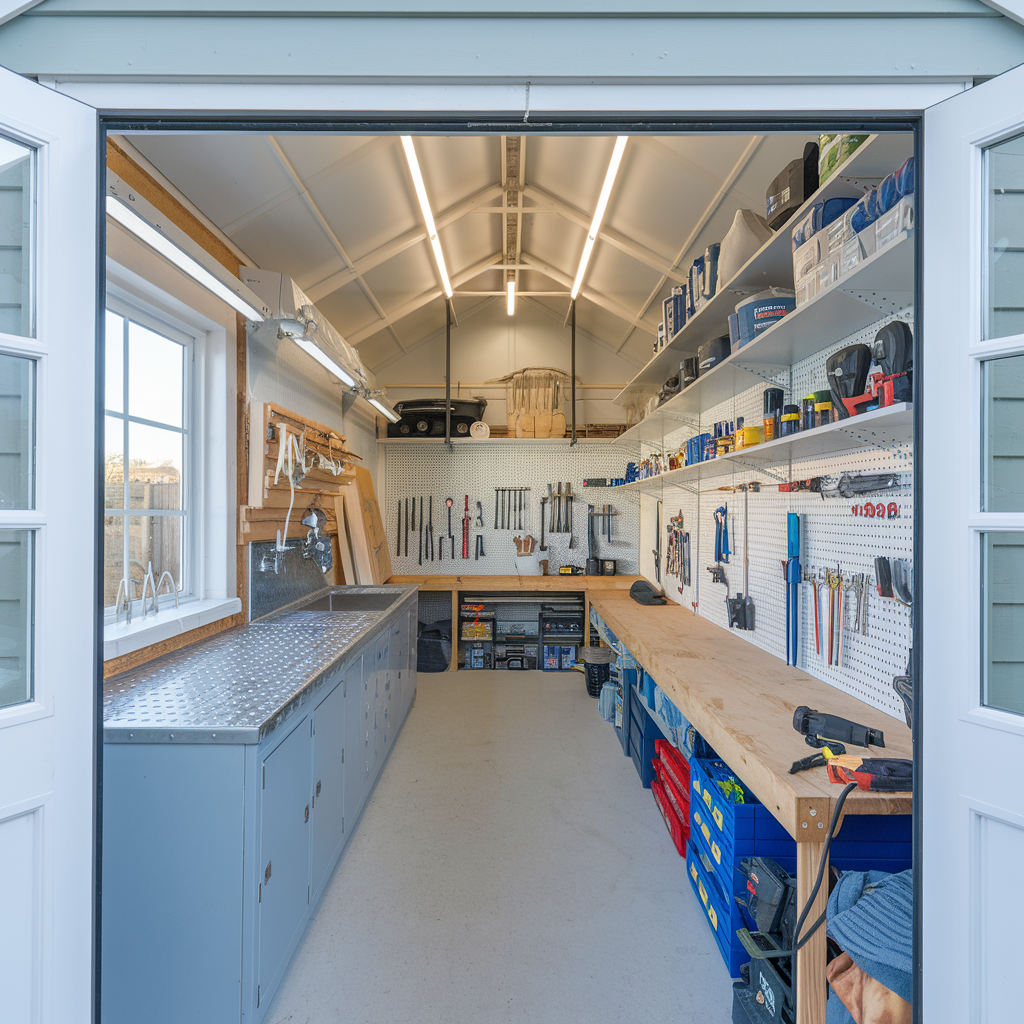
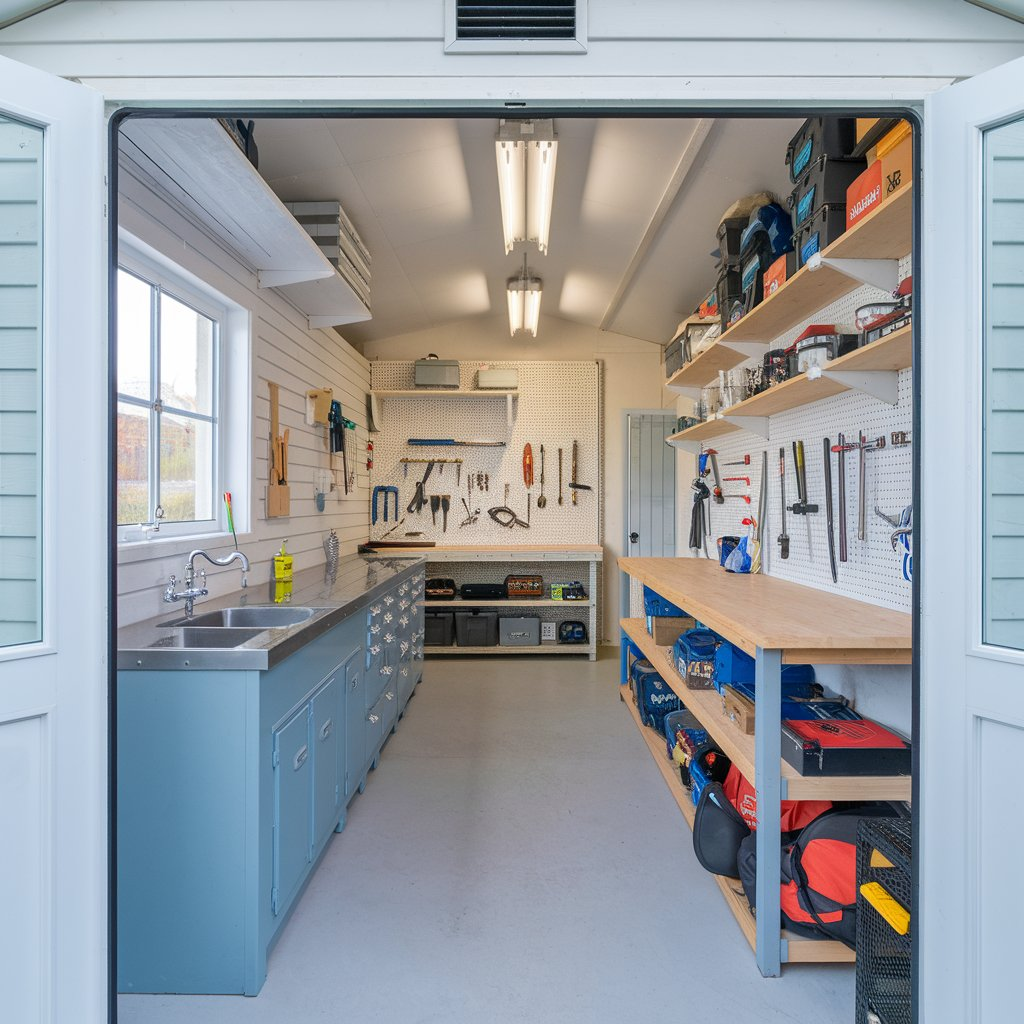
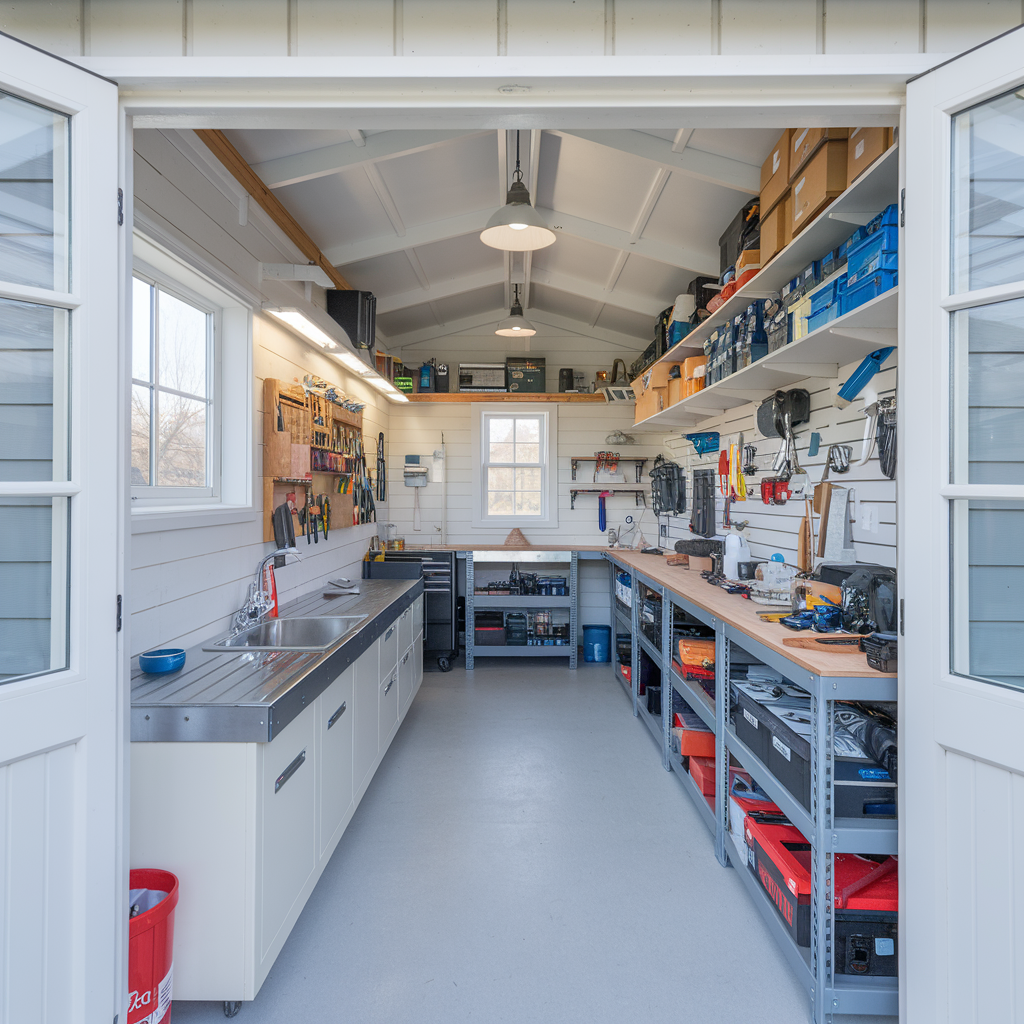
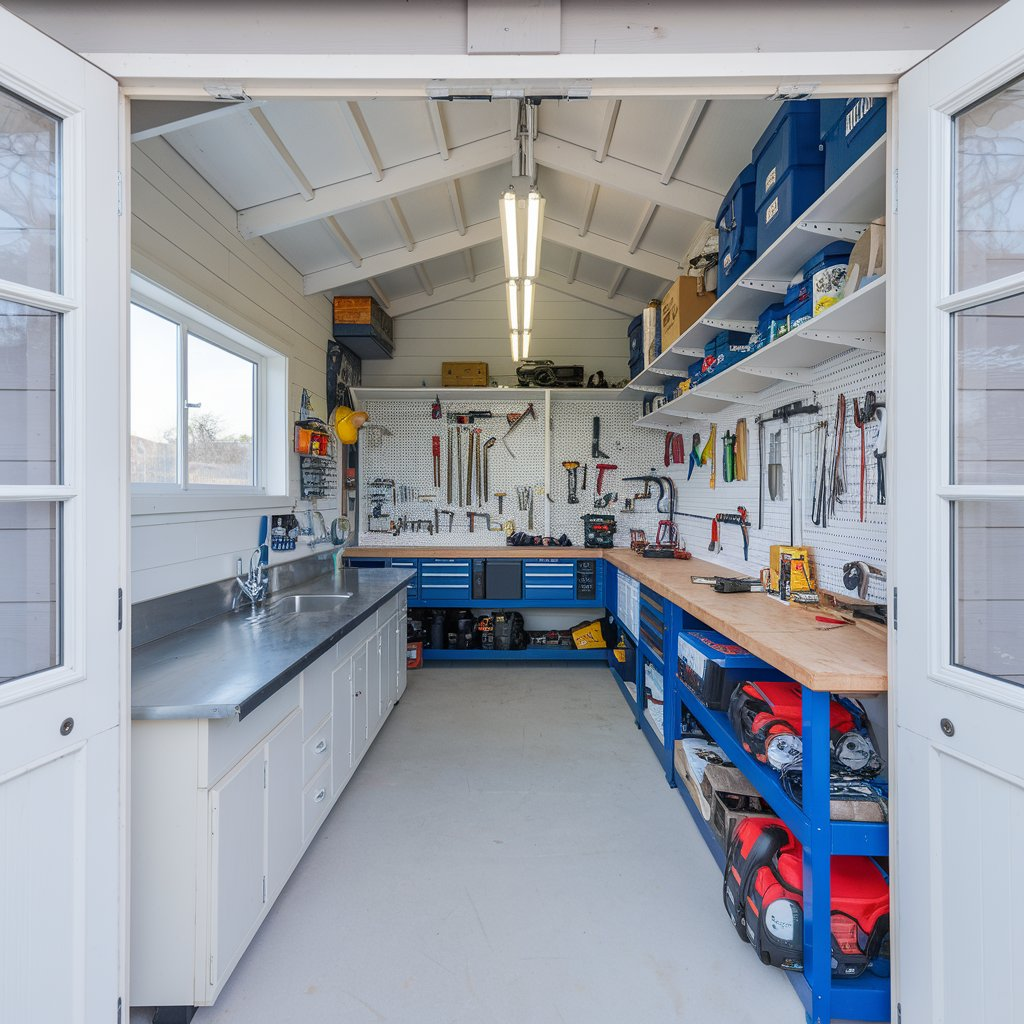
1. Use Wall Space Like a Tetris Master

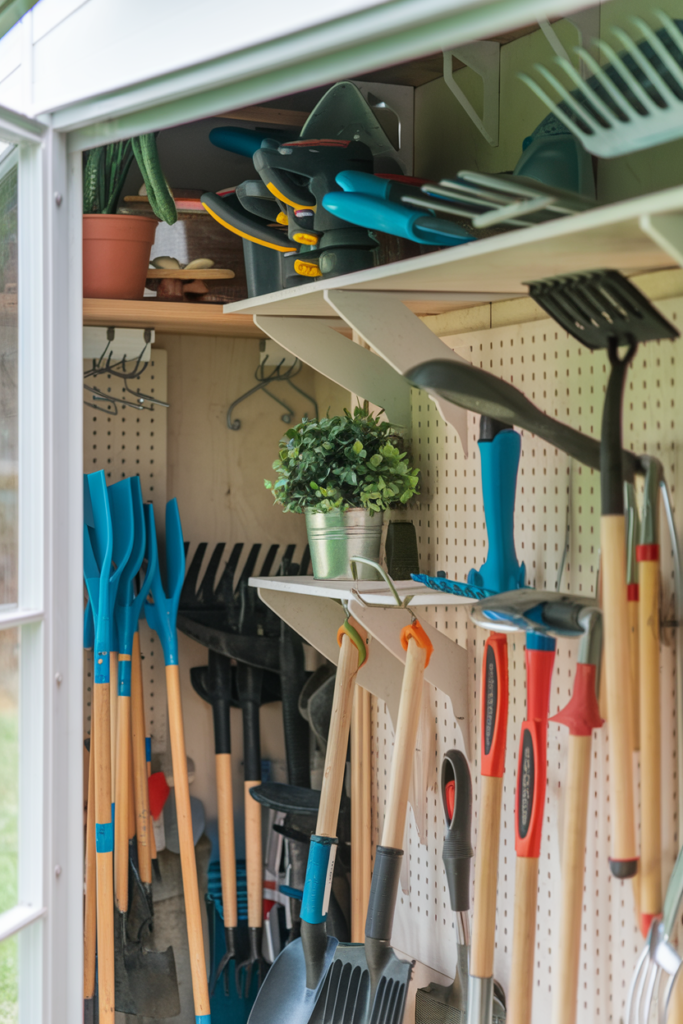
Vertical space is your best friend. Pegboards, wall hooks, and slat walls let you get things off the ground. Imagine hanging your tools in neat rows, like soldiers lined up ready for duty. It’s satisfying and functional.
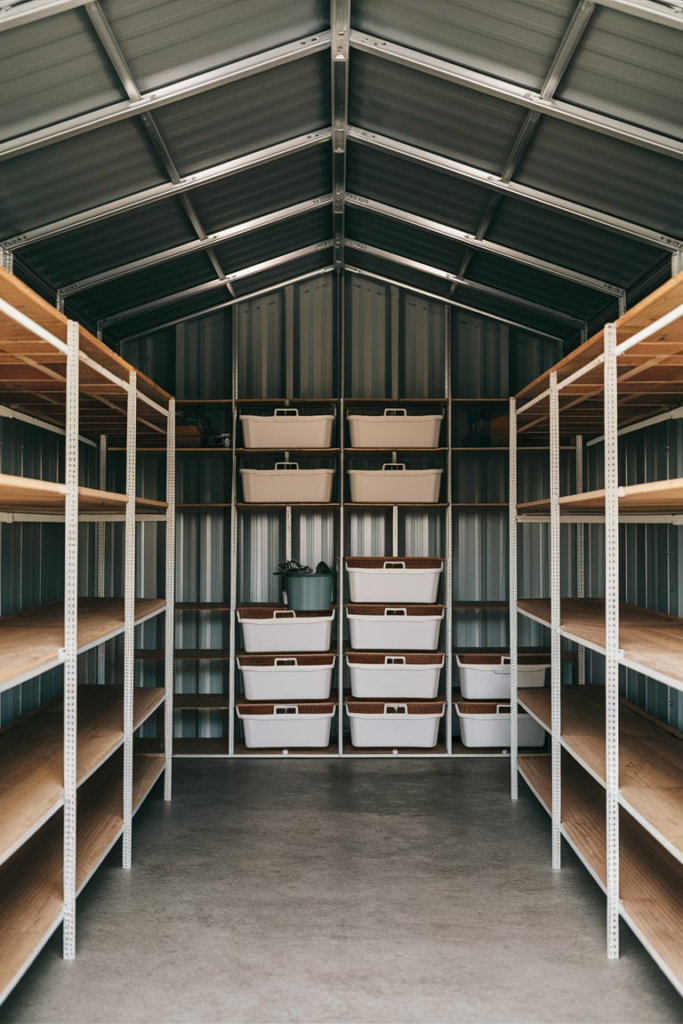
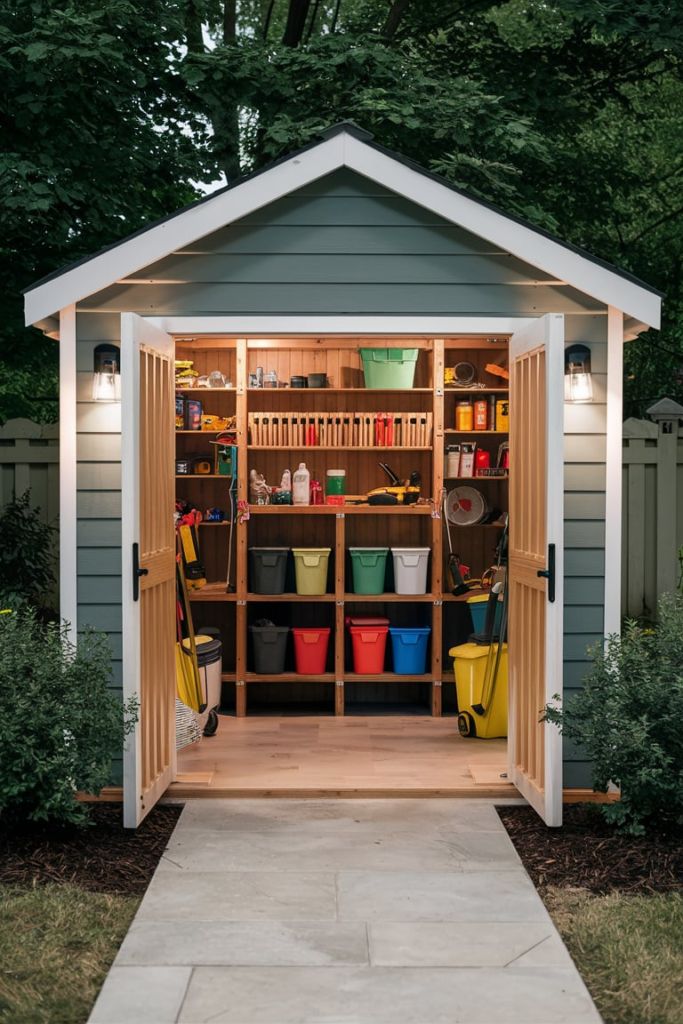
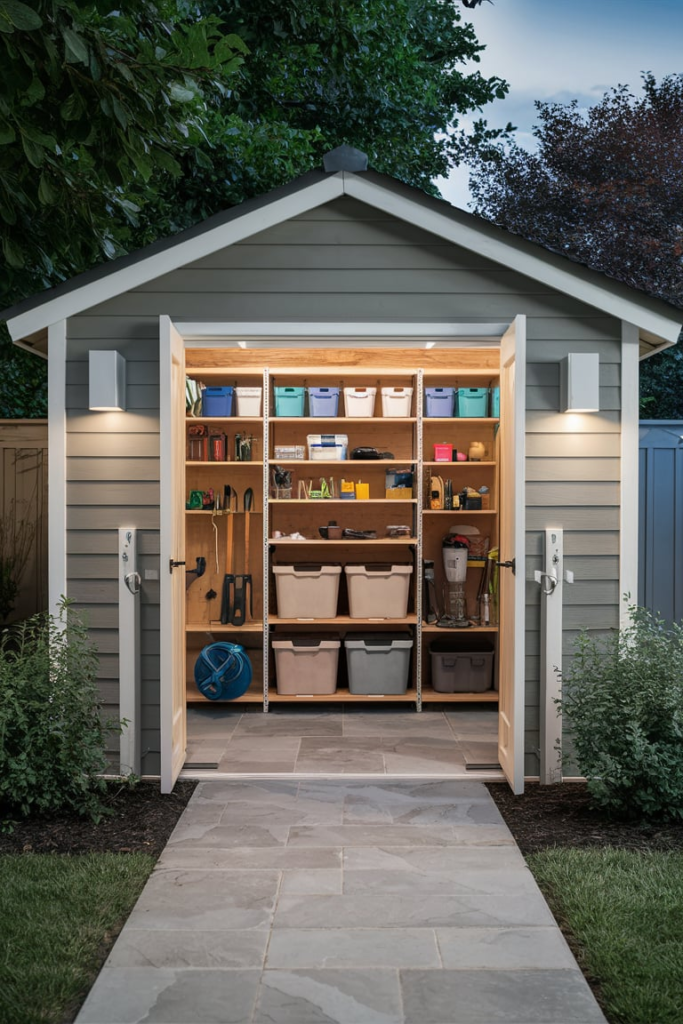
2. Install Adjustable Shelving Units
Think of your shelves as the backbone of your shed. Adjustable shelves allow you to evolve your setup over time — taller gear today, more storage bins tomorrow. It’s like giving your shed a flexible spine.
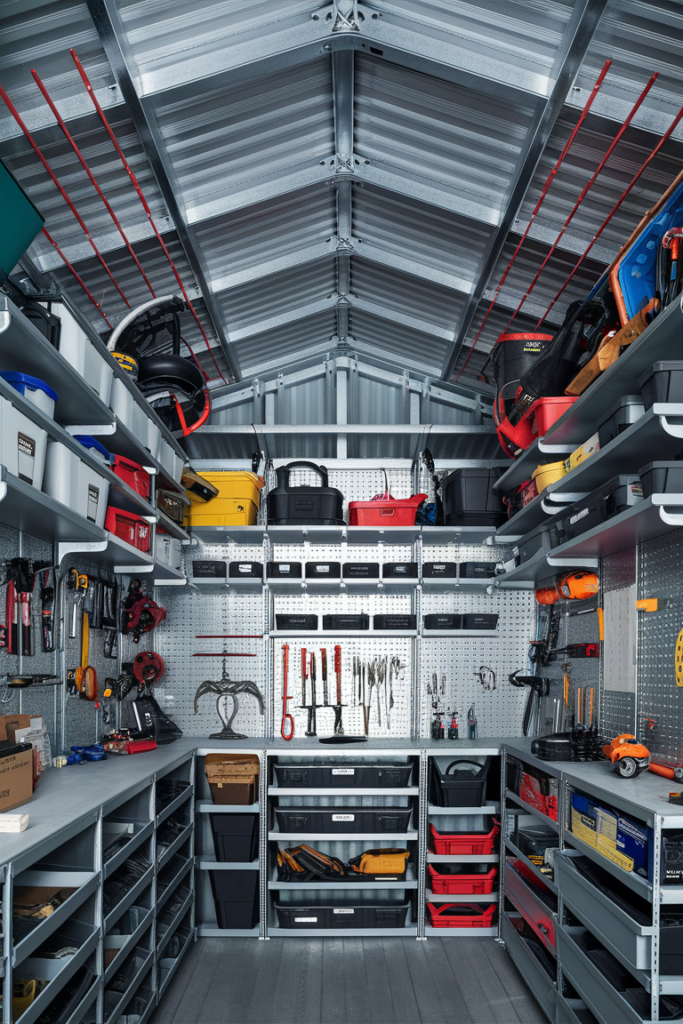
3. Label Everything (Yes, Everything)
You might think you’ll remember where you put that socket set — you won’t. Labeling bins, drawers, and shelves will save you hours of future frustration. A label maker may feel nerdy, but it’s the unsung hero of shed sanity.
4. Add a Ceiling Storage System

Why let your ceiling go to waste? Overhead racks or hanging bins are perfect for storing seasonal items or things you don’t need often. Think of it as your shed’s attic.
5. Create Zones Based on Use
Divide your shed into zones: gardening, repair tools, seasonal décor, sports gear. It’s like creating neighborhoods for your gear — everything has a home.
6. Invest in Stackable Storage Bins

Stackable bins are like Lego bricks for adults. Clear or labeled bins make it easy to see what’s inside, and they maximize vertical storage. Make sure the lids are sturdy — wobbly stacks are accidents waiting to happen.
7. Use Magnetic Strips for Tools

One of the slickest hacks out there: mount magnetic strips on your walls for things like screwdrivers, drill bits, or scissors. It’s fast, visual, and oddly satisfying.
8. Hang Garden Tools Using Hooks or Racks
Rakes, shovels, hoes — don’t let them become a tangled mess. Wall-mounted racks or heavy-duty hooks will keep them off the floor and ready for action.
9. Add a Workbench With Built-in Storage
A multi-functional workbench gives you a place to tinker while hiding clutter in drawers or cabinets below. It’s the equivalent of a kitchen island for your shed.
10. Store Smaller Items in Drawer Organizers

Nuts, bolts, washers — they multiply when you’re not looking. Drawer dividers or small parts organizers keep these tiny troublemakers in check.
11. Use Old Jars or Cans for Loose Hardware
This is a classic — clear jars for screws, nails, and washers, labeled and lined up on a shelf. It’s vintage utility meets smart design.
12. Incorporate Foldable Furniture or Workstations
If space is tight, go collapsible. Drop-down workbenches, foldable chairs, or retractable tables give you function without bulk. Like a Murphy bed for your DIY side.
13. Hang a Pegboard Above the Workbench

A pegboard wall is a game-changer. Customize your setup, move things around, and keep frequently used tools within reach. It’s the Swiss Army knife of organization systems.
14. Build a Vertical Lumber Rack
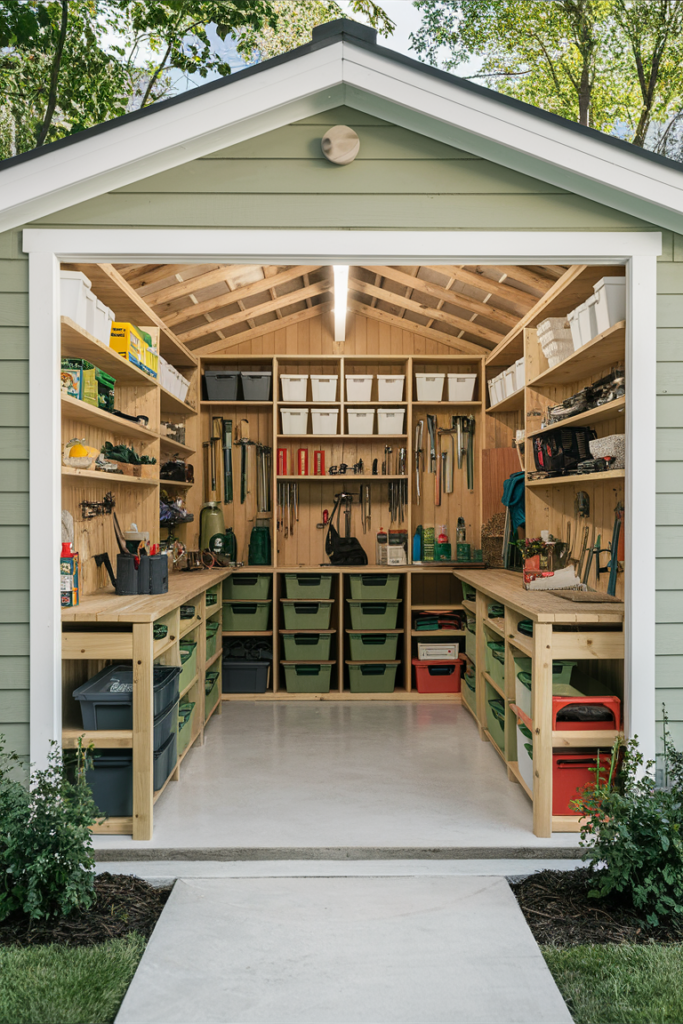
Got leftover wood pieces? Don’t pile them in a corner. A vertical rack or wall cradle will keep lumber sorted and accessible. It’s safer and far less frustrating.
15. Mount a Hose Reel or Cord Organizer
Stop fighting with tangled hoses and extension cords. Wall-mounted reels or cord wraps keep them tidy and extend their lifespan. It’s like giving them a proper leash.
16. Utilize Clear Plastic Drawers for Visibility
Out of sight is out of mind — and leads to buying duplicates. Clear drawers let you see what you have and avoid that second trip to the hardware store.
17. Build Custom Cabinets if You Have the Skills
Got some DIY chops? Custom cabinets tailored to your needs can optimize your space like nothing else. Think of it as a suit tailored for your shed.
18. Use a Rolling Tool Chest

A mobile tool chest brings convenience and organization. You can move it to your project spot, then roll it back when done. It’s like a toolbox on wheels.
19. Store Lawn Equipment Strategically
Your mower, weed trimmer, and leaf blower deserve a proper parking spot. Create a designated corner with floor pads or wall clips to keep them corralled.
20. Repurpose Old Furniture for Storage
That rickety old dresser? Perfect for hardware storage. Old bookshelves, cabinets, or even nightstands can find new life as shed organizers.
21. Install a Sliding Storage System
If you’re tight on space, try sliding panels or pull-out racks. They let you double up on storage without feeling cramped — think closet organizers for your tools.
22. Add a Chalkboard or Whiteboard for Notes
Projects, shopping lists, measurements — a board on the wall helps track it all. It’s your shed’s mission control.
23. Keep Safety Gear Easily Accessible

Fire extinguisher, gloves, goggles — don’t bury safety gear under clutter. Make a safety zone near the door where it’s easy to grab.
24. Use Tension Rods for Spray Bottles or Tools

It’s a little-known trick: mount tension rods between shelves to hang spray bottles or even small hand tools. It’s quirky but clever.
25. Add Lighting That Actually Works
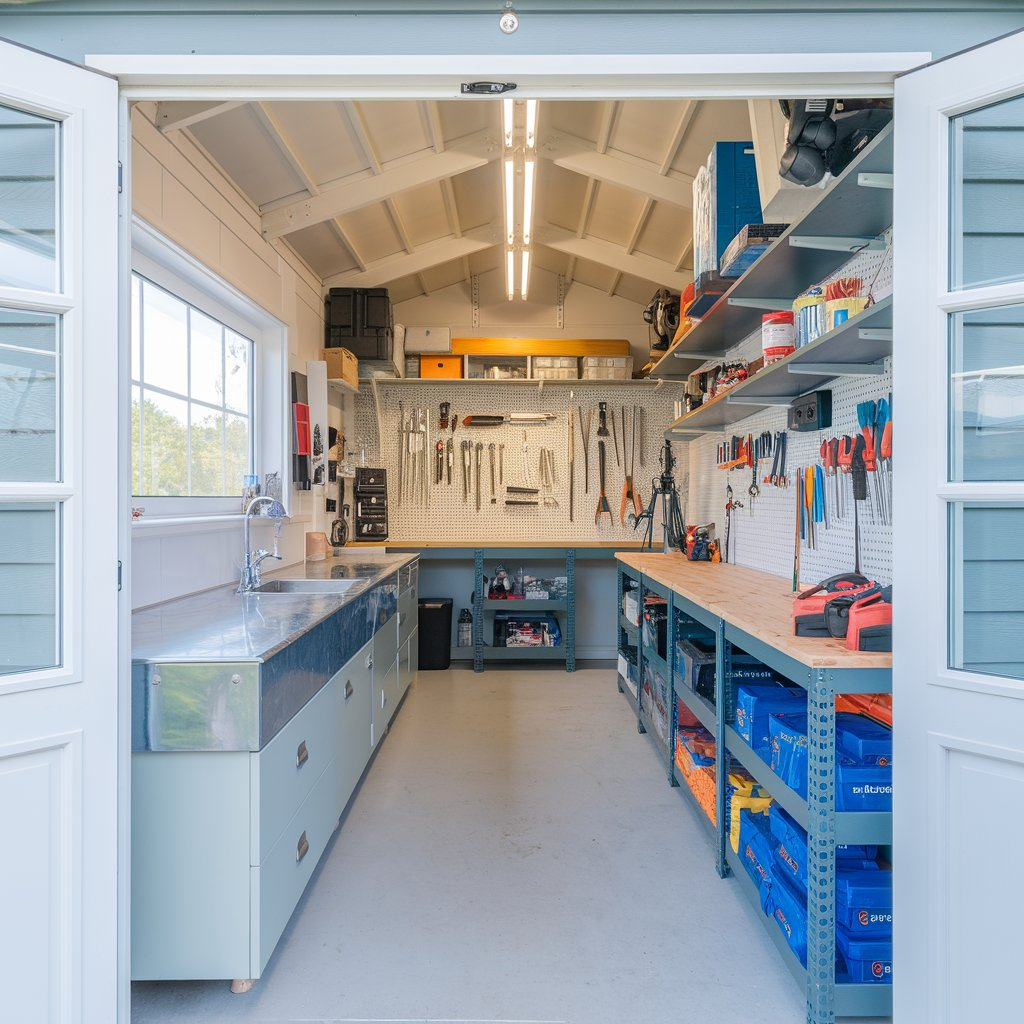
Most sheds come with lighting that’s about as bright as a candle. Upgrade to LED strips, task lights, or battery-powered options so you’re not fumbling in the dark.
26. Install a Wall-Mounted Bin System
Think post office cubbies, but for tools. Wall bins or cubby systems keep everything visible and sorted — perfect for hobbyists or busy DIYers.
27. Rotate and Declutter Regularly
Last but most important: make a habit of rotating and decluttering. Twice a year, go through what you have. Donate, toss, or repurpose what you no longer need. A clean shed is a maintained shed.
Conclusion
Every shed tells a story. Mine once looked like a yard sale explosion — I’d step inside, trip over a rake, and curse while trying to find my wrench. But after implementing these ideas, the transformation was night and day. Now it’s a space I actually enjoy working in.
So take these ideas, tailor them to your needs, and turn your shed into a well-organized retreat that serves you, not the other way around. The mess doesn’t have to win. With a little effort and these strategies, you’ll be the master of your shed kingdom in no time.