
35 Patio Layout Ideas That Actually Work (Even If Your Space Is Weird)
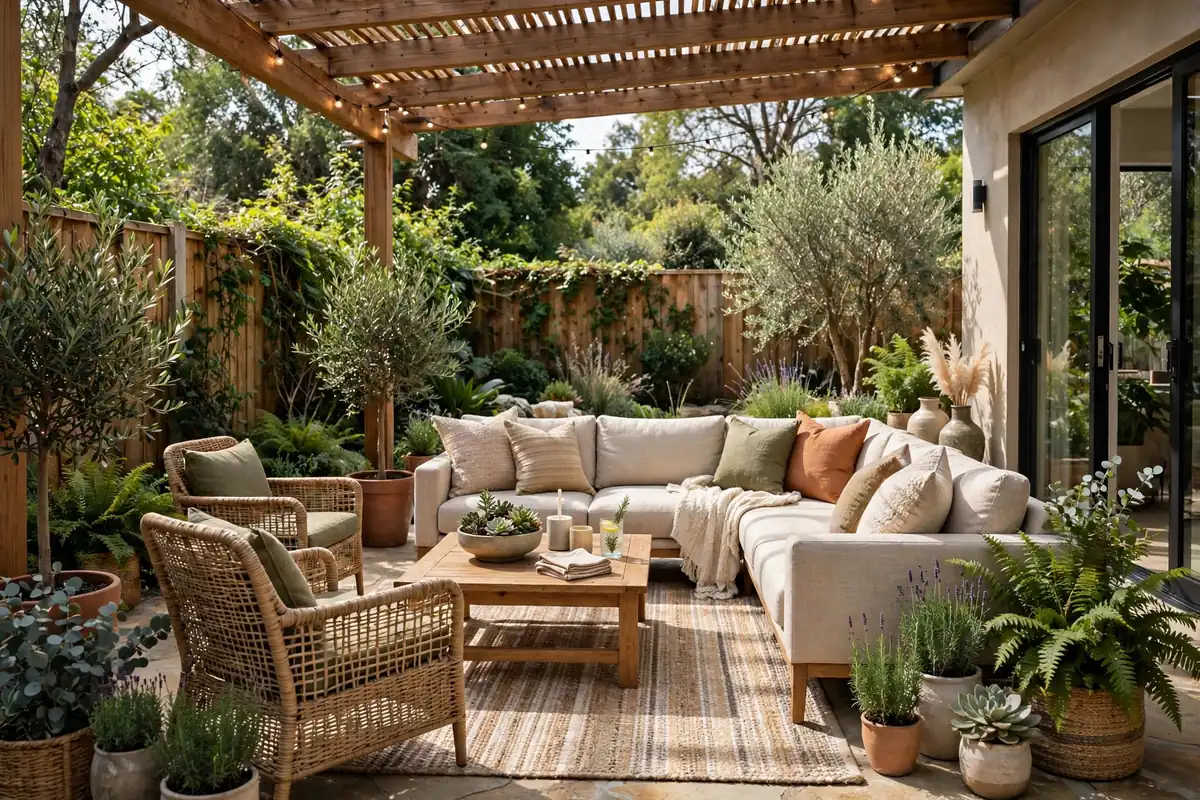
I have a confession: I spent the first two summers in my last apartment staring at a 9-by-12-foot concrete slab and doing the exact wrong thing.
I pushed a bulky hand-me-down loveseat against the house, added a plastic side table, and then couldn’t figure out why the whole thing felt like a waiting room with a view of the parking lot.
The problem wasn’t the patio. It was the patio layout.
Here’s the thing I wish someone had told me earlier: layout does more for a small or awkward patio than any single furniture purchase.
You can buy the most beautiful outdoor sofa on the internet and still hate the space if it’s facing the wrong wall, floating in the center, or leaving a 19-inch “walkway” that forces everyone to turn sideways.
I’ve measured, re-measured, returned, and repurchased enough patio furniture to know that the difference between “cramped” and “we actually live out here” is almost always geometry.
So this is the guide I wish I’d had. It’s 35 patio layout ideas, organized by the real problems people actually have: tiny footprints, long narrow slabs, L-shaped corners, awkward angles, renters who can’t drill, and the eternal question of whether you’re a dining patio or a lounging patio.
I’ll give you the why, the how, and the specific numbers that make a layout work—plus the costs I’ve either paid or watched friends pay, so you’re not guessing.
If you’re starting from zero, read the first section before you buy anything. If you already have furniture and it’s just not working, skip to the layout that matches your patio’s shape.
Start With the Numbers (Because “It Looks Big Enough” Is a Lie)
I learned this the hard way with a marketplace sectional that looked compact in photos and ate 70% of my patio in real life. Before you sketch a single layout, you need five measurements, and you need them in inches, not vibes.
Walkways need 36 inches. This is the single most common layout mistake I see in real patios, including my own first attempt. The path behind seating, between zones, and around the perimeter needs at least 3 feet of clear space. Less than that and guests have to turn sideways to pass, which makes even a large patio feel cheap and cramped. For heavy foot traffic, 4 feet is better.
Seating depth is 30–36 inches per person. A standard 3-seat outdoor sofa is roughly 89 inches long and 35 inches deep, and you need 24 inches behind it for chair push-back plus 18–24 inches in front for leg room. That math is why a “small” sofa can still overwhelm a 10-foot-wide patio.
Conversation distance is 7–10 feet, edge to edge. Further than 10 feet and people have to raise their voices; closer than 7 and it feels cramped. This one number determines whether your seating area reads as a conversation zone or a bus stop.
Dining clearance is 36 inches on every side chairs use. A 42-inch-wide tabletop can require roughly 9½ feet of total footprint once occupied chairs and minimum clearance are included. If you have a 10-foot-wide patio, a full 6-person dining set is not happening unless you’re okay with someone’s chair backed against the house.
Fire pit clearance depends on fuel. Wood-burning needs 6–7 feet from fire to seat; propane or natural gas needs 3–4 feet; a fire pit table needs 2–3 feet. This is a comfort and safety number, not a code minimum, and it’s the reason fire pits swallow small patios faster than any other feature.
Sketch your patio on graph paper at 1 inch = 1 foot, mark the door, mark north, and mark every fixed obstacle—AC unit, hose bib, downspout, gas line, tree root. That sketch becomes your working document for every decision that follows. I still have mine taped inside a cabinet.
Pro tip: Measure at the narrowest point, not the widest. Patios are rarely perfect rectangles, and the 2-inch difference at one edge is exactly where your chair will jam.
Small Patio Layouts Under 150 Square Feet: Stop Filling the Middle
Patios under 150 square feet need a different philosophy. The instinct is to fill every inch, but small patios that feel generous almost always have negative space—areas where you can actually see the floor. These layouts are about creating the illusion of room, not maximizing seat count.
1. Perimeter Seating (Push It to the Edges)
Why it matters: When furniture hugs the edges, it frees up the center, and that open middle is what tricks the eye into reading the space as bigger. It’s the outdoor equivalent of a living room with a clear path through.
How to do it: Put your main seating along the perimeter wall or fence line. Keep chairs angled inward at roughly 45 degrees so people can still face each other—do not line everything up like an airport waiting area. This is my go-to for rectangular patios under 150 square feet.
The trade-off: You lose the “cozy enclosed” feeling. If you want that, a rug under the seating zone helps visually contain it without blocking the open center.
Pro tip: A friend, Danielle, tried this on a 10-by-12 slab and initially hated how “empty” the middle looked. She added a low, wide coffee table—not a tall one—and the space finally read as intentional instead of unfinished.
2. The Single Anchor Piece
Why it matters: One strong piece reads more expensive and more deliberate than five mediocre pieces crammed together. This is my favorite layout for awkward rectangular patios under 150 square feet.
How to do it: Pick one piece that carries the visual weight—a curved two-seater, a sculptural lounge chair, something that reads as deliberate. Then keep everything else below seat height: low tables, poufs, a small ottoman. Nothing tall competing for attention.
The trade-off: You’re sacrificing seating capacity for visual calm. If you regularly host four or more people, this isn’t the layout for you.
3. Diagonal Placement
Why it matters: Angling furniture to the patio edges draws the eye across the longest dimension of the space rather than straight across the short end. If your patio is 10 feet wide, do not arrange furniture parallel to the 10-foot wall—angle it, and the eye naturally tracks toward the far corner, which reads as more depth.
How to do it: On a square patio, place your main seating at a 45-degree angle to the edges. On a rectangular patio, angle toward the longer diagonal. A rug helps define the zone so the diagonal doesn’t feel accidental.
Pro tip: This works especially well on square patios, where every dimension is the same and there’s no obvious long side to play with. The diagonal creates one.
4. Bistro Set + Folding Chairs (The Tiny Patio Standard)
Why it matters: On patios under 100 square feet, a full dining set eats the entire footprint. A bistro table for two plus a pair of folding or stackable chairs covers most use cases and can shift between uses.
How to do it: Look for a round bistro table (typically 24–30 inches across) with a pedestal base, which leaves more room to walk around than a four-legged table. Keep the chairs folding or stackable so you can clear the floor when you’re not using them.
The trade-off: You’re not hosting dinner for six. But you’ll actually use the space for coffee, drinks, and reading, which is more than most people do with a dining set they can’t walk around.
5. One Primary Zone, One Small Secondary
Why it matters: On patios under 100 square feet, trying to fit both a lounge zone and a dining zone usually means neither works. Pick one primary use and allow at most one small secondary zone.
How to do it: Primary zone is your seating or dining setup. Secondary zone is a slim console against the wall for drinks, plants, or a small grill—something that serves the primary zone without competing for floor space.
Pro tip: A slim console table under 12 inches deep against the house wall is the unsung hero of tiny patios. It holds a drink, a plant, and a plate of food without projecting into the walkway.
Long, Narrow, and L-Shaped Patios: Work With the Shape, Not Against It
Long narrow patios and L-shaped patios fail when you try to arrange them like square patios. Each shape has its own logic.
6. One-Row Furniture for Narrow Patios
Why it matters: On patios under 8 feet wide, two rows of furniture create a corridor, not a room. One-row furniture—bench seating along the wall plus a narrow dining table or coffee table out from the bench—keeps the middle open.
How to do it: Bench along the long wall, narrow table parallel to it. Skip anything that requires people to sit on two opposing sides of a single piece. A swing or hammock chair at one end gives the narrow space a focal point.
Pro tip: If you want dining, a narrow rectangular table oriented lengthwise down the patio works better than a round table, because it follows the shape of the space instead of fighting it.
7. Built-In Bench With Storage
Why it matters: A built-in bench along one wall gives you seating without eating into the walkway. In a long narrow space, it keeps the middle clear and adds hidden storage underneath.
How to do it: A simple bench frame with lift-up seats or open cubbies below. Cushions make it comfortable; pillows make it look intentional. This is also a good DIY candidate if you’re handy—concrete blocks and wood planks can make a surprisingly decent bench for under $100.
The trade-off: Built-ins are permanent. If you’re renting, a freestanding bench with storage does the same job without the commitment.
8. The L-Shaped Zoning Rule
Why it matters: L-shaped patios are actually an advantage if you treat each leg as a separate zone. The longer leg usually handles dining; the shorter leg becomes a lounge or fire pit zone. A corner sectional that runs along the inside of the L makes the corner read intentional rather than wasted.
How to do it: Keep 36 inches of walking space along the inside of the L between zones. Don’t try to make one giant furniture grouping wrap the whole L—that’s how you end up with a sectional that blocks the door.
Pro tip: Put the fire pit or fireplace at the interior corner of the L. It warms both zones and becomes the natural focal point whether you’re dining or lounging.
9. Multi-Level L-Shaped Patio
Why it matters: If your L-shaped patio has any slope or step, two levels let you separate dining and lounging without a wall. Dining up top, lounging below, connected by wide steps that double as extra seating.
How to do it: Keep the dining level closest to the house for easy kitchen access. The lower level becomes the lounge or fire pit zone. Wide, deep steps (at least 12–15 inches deep) are comfortable enough to sit on with a cushion.
10. The Corner Grill Station
Why it matters: On an L-shaped patio, the interior corner is the natural gathering spot. Positioning the grill or smoker there turns the corner into a functional zone and keeps the cook part of the group instead of banished to the edge.
How to do it: A counter or bar along one arm of the L doubles as dining and prep space. Keep 4 feet of clearance in front of the grill for the cook and anyone walking by.
Awkward Angles, Curves, and Weird Footprints: Stop Fighting the Shape
Awkward shapes aren’t a problem to solve. They’re a constraint that tells you which furniture to choose.
11. Curved Sofa for Curved Edges
Why it matters: A curved sofa or sectional follows a curved patio edge instead of pointing a corner into the walkway.
How to do it: Match the radius of the sofa to the curve of the patio as closely as you can. If the curve is shallow, a curved loveseat or a pair of angled chairs works better than a full sectional.
12. Circular Dining Table for Awkward Corners
Why it matters: A circular table fits in spaces where a rectangular one would point a corner into walkway space. On a patio with angled walls or a tight corner, round is almost always more efficient.
How to do it: Look for a round pedestal table—the single base leaves more room for chairs and feet than four legs. A 42–48-inch round table seats four comfortably with 36 inches of clearance.
13. The “Float the Screen” Trick for Privacy
Why it matters: If your patio has an awkward exposure—a neighbor’s window, a street, a shared wall—a freestanding screen placed perpendicular to the house wall creates a visual nook without blocking the whole patio. It hides the seating zone rather than the entire space.
How to do it: Place the screen so it shields the chairs from the sightline you’re trying to block, but leaves the rest of the patio open. A slatted screen lets light through and feels less heavy than a solid panel.
Pro tip: I tried a full-width privacy panel first and it made my patio feel like a fence enclosure. The perpendicular screen was the fix—it blocked the one bad angle without closing everything in.
14. The Three-Height Privacy Stack
Why it matters: A single solid screen looks heavy and collects wind. Stacking three heights—a low planter, a medium screen, a tall element—blocks sightlines at multiple levels while keeping the arrangement airy.
How to do it: Low walnut planter near the seating, a 4-foot outdoor screen behind it, a tall olive tree or potted grass toward one side. Stagger the heights so it looks organic, not like a barricade.
The trade-off: This takes up more floor space than a single panel. On a very small patio, one tall planter beside a chair may be enough.
15. Zone With an Outdoor Rug Instead of Furniture
Why it matters: If your patio opens onto a larger yard or you want it to feel like two distinct areas, an outdoor rug defines the seating zone without a wall. The rug creates a visual container—everything inside it belongs together, everything outside is separate space.
How to do it: Keep the rug a few inches smaller than your furniture grouping on each side, and let the furniture legs sit partially on the rug. That’s what anchors the zone.
Material note: Solution-dyed polypropylene is the workhorse—it resists UV fading, repels moisture, and dries quickly. Recycled PET feels softer underfoot and costs about $1–$2 more per square foot, which is worth it if comfort matters as much as weather resistance.
Pro tip: Don’t buy a rug that’s the same size as your patio. The point is to define a zone, not carpet the entire slab.
Dining vs. Lounging: Pick the Layout That Matches Your Actual Life
The single most useful layout decision is identifying which primary use matters more. A patio arranged around a dining table feels wrong if you never eat outside. A conversation set feels wrong if you host brunch every weekend.
16. The Conversation Layout (For Talkers and Drinkers)
Why it matters: A conversation set uses lounge seating around a low coffee or side table, built for talking, not eating. If you mostly head outside to relax and socialize, this is the layout that earns its footprint.
How to do it: A loveseat or two chairs facing each other with a coffee table between them, 7–10 feet apart edge to edge. Add a side table within arm’s reach of each seat. Keep the coffee table 14–18 inches from the sofa edge so you can reach a drink without standing up.
The trade-off: You’ll eat outside less. If that matters, add a small bistro table or a tray on the coffee table for casual meals.
17. The Dining Layout (For People Who Actually Eat Outside)
Why it matters: A dining set is the right choice if your patio’s regular routine happens around a table—meals, games, working outside, kids’ crafts. It’s a different posture and a different footprint.
How to do it: Allow 24–30 inches of table edge per person and at least 36 inches of clearance around every side chairs use. A 48-inch round table seats four; a 60-inch rectangular table seats six. Measure the occupied footprint, not just the table.
Pro tip: If you’re torn between dining and lounging, a bar-height table with stools can do double duty—it’s comfortable for meals and drinks but takes less floor space than a full dining set.
18. The Mixed-Use L: Dining One Leg, Lounge the Other
Why it matters: On an L-shaped patio, you don’t have to choose. Dining on the longer leg, lounge on the shorter leg, with a clear walking path between them.
How to do it: Keep the dining zone closest to the kitchen door. The lounge zone goes on the shorter or more private leg. A rug under the lounge zone and a different material (or no rug) under the dining zone helps visually separate them.
19. The “One Big Table” Layout
Why it matters: If your patio is large enough (think 16 by 16 feet or more), a single long table can serve as dining, prep, and gathering space. It’s the layout equivalent of a kitchen island—one surface, many uses.
How to do it: A 72–84-inch rectangular table with chairs on both long sides and one short end. Leave 36 inches on all sides. This works best on a patio at least 12 feet wide.
The trade-off: It’s not a lounging layout. If you want to sink into a sofa after dinner, you’ll need a separate seating zone.
Shade, Privacy, and Lighting Layouts: The Layers That Make a Patio Usable
A patio layout isn’t just furniture. Shade, privacy, and lighting are layout decisions too—they determine whether you can actually use the space at 3 p.m. in July or 9 p.m. in October.
20. The Shade Sail Over the Seating Zone
Why it matters: A shade sail can cover areas no single umbrella can reach, and it looks more architectural than a pop-up canopy. Typical cost is $50–$400 for the sail, with a 5–15 year fabric lifespan.
How to do it: Tension is everything. A slack sail flaps, pools water, and tears prematurely. One corner should be higher than the others so rain sheds. Anchor to solid points—wall, posts, or concrete footings—not a fence rail.
Pro tip: If your patio faces west, overhead shade alone won’t solve the late-afternoon sun problem. The sun comes in low and sideways, so you need both an overhead sail and a vertical screen on the western edge.
21. The Offset Umbrella (For Renters and Zero-Drill Setups)
Why it matters: An offset or cantilever umbrella lets you sit under it without a pole in the middle of the table, and it requires no drilling. It’s the fastest path to shade for a renter.
How to do it: A large 11-foot umbrella needs a base weighing at least 50–75 pounds. Don’t skip this—the base is the whole system. Position it so the canopy covers the seating zone, not the walkway.
The trade-off: Umbrellas are not great in wind, and most fabric lasts 3–5 years in strong sun. If you live in a windy area, a shade sail with proper footings is a better investment.
22. The Pergola as a “Ceiling” for the Dining Zone
Why it matters: A pergola defines the dining zone without walls. It creates a ceiling effect that signals “this is a separate space,” and it gives you a frame for string lights, curtains, or a shade cloth.
How to do it: A freestanding pergola kit runs roughly $1,500–$6,000 in DIY materials, or $800–$5,000+ for a freestanding model depending on size and material. Attached pergolas cost more but feel more permanent.
Pro tip: If you’re not ready for a pergola, a pair of tall posts with a string of lights between them creates a similar “ceiling” cue for a fraction of the cost.
23. Layered Lighting: String Lights + Low Voltage
Why it matters: Most patios that feel dim don’t need a rewire—they need $200 of string lights and a dimmer. Lighting is a layout layer because it determines where people gather after dark.
How to do it: String lights ($25–$60 for a 48-foot set) for ambiance, low-voltage path or landscape lights for safety, and a dimmer so you can adjust the mood. Hang string lights in a zigzag or across the seating zone rather than around the perimeter—it creates a ceiling of light over the conversation area.
Pro tip: Battery-powered string lights are the renter-friendly option. No outlet, no extension cord, no drilling—just hang and go.
24. Outdoor Curtains on a Freestanding Frame
Why it matters: Outdoor curtains create instant privacy and soften hard patio edges. On a freestanding frame, they require no drilling and no landlord approval in most cases.
How to do it: A freestanding frame or tension rod between two posts, with outdoor-rated curtains. Lightweight fabric solutions cost under $75, while cedar slats or metal panels average $300–$600.
The trade-off: Curtains aren’t structural privacy. They block sightlines and soften the space, but they won’t block noise or a determined neighbor’s view.
25. The Tall Planter Screen (A Living Privacy Wall)
Why it matters: A row of tall planters gives you privacy without making the patio feel boxed in. You get a soft green wall, and you can move everything later if the layout changes.
How to do it: Three containers in different heights, placed just inside the patio edge rather than directly against the fence. Clumping bamboo works in a container if you choose a non-running variety; ornamental grasses are gentler and look airy in a breeze.
Pro tip: Stagger the heights. A row of identical pots at identical heights looks like a fence. Three different heights looks like a garden.
Surface and Floor Layouts: The Base Layer Nobody Talks About
The surface under your furniture is part of the layout. It affects how the space feels, how hot it gets underfoot, and whether a renter can install it without losing a deposit.
26. Interlocking Deck Tiles Over Concrete
Why it matters: If you’re renting or stuck with ugly concrete, interlocking deck tiles snap together over the existing surface and pull up cleanly when you move. Plastic and basic composite tiles run roughly $3–$8 per square foot; real wood and premium composite climb to $8–$15 or more.
How to do it: Start at one corner and work outward. A 200-square-foot rental patio runs about $600–$1,200 for hardwood interlocking tiles or $400–$800 for composite. IKEA’s ALTAPPEN tiles are about $2.06 per square foot and are a popular budget option.
The trade-off: They’re not permanent, and they can shift slightly if the base isn’t level. But for a rental, they’re the fastest way to make a concrete slab feel like a deck.
27. A Gravel or Decomposed Granite “Rug”
Why it matters: On a patio that’s part concrete, part dirt, or part grass, a gravel or decomposed granite area defines a separate zone without a hard border. It’s cheaper than extending the patio and softer underfoot than concrete.
How to do it: Excavate 2–3 inches, lay landscape fabric, and fill with 2–3 inches of gravel or decomposed granite. Use metal or composite edging to keep it contained. It’s a good DIY weekend project for a small area.
Pro tip: Decomposed granite packs firmer than loose gravel and is easier to walk on with bare feet. It’s also cheaper than pavers per square foot, though it needs occasional raking.
28. The Paver Patio (And What It Actually Costs)
Why it matters: If you’re laying a new patio from scratch, the material you choose affects cost, maintenance, and how the space feels. Concrete pavers are the most popular choice for residential patios, accounting for roughly 60% of installations, and they run $3–$8 per square foot for materials—making them the most budget-friendly option.
How to do it: A typical 300-square-foot concrete paver patio runs $2,500–$5,500 installed. For a more modern look, porcelain pavers cost $8–$15 per square foot for materials, with installed costs ranging from $16–$28 per square foot depending on grade and region. If you DIY, expect to pay 35–50% of a professional installation—but only if you don’t botch the base.
The DIY warning: The #1 DIY paver mistake is skipping proper base preparation. You need 6–8 inches of compacted sub-base, not just a couple of inches of sand. A friend, Marcus, tried to save a weekend by digging only to paver depth; his patio developed a dip that held water within two months. Skipping base compaction is the most expensive mistake because the whole surface has to come up to fix it.
Pro tip: Order 10% extra pavers for cuts, breakage, and future repairs. The dye lot on a later batch won’t match perfectly.
Renter-Friendly and Budget Layouts: No Drilling, No Deposit Loss
Renters have the same layout problems as homeowners, just with more constraints. These layouts are designed around removable, freestanding, and no-damage solutions.
29. The “No-Hole” Shade Setup
Why it matters: A weighted-base offset umbrella and a freestanding shade sail frame give you shade without drilling into anything. You’re not attaching to a fence, a wall, or a roof.
How to do it: Offset umbrella with a 50–75 pound base, positioned to cover the seating zone. For a larger area, a freestanding shade sail frame anchored with sandbags or water weights works, though it’s less secure in high wind than a permanent install.
30. The Tension-Rod Privacy Curtain
Why it matters: Tension-pole privacy curtains wedge between the floor and ceiling (or between two walls) with spring-loaded poles. They require no drilling and no landlord approval in most cases.
How to do it: Measure the height carefully—tension poles need a solid surface top and bottom. Outdoor-rated curtains with grommets slide onto the pole before you tension it. Cost is roughly $50–$150 for the pole and curtain setup.
31. The Planter-Base Privacy Screen
Why it matters: A folding screen or trellis anchored in heavy planters is freestanding, renter-friendly, and movable. You’re not attaching anything to the building.
How to do it: Connect two or three trellises together as a folding screen and anchor the ends in heavy planters filled with gravel or soil. Add climbing plants if you want a living screen over time. Weighted planter fences run $100–$400.
32. The “Furniture as Divider” Layout
Why it matters: On a narrow patio or a shared outdoor space, a bench seat placed across the shorter side of the patio can divide the space without a wall. It helps the space feel wider and less like a corridor.
How to do it: A backless bench or a low console positioned perpendicular to the main seating area. It creates a visual stop without blocking light or airflow.
The “Extra” Layouts: Water, Fire, and Cooling
These aren’t for everyone, and they’re not for every patio. But if you have the space and the budget, they change how a patio feels more than any furniture rearrangement.
33. The Small Water Feature (For Sound, Not Scale)
Why it matters: A small water feature adds the sound of moving water, which masks street noise and makes a patio feel more private even when it isn’t. It’s also a focal point that doesn’t require seating.
How to do it: A DIY container fountain—a glazed pot or basin, a submersible pump, and a fountain head—can cost as little as $50–$100. A DIY water wall runs around $100 in materials if you’re comfortable with basic carpentry and a pump. Keep it near the seating zone so you actually hear it, not tucked in a corner where it becomes a maintenance chore.
The trade-off: Moving water needs occasional cleaning and pump maintenance. A solar fountain avoids wiring but is less powerful.
34. The Fire Pit Zone (With Real Clearance)
Why it matters: A fire pit turns a patio into a three-season space. But it also demands more clearance than any other feature—6–7 feet for wood-burning, 3–4 feet for propane, 2–3 feet for a fire pit table.
How to do it: A DIY block or stone ring runs $50–$300 in materials; a paver or block kit runs $1,500–$5,000+; a plumbed gas feature with a patio runs into the thousands. For a small patio, a fire pit table is the least space-hungry option and the easiest to move.
Pro tip: Don’t put a wood-burning fire pit on a covered patio or under a pergola unless you’ve checked the clearance and ventilation. The smoke needs somewhere to go.
35. The Misting Fan or Ceiling Fan Layout
Why it matters: On a covered patio in a hot climate, air movement is the difference between “usable in July” and “decorative until October.” A ceiling fan or misting fan extends the patio’s usable season.
How to do it: A ceiling fan on a pergola or covered patio runs $200–$600 installed depending on the fan and wiring. A low-pressure misting kit starts under $500 and can be attached to a fan or the perimeter of a pergola; high-pressure systems that actually cool the air run $1,349–$1,699 for residential systems.
The trade-off: Low-pressure misters make things damp. High-pressure systems cool better but cost more and need a dedicated pump. If you’re in a dry climate, misting works better than in humid climates, where it can just make the air feel heavier.
Patio Layout Comparison: Which Surface and Shade Option Makes Sense for You?
This table is for the two decisions that most often stall a patio project: what goes on the floor and what goes overhead. I’ve included the costs I’ve either paid or confirmed with friends and current pricing guides.
How to choose: If you rent, start with interlocking tiles and an offset umbrella. If you own and plan to stay, concrete pavers and a shade sail or pergola are the best cost-to-impact ratio. If you have a west-facing patio, budget for both overhead shade and a vertical screen—one without the other won’t solve the 4 p.m. sun problem.
What I’d Do First If I Were Starting Over
I’d measure the patio before I bought anything—not just the length and width, but the walkway from the door, the distance between the house and the fence, and the exact spot where the afternoon sun hits. I’d sketch it on graph paper and mark the door, the hose bib, and the AC unit. I’d pick one primary use—conversation or dining—and build the layout around that instead of trying to do both in a space that can’t hold both.
Then I’d buy the biggest rug and the smallest table I could get away with, because the rug defines the room and the table doesn’t need to be the center of it. And I’d leave more empty floor than feels comfortable at first. Small patios that feel generous almost always have negative space—the empty middle is the thing that makes the space work.
The best patio layout isn’t the one that fits the most furniture. It’s the one that makes you want to walk outside with a cup of coffee and stay there.
FAQs About Patio Layout Ideas
What is the minimum size for a usable patio?
A patio around 6–10 feet long by 8–12 feet wide can work for a bistro set or a small conversation layout with two chairs and a side table. Below that, you’re looking at a balcony footprint rather than a true patio, and a single anchor piece plus a folding chair is more realistic than a full set.
How much clearance do I need around a patio dining table?
Allow at least 36 inches on every side chairs use, so chairs can pull out without hitting a wall or planter. A 42-inch-wide table can require roughly 9½ feet of total footprint once occupied chairs and clearance are included.
Can I put a patio layout together without drilling into anything?
Yes. Offset umbrellas with weighted bases, interlocking deck tiles, tension-pole curtains, freestanding screens anchored in planters, and battery-powered string lights are all no-drill options that work for renters.
What’s cheaper: a paver patio or a concrete patio?
Poured concrete is cheaper upfront, at roughly $6–$15 per square foot versus $10–$30 for pavers installed. Pavers cost more but are easier to repair, can be installed over a sand base in some cases, and have a longer visual lifespan. DIY pavers can save 35–50% of the installed cost if the base is done correctly.
Do patio rugs actually hold up outdoors?
Yes, if you choose the right material. Solution-dyed polypropylene is the most fade- and moisture-resistant option; recycled PET feels softer and costs about $1–$2 more per square foot. Avoid natural fibers like jute unless the rug is under a covered area, because they hold moisture and mildew.
How do I make a narrow patio feel wider?
Use one row of furniture, not two. Put bench seating along the long wall and a narrow table parallel to it, and keep the middle open. A bench placed across the shorter side of the patio can also help it feel wider and less like a corridor.
What’s the best layout for an awkward, angular patio?
Work with the shape instead of fighting it. A curved sofa follows a curved edge; a round dining table fits where a rectangular one would point a corner into the walkway; a freestanding screen placed perpendicular to the house creates a nook without blocking the whole space.


