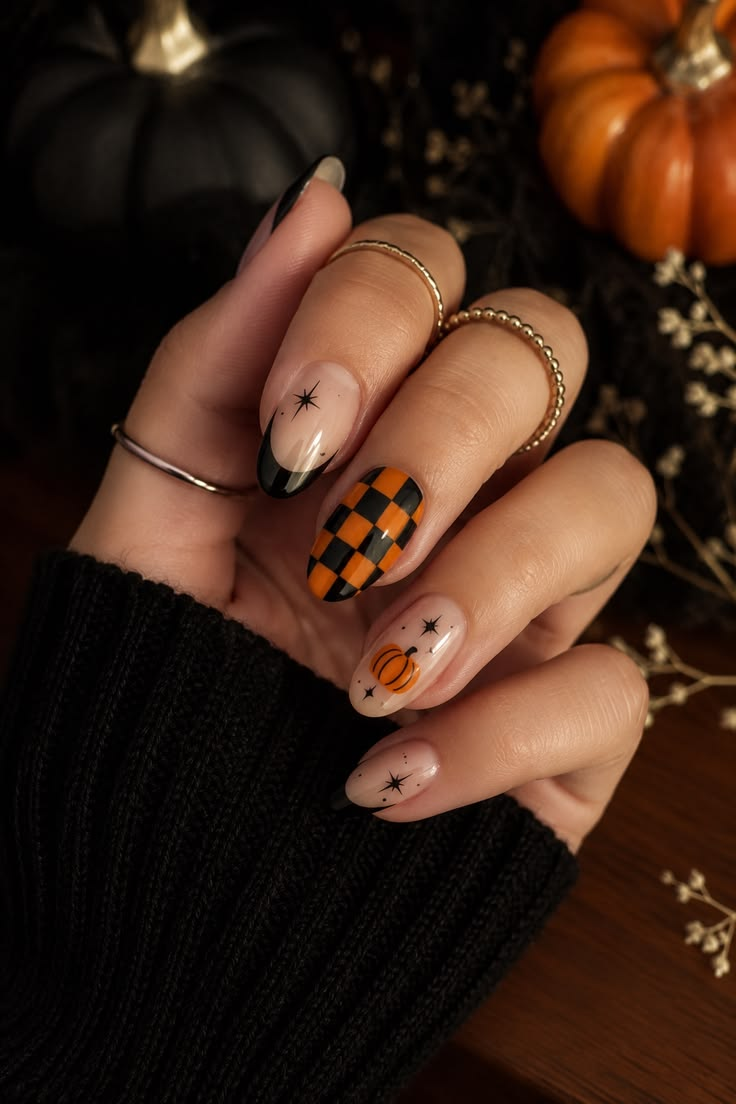
21 Short Halloween Nails That Actually Look Good (No Length Required)
I spent years assuming every good Halloween nail design needed at least a little length to “read” properly — enough room for a full spiderweb, enough canvas for a detailed pumpkin face.
Then I chipped a nail two days before a Halloween party, cut everything down to almost nothing to match, and ended up doing a set of tiny black cat silhouettes that got more compliments than any long, elaborate set I’d done in years before.
Short Halloween nails aren’t a compromise — they’re honestly the better canvas for a lot of these designs.
Small, simple shapes (a single spider, one dripping accent nail, a tiny ghost) read cleaner on a short nail than they do stretched across a long one, and they hold up so much better if you’re using your hands all night for candy bowls, cocktails, or actually carving a pumpkin at some point during the season.
I’ve split these into a few groups below based on how much actual nail art skill they require, since “short Halloween nails” searches usually split between people who want salon-level detail and people who genuinely just want something cute they can do themselves in twenty minutes with polish they already own.
Quick Comparison: Short Halloween Nail Styles by Skill Level
| Nail Style | Skill Level | Time to Do | Best For |
|---|---|---|---|
| Single accent nail designs | Beginner | 20-30 min | DIY, first-time nail art |
| Dot and line-based designs | Beginner-Intermediate | 30-45 min | Simple patterns, minimal tools |
| Detailed single-motif designs | Intermediate | 45-60 min | One statement nail per hand |
| Full-set coordinated themes | Intermediate-Advanced | 60-90 min | Salon visits or experienced DIYers |
1. Single Black Cat Silhouette Accent Nail
Paint all nails a solid color — cream, black, or deep orange — and add one small black cat silhouette (sitting, arched back, or just ears and a tail) on the ring finger only. This is genuinely one of the easiest Halloween looks to do yourself, since you only need to get one small shape right instead of repeating a design ten times.
A thin nail art brush (the kind that comes in most drugstore nail art kits for a few dollars) makes this dramatically easier than trying to freehand with a regular polish brush, which is honestly where most people go wrong on their first try.
Pro tip: Use a dotting tool to place two tiny dots for the eyes before you clean up the silhouette shape — doing the eyes last makes it much easier to keep them symmetrical.
2. Tiny Spiderwebs (Corner Style)
Instead of covering the whole nail, paint a small web in just one corner using white or silver polish over a black or dark purple base. This scales down perfectly for short nails since the design doesn’t need much surface area to read clearly, unlike a full-nail web which can look cramped on a shorter length.
Pro tip: Use a striping brush or a toothpick dipped in polish for the web lines instead of a regular brush — the thinner line width matters a lot on a smaller nail surface.
3. Orange and Black Half-Moon Manicure
Paint the base of each nail one color (orange) and the tip a contrasting color (black), or reverse it, using a small elastic hole-punch sticker as a guide for a clean line. This is a classic, low-effort seasonal look that doesn’t require any actual drawing skill — just a steady hand for the line itself.
Pro tip: French tip guide stickers (a couple dollars for a sheet at any drugstore) work just as well for the half-moon shape as specialty nail stickers, and they’re easier to find.
4. Dripping Blood Accent Nail
A red base with a few uneven drips painted downward from the tip using a thin brush, kept to just one or two accent nails rather than the whole set. This is a dramatic look that photographs well specifically because the contrast (bright red on a neutral or black base) reads clearly even from a distance.
Pro tip: Let the base coat fully dry before adding the drips — wet-on-wet polish blends into a muddy mess instead of the clean drip effect you’re going for.
5. Simple Jack-o’-Lantern Face
An orange base with a tiny black triangle-eyed pumpkin face on one or two nails, kept intentionally simple rather than trying for a fully detailed carved look. Short nails actually work in your favor here — a simplified, slightly cartoonish face reads more clearly on a small surface than an attempt at realistic pumpkin texture.
Pro tip: Sketch the face lightly with a toothpick before committing with polish — it’s much easier to adjust a scratch-guide than to fix a mistake once real polish is down.
6. Matte Black with One Glossy Accent
Paint every nail a matte black topcoat except one, which stays glossy black. This is one of the lowest-effort “Halloween” looks on this list since it’s really just about the texture contrast rather than any actual imagery, but it reads as intentional and seasonal without requiring any drawing at all.
Pro tip: Apply the matte topcoat as the very last step over your regular black polish rather than buying a separate matte black polish — it’s cheaper and gives you more control over which nails stay glossy.
7. Candy Corn Stripes
Three horizontal stripes in yellow, orange, and white, stacked from base to tip on the ring finger, with the rest of the nails a simple solid color. This is a nostalgic, easy-to-execute look that works well even on very short nails since the stripes just need to be roughly proportional rather than perfectly measured.
Pro tip: Do the white tip section first, let it dry completely, then work backward with orange and yellow — starting from the tip prevents smudging the sections you’ve already finished.
8. Tiny Ghost Silhouettes
A soft gray, lavender, or black base with one or two small white ghost shapes (a rounded top with a wavy bottom edge) painted on accent nails. This is one of the most beginner-friendly designs on the entire list — the ghost shape is forgiving even if it’s not perfectly symmetrical, since ghosts are inherently a little wobbly-looking anyway.
Pro tip: Dot two small black eyes on with a toothpick after the ghost shape dries — this is the detail that makes it read clearly as a ghost instead of just an abstract white blob.
9. Deep Purple with Silver Foil Accents
A deep eggplant or plum polish base with small pieces of silver foil (nail foil sheets, sold cheap in packs) pressed onto one or two accent nails for a cracked, metallic effect. This is a genuinely elegant option if you want something Halloween-adjacent without leaning into anything overtly spooky — it works well for both a costume party and a regular fall outing.
Pro tip: Apply the foil over a fully tacky (not wet, not fully dry) layer of foil glue specifically — regular topcoat doesn’t have the right texture to grip foil properly, and you’ll end up with the foil sliding off within a day.
10. Bat Silhouettes
Small black bat shapes (two simple curved wings and a rounded body) painted on a cream, orange, or gray base. This design scales down nicely for short nails since a bat silhouette doesn’t need much detail to read clearly — a simple, slightly asymmetrical shape actually looks more natural than an overly precise one.
Pro tip: Practice the bat shape on a piece of paper a few times before committing to your actual nail — the wing angles are the trickiest part to get consistent, and paper practice is free.
11. Negative Space Moon and Stars
Leave a small crescent moon shape unpainted (using the natural nail as the “moon”) against a dark navy or black base, with a few tiny white dots for stars. This is a genuinely elegant, slightly less “costume-y” take on Halloween nails, and it’s a good pick if your Halloween plans overlap with everyday wear.
Pro tip: Use a small piece of tape cut into a crescent shape to mask off the moon area before painting the dark base — it gives you a much cleaner edge than trying to paint around a shape freehand.
12. Witch Hat Accent Nail
A simple black triangle with a small colored band near the base (purple, orange, or green) painted on one or two nails, with the rest of the set a solid coordinating color. This is one of the more recognizable Halloween motifs and one of the easier ones to simplify for a short nail, since the shape itself is basic geometry rather than anything requiring fine detail.
Pro tip: Paint the black triangle first and let it fully dry before adding the colored band — doing it in this order keeps the band’s edge clean instead of bleeding into wet black polish.
13. Cobweb French Tips
Instead of a plain French manicure tip, paint the white tip in a thin web pattern using a striping brush, over a black or deep red base. This is a more advanced take on a classic manicure shape, and it’s a good option if you want something that still reads as “polished” rather than fully costume-themed.
Pro tip: A striping brush with a very fine tip (thinner than most standard nail art brushes) makes a genuine difference here — the web lines need to stay thin to look intentional rather than messy.
14. Skeleton Hand Accent Nail
A black base with small white bone shapes painted in a simplified skeleton hand pattern on one nail, kept to a single accent finger rather than the whole set. This is one of the more detailed designs on this list, so it’s worth practicing the bone shapes separately before attempting them on an actual short nail.
Pro tip: Use a dotting tool for the small knuckle joints rather than trying to paint them with a brush — dots are far more forgiving and consistent than freehand brush strokes at this scale.
15. Orange Ombré with a Black Tip
A gradient from a light orange base fading into a deeper orange or red, finished with a solid black tip. This is a technique-based rather than drawing-based design, which makes it a good option if you’re more comfortable blending polish than freehanding shapes.
Pro tip: Use a makeup sponge to dab and blend two shades of polish together for the ombré effect rather than trying to blend with a brush — it’s a much easier technique to control on a small nail surface.
16. Tiny Eyeball Accent Nail
A single small eye shape (a white oval with a colored iris and black pupil) painted on one accent nail, with the rest of the set a solid neutral or black. This is a fun, slightly unsettling design that works well specifically because it’s kept to one nail — a full set of eyeball nails tends to look busier than effective.
Pro tip: Paint the white oval base first and let it dry completely before adding the iris — this keeps the colors from bleeding into each other and muddying the design.
17. Purple and Green Poison Bottle Accent
A simple bottle silhouette (a rounded body, narrow neck, small cork) painted in dark green or purple with a tiny skull-and-crossbones detail, kept to one accent nail. This is a more detailed, illustrative design, so it works best as a single statement nail rather than something you’d attempt to replicate across all ten.
Pro tip: Keep the skull-and-crossbones detail extremely simple — two small dots for eyes and two crossed lines is genuinely all you need at this scale, and over-detailing tends to look muddy rather than intricate.
18. Solid Deep Red with a Glossy Finish
Just a rich, deep red polish (closer to oxblood than a bright cherry red) with a high-gloss topcoat, no additional art at all. This is the option for anyone who wants a seasonal, slightly dramatic look without any actual nail art involved — the color alone does the work.
Pro tip: Two thin coats dry more evenly and last longer than one thick coat, even though it’s tempting to rush a solid color look — thick coats are more prone to chipping within the first couple days.
19. Mummy Wrap Nails
Thin white or off-white lines painted haphazardly across a black or gray base to mimic loose mummy wrapping, with two small black dots for eyes peeking through on one nail. This is a genuinely forgiving design since the “messy” wrap lines are supposed to look a little uneven and overlapping.
Pro tip: Use a striping brush loaded with slightly thinned white polish for the wrap lines — full-strength polish tends to look too solid and opaque for the thin, gauze-like effect you’re going for.
20. Simple Pumpkin Patch (Multiple Small Pumpkins)
Instead of one large pumpkin, paint two or three small round orange shapes with tiny green stem lines across a single accent nail, mimicking a small pumpkin patch. This design actually works better on a short nail than a long one, since the smaller canvas naturally limits how many pumpkins you’re trying to fit, keeping the whole thing from looking cluttered.
Pro tip: Vary the size of each small pumpkin slightly rather than making them uniform — a few different sizes reads as more natural and less like a printed pattern.
21. Black Cat Eyes (Negative Space)
A black base with two small, almond-shaped negative space cutouts (bare nail) filled in with a bright green or yellow polish for the “eyes.” This is a striking, slightly more advanced look that plays with negative space rather than adding art on top of a full base coat.
Pro tip: Use striping tape to mask the eye shapes before painting the black base, then peel it away and fill in the green — it gives you a far cleaner edge than trying to paint the negative space freehand.
What I’d Actually Do
If I only had twenty minutes before Halloween plans, I’d go with the single black cat silhouette or the negative space moon and stars — both look intentional and finished without requiring more than one nail’s worth of actual detail work, and both hold up well through a night of actual hand use.
The designs on this list that work best on short nails aren’t the ones trying to pack in the most detail — they’re the ones that pick one clear motif and let it do the work on a single accent nail, with the rest of the set kept simple.
FAQs
Do I need gel polish for these designs to last through Halloween? No — regular polish works fine for most of these, especially the simpler accent-nail designs. Gel holds up longer if you’re planning multiple nights out, but it’s not required for any design on this list.
What tools do I actually need for nail art on short nails? A thin nail art brush, a dotting tool, and some striping tape cover almost everything here — all three are usually available together in a basic drugstore nail art kit for under $10.
Which designs are best if I have zero nail art experience? The matte-and-glossy black look, the solid deep red, and the candy corn stripes are the most forgiving for a first attempt, since none of them require freehand drawing.
How do I keep nail art from smudging while it’s still wet? Let each color or layer dry fully before adding the next — even a couple extra minutes between steps prevents most smudging, especially on a design with contrasting colors layered close together.
Can these designs work if my nails are extremely short, not just short-to-medium? Yes — the single accent nail designs (the cat silhouette, the ghost, the witch hat) actually work best on very short nails since they don’t rely on extra surface area the way a full-nail scene would.